• The move to the new server is done. There are some software and database maintenance updates in process. This has us passing the hat around to help out. We appreciate any donations. Seriously, even a dollar helps. The payment page may be found here - https://www.audiokarma.org/support.html

Circumaural Yamaha HP-1 Build Thread

elcoholic

KSDS 88.3 Supporter
Subscriber
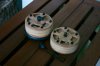
Next up will be to harvest the 55 mm ortho drivers from a pair of Yamaha YH-1's I recently acquired. They are going to be transplanted into DIY mahogany - constrained layer over-ear housings. The design concept I've settled on will allow the stack of wood rings and resilient material to be easily shuffled to experiment with different materials. So far I'm considering cork and silicone for the rings. I'll also be able to vary the position of the driver relative to the ear. Should be fun to see if I can surpass my modified HP-1's and see how they stack up against the Stax's. Watch for a new thread in the not to distant future.

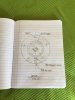
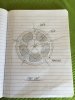
Well here we go. I've collated, filtered, and ruled out a gazillion ideas floating around my cranium. The hardware has been ordered, so today was spent doing full size drawings. If I was at home I'd pattern route the components, but I'll xerox copies and adhere them to the stock and go at it with the apartment tool kit. I have ordered a drill press stand for a Dremel which will add the needed drilling precision.
IMG_1492.jpg IMG_1496.jpg IMG_1497.jpg IMG_1498.jpg
 
Register to hide this ad
moved from headphones, and original deleted.
Regards,
Jim
 
I've seen designs like that home built and commercial. (grado may still make them?) Sounds interesting as other projects turned out to be successful.
 
I've got my HP-1's torn apart and they've been waiting for me to do a rebuild for a long time. Maybe I'll wait and see rather than doing my restore plan.
 
Last edited:
I've got my HP-1's torn apart and they've been waiting for me to do a rebuild for a long time. Maybe I'll wait and see rather than doing my restore plan.
I'll post along the way. Once I receive the hdwr and confirm it works as planned I'll put up a parts list.

actually nice art work on the drawings. :D
Thanks, I enjoy drawing/design as much as making. It was fun to revisit dividing a circle 5 ways with just a compass and a straight edge
 
It's been a busy month since my last post. My wife moved here to Atlanta, we found a 2X bigger apartment, moved, bought and assembled more furniture, she started at her new IKEA store and now were mostly settled. Yesterday, I had time to work on my project.

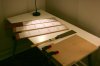
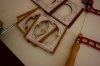
I copied the drawings for the 14 parts and stuck them to the mahogany stock with spray adhesive prior to cutting individual tiles.
IMG_6249.jpg

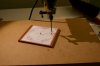
I found this Proxxon rotary tool stand on Amazon. All metal unlike the Dremel stand which is mostly plastic. The Proxxon rotary tool is a little bigger so I had to make an aluminum shim for the Dremel to fit it.
IMG_6250.jpg

It would be impossible to drill the exact 5 hole pattern for the 4mm machine screws repeatedly freehand so the jig uses center and indexing pins.
IMG_6252.jpg

The trade-off is accumulated error. By the time the 5th hole is drilled the error in the cord length is 5X, but if all the parts are oriented the same way they will line up just fine.
IMG_6254.jpg
 
IMG_6257.jpg
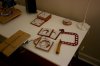
I started cutting out the parts yesterday - inside captive cuts first. The fret saw uses plane-end blades and can turn in a blade depth. This one from Knew Concepts has quick release tensioning and a very rigid yet light frame. With a 12.5 tpi skip tooth blade I was able to saw very closely to the line even though this was my first use. The cuts are very clean and required just a little smoothing with the Dremel drum sander.
Below are some of the cup sections and the ear caps. To save weight the cup sections are very thin and the short grain areas will be weak. I'll at least treat them with thin CA adhesive, maybe veneer them as well.
IMG_6259.jpg
 
Last edited:
IMG_6311.jpg
Well they're really starting to look like headphones now. I'm second guessing the anodized aluminum hardware color. Originally I picked out red, but switched to the more subdued (classy) black. The 4mm machine screws came from Pro Bolt and are meant for sport bikes. They have a choice of colors in aluminum as well as ss and titanium. I went with the cheaper aluminum.

Full pics here
 
Each layer has been lapped flat and the screws trimmed to length. True to the original Bellini design for Yamaha the ear cups attach to the headband with ball joints.
IMG_6333.jpg

The original ball joints are a weak point and many have broken. These are 10mm steel ball posts and delrin sockets used for the gas struts that hold up SUV rear hatches. They're not going to break, ever. A 6mm alumium cap screw is threaded to the socket and will be the adjustable mounting rod.
IMG_6337.jpg

Here you can the AKG240 ear cushions. These studio cans have been around for 20 years and replacement fabric and synthethic leather cushions are cheap.
IMG_6341.jpg

Close up of the interior. The 55mm drivers will be sandwiched between the inner baffle sections.
These are done except for finishing so it's on to the headband.
IMG_6339.jpg
 
Using my head. Reviving this project and thread. I'm hoping to get the form for the bent lamination headband made today. Maybe even the glue- up. My adhesive choices are narrowed to polyurethane, plastic resin or Type lll PVA. Favoring shear strength and flexibility. Input welcomed.
image.jpeg
 
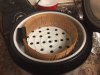
image.jpeg (6) 24x2.125 plys of mahogany veneer going into the rice steamer for their steam bath to pre-bend. This will help the plys nest tighter in the glue up and reduce spring back. They'll steam for an hour, maybe an hour and a half. They'll cool for 24 hours to set the lignin.
 
image.jpeg image.jpeg
The plys are stretch wrapped to the form and then placed in a vacuum bag until tomorrow.
 
Last edited:
I'll let these dry for a while. Polyurethane glue is moisture activated and I don't want it to foam before I can get the plys wrapped up tight.
image.jpeg
 
Back
Top Bottom