• The move to the new server is done. There are some software and database maintenance updates in process. This has us passing the hat around to help out. We appreciate any donations. Seriously, even a dollar helps. The payment page may be found here - https://www.audiokarma.org/support.html

Compact Dim Bulb Tester Wiring

Excellent post.

You should take up technical writing, if you haven't already gone down that career path.

Life would be a lot easier if every owner's manual for just about anything was written as clearly as your DBT post. Nice work!

By the way, will a Dim Bulb Tester also detect stupidity levels?:D
 
As others have said good pics and VERY clear write up. :thmbsp:

By the way, will a Dim Bulb Tester also detect stupidity levels?:D

The magnitude of the mistake or fault is directly proportional to the brightness of the bulb - and is bulb wattage independent :rolleyes:
 
Last edited:
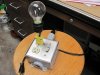
Here's mine. Thanks for the post.

DimBTester_4.jpg
 
You are an inspiration sir.
It's amazing what you can find just lying around eh?

BTW...how do you attach full size photos like the previous one?
 

Attachments

  • IMG_3087.jpg
    IMG_3087.jpg
    71.5 KB · Views: 246
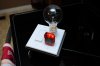
Mine's the same ... only different.

dimbulb-002.jpg


Handy little devil to have laying about.

* Don't forget to stock up on some spare bulbs. Not sure if these will work with CFLs.

Woah... I like this one and it just occurred to me that using a bouble switch instead of the red light) will give me a shorting switch too!
 
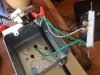
And my version, upside down Southern Hemisphere version, of course
I used a computer PSU housing (shown with the top off) and included the IEC socket so I wouldn't get the inny & outty mixed up. The rest of the bits are just stuff collected over the years. My father taught me well!!
 

Attachments

  • Dim Bulb Tester 002.jpg
    Dim Bulb Tester 002.jpg
    50.5 KB · Views: 312
Mine's a bit bigger, I connected two metal boxes with the shortest piece of conduit available and used a standard single-bulb plate on the second box. That give me both a DUT and 120V switch-controlled socket. Handy for verification that everything is OK - just move the plug to the 120V socket and flip the switch back on.

The commonly-available halogen screw-in bulbs are essentially an upgrade of the classic incandescent bulbs. They should work fine. "Rough service" and specialty bulbs will continue to be available, so don't worry too much. I've seen some high-wattage "rough service" bulbs.
 
I made mine with a 3 way lamp socket and use a 50-100-150 3 way lamp. Works right well for everything up to a Large Tube Receiver. Then I need a 200W bulb.
 
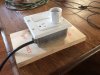
Great instructions, so thought I'd bump this and post a pic of my effort.
 

Attachments

  • IMG_0658.JPG
    IMG_0658.JPG
    90.7 KB · Views: 204
  • IMG_0659.JPG
    IMG_0659.JPG
    95.6 KB · Views: 202
I know this thread is old, but the information still very useful and up to date ! I just build one. Yes, yesterday (March 12, 2017) I bought a vintage and very nice and clean SANSUI AU 519. Of course I know that this integrated amplifier need a complete restoration and a recap job due to his age (about 1978-1980). I did not find much information yet on this model (AU 519) but I will soon star a thread in regard to the restoration, sharing my experience and I will probably have many questions to ask AK community.
 
Hello
In the beginning of this thread OverLoad posted several pictures that showed how the dim bulb tester was wired and constructed. Those images are not showing up for me. Is there any way to repost those images again so they are visible on this thread?

Thanks!!
 
Back
Top Bottom