• The move to the new server is done. There are some software and database maintenance updates in process. This has us passing the hat around to help out. We appreciate any donations. Seriously, even a dollar helps. The payment page may be found here - https://www.audiokarma.org/support.html

Concrete Speakers-Way Better Than I Expected.

FireGuruMN

Active Member
Finished product:
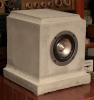
upload_2020-10-6_19-24-25.png
Now as always with my previous post of "strange" speaker builds I have to get the obvious jokes out of the way before everyone adds their own:
They have a very solid sound.
Very good for playing rock music.
Very durable finish.
Ok, that's all I got for now. Have at it.

The sound out of these is wonderful. Probably mostly due to the fabulous Tang Band W4-1337SDF driver.
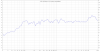
upload_2020-10-6_19-30-20.png
I suspect that they would sound pretty much as good with some solid MDF enclosures but you probably would not even still be reading this if they were MDF enclosures. Just saying.

Here is the process:

Continued. . .
 
Register to hide this ad
So there are several other concrete speaker builds on the interweb and apparently even a company that makes (and apparently sells) concrete speakers. So I figured there had to be some reason for doing it.
So first I had to do a trial to figure out the process. None of the posting about concrete speakers offered much support. But there were some delightful videos about making lawn ornaments our of silicone molds which seemed like a similar process. I learned what I could from them. Deleted my youtube history and moved on. So I had to do a trial to figure out the process. A dry run:
upload_2020-10-6_19-38-51.png
The result:
upload_2020-10-6_19-40-15.png
rotten corners:
upload_2020-10-6_19-43-47.png
What I learned:
PAM cooking spray is a bad choice for concrete release agent. It tends to collect in the corners and then spreads into the setting concrete and prevents it from becoming concrete. I settled on WD40 silicone spray:
upload_2020-10-6_19-42-2.png
This is NOT normal WD40. It is pretty much alcohol that totally evaporates and leaves slippery silicone behind. Perfect for this project.
Other things to note:
I built a box the correct volume for the speaker out of 1/4" plywood and figured I would just leave it inside the concrete for ever. I considered using Styrofoam and melting it out but that is really really not fun. As opposed the rest of working with concrete which is just simply not fun.
In my sample project I put wood all the way out to the concrete form wherever I needed to attach the speaker, terminals and port. It is way easier to work with wood than with concrete. I made each of the wooden parts the exact size so that they would not be exposed and all you will see is concrete. So it's just between you and me.
Pick the right concrete. I had some tight corners and details so I didn't want anything with big rocks in it. What I found was concrete mix that is for making concrete countertops.
upload_2020-10-6_19-51-1.png
It's pretty much fine sand and cement. Not much rocks at all. Or mix your own. It's like $15 for a bag. I think it would take two bags without my sample project and other reasons for needing more (details later).
Buy a paint stirring attachment for your drill.
upload_2020-10-6_19-54-15.png
You will need a powerful drill but it's worth it to get a good mix without any dry spots. Look at some videos of how to mix concrete. It's an art. The difference between a good mix and useless slop that will not work can be a tiny amount of water. I mixed mine in a 5 gallon bucket but whatever you have around is fine.

Continued. . .
 
Now build the interior box with the correct volume. I ended up with contradicting information about the correct volume, port size and pretty much everything to do with the technical design. But in the end here is what I ended up with:
Desired volume: 0.12 cubic feet
For the interior dimensions ended up with:
5 inches wide
6 inches deep
7.2 inches high
or something like that. My drawings are buried in other projects in the garage now.
Back:
upload_2020-10-6_20-4-53.png
Front without extra wood:
upload_2020-10-6_20-5-30.png
extra wood:
upload_2020-10-6_20-6-32.png
I went to the trouble of rounding the edges with a sander because sharp edges are where cracks start.
I planned having the concrete about 1 inch thick. so two layers of 1/2 inch plywood were used to build out all the wood areas.
I put 1/2 inch felt (carpet pad from amazon) all around the inside because it made me feel like I care. Put this felt in before you put the extra wood on if your hands are as large as mine. I don't think I ever put polyfill in these. Do what ever makes you feel good. Just do something to dampen the inside.
The vent is 1.125 inch and 4 inches long as I recall. 260-472 Speaker Cabinet Port Tube 1-1/8" ID x 6-1/2" L Flared.
Speaker terminals are: #260-285 - Square Speaker Terminal 3-1/8" Gold Binding (way overkill but again it makes me feel good)
Some more notes:
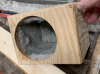
The magnet on this driver is about the same diameter as the hole. And because this speaker is so thick (about 1.5 inches) I had to bevel out the inside of the hole like this:
upload_2020-10-6_20-14-56.png
Just so the speaker could breath.

Continued. . .
 
Then its time to build the outside of the concrete form:
upload_2020-10-6_20-17-53.png

upload_2020-10-6_20-23-59.png
I used 3/4 inch plywood. You need it for strength so your mold does not bow out. Wet concrete is nasty stuff. The cool coves that make this speaker more than a box are made with 1/4 round. I bought 1/4 round slightly less than 3/4 inch so it added an extra notch to the profile. Look at the pictures, I'm not going to provide any dimensions because I don't have any. But I will say that you need lots of screws. don't depend on glue. on one pour the 1/4 round floated to the top because something dissolved the glue. Screw everything. if you can't tell, I poured the speaker upside down. The bottom will not be pretty when you are done unless you are better at this than I am. I made my sides and top about 1 inch thick and the bottom a little thicker so the profile looked like what I wanted.
The extra wood for the port, plugs and driver need to be TIGHT against the outside of the form. Then screw through the form into those boards to suspend the interior of the speaker in the mold.

Mix up your concrete. I made mine a bit watery compared to previous concrete experiences. "warm peanut butter" is what I was going for.
upload_2020-10-6_20-25-54.png
Pour about 4 inches in then tilt the entire thing to the side and bang on it with a "slow hammer". That's what I call those hammers with metal balls in them. They are wonderful for convincing things to move. The idea here is to get all the air out from under the "top" of the form. Air will be trapped and the top will not be smooth if you skip this step. [voice of experience]. Then keep pouring until you get to the top of the form. I built my form so it would be filled all the way. That makes it easier to know that the base is level and other reasons. I pushed a stick into the concrete several times to make sure it was getting into all the corners of the mole. Then pound pound pound. The top of the concrete will tend to liquefy. Don't worry about it. Be sure to put your initials in the wet concrete to demonstrate your childishness.
upload_2020-10-6_20-34-23.png
Let it set at least 24 hours.

Continued. . .
 
Not sure what happened there.
The next go around I put bubble wrap inside just to be sure:
upload_2020-10-6_20-37-17.png
It's possible that the glue had not set and one of the rings slipped. I suppose there is a way to not have to drill out the speaker hole before pouring concrete but my confused little mind was already melting from trying to figure out the rest of this project. Seriously this is easily three or four times harder than anything a normal person would do for a speaker.
Eventually you will unscrew the outside forms and get something like this:
upload_2020-10-6_20-39-44.png
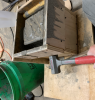
you might have a few places where concrete leaked into cracks. They chip off pretty easy:
upload_2020-10-6_20-41-30.png
Drill out the appropriate size holes:
upload_2020-10-6_20-40-15.png
Here's a picture of the driver. You can see where the magnet does not leave much room for airflow:
upload_2020-10-6_20-42-43.png
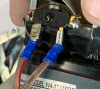
No crossover required for this driver. Just wires straight to the input terminals. I suppose you could put in a cap to keep some low frequencies from damaging the driver but it's a pretty robust driver. I did add some tape between the speaker frame and the terminals because it was tight getting the speaker in the hole and it looked like they could short pretty easy. It would be nice if tang band put some card board there. I suppose insulated spade connectors would be smart on my end but just be careful, it's a tight fit. Or if you have really long pliers or tiny hands you could install the speaker first. Whatever.
upload_2020-10-6_20-46-29.png
If you got this far you can figure that out.
Be sure to put some felt pads or something on the bottom or you will destroy any surface you put them on.

So obviously there is not much below 60hz on these. So I listen to them with a subwoofer set to 80hz. But man oh man do the vocals sound wonderful. I suppose that in a small room or a desktop these would be just perfect.

The color of the titanium driver matching the concrete increases the WAF (wife acceptance factor) way above 0. And they are small so out of site, out of mind.

I often remind my wife that I want to be buried in my 4435's and not she tells me that I have grave markers to use also. So thoughtful of her.

Is see the "interesting" comments coming in on my email already. This should be interesting. . .
 
I was contemplating my next summer project to be "aircrete". Your enclosure mold photos give me hope that I can cast it in one piece.
 
What do they weigh, if I may ask?
39 pounds. If you put them on a desk top, make sure it's a sturdy desk. I was originally going to use 5 inch drivers but the scale of that enclosure would have been massive. 4" was a good choice for me.
Here are some other photos showing overall dimensions:
upload_2020-10-7_7-34-12.png
upload_2020-10-7_7-34-39.png
upload_2020-10-7_7-35-4.png
In this house all the speaker terminals point down. Try it, you'll like it. I can't wait for the arguments on that one. . .
upload_2020-10-7_7-35-30.png
The port is hot-glued in place. It had some weird fins on the back that supposedly would hold it in place. That seemed like a bad idea so I broke them off and used hot glue since I felt deprived of my hot glue joy of gluing capacitors to crossovers since this one had no crossover.
This is a great glue gun:
DeWALT DWHTGR50 Rapid Heat Ceramic Glue Gun, Yellow. Heats up fast and nice trigger mechanism.
upload_2020-10-7_7-40-5.png

Next project for the spring:
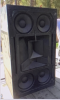
upload_2020-10-7_7-40-55.png
I got drivers from an IMAX theatre. Including the 18" woofers. Gonna try to civilize them for home use. Wish me luck. I cut the person out of the photo but these are easily 6 feet tall. I don't have the enclosures, just the drivers.
 
I got drivers from an IMAX theatre. Including the 18" woofers. Gonna try to civilize them for home use. Wish me luck. I cut the person out of the photo but these are easily 6 feet tall. I don't have the enclosures, just the drivers.
Whoa! How many of those did you get? What happened to the enclosures?
 
I have:
2 18" drivers
4 12" drivers
3 horns with drivers
1 midrange with 8" driver
These were saved from the dumpster by another person during an upgrade of the theater. I can't speak to where the enclosure went but I suspect they would not fit in the car this guy had available. They would not be suitable for a home system regardless.
But let's save the rest of this conversation for another thread please.
 
Didn't ex-member Arkay experiment with concrete speakers a few years back? Anyone remember that?
 
Back
Top Bottom