• The move to the new server is done. There are some software and database maintenance updates in process. This has us passing the hat around to help out. We appreciate any donations. Seriously, even a dollar helps. The payment page may be found here - https://www.audiokarma.org/support.html

Custom Terminal Build

JB1962

Well-Known Member
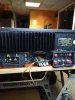
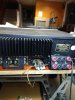
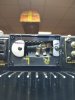
I'm finally addressing an issue that started, round about ten years ago, broken speaker terminals on my Fisher CA-2120 Integrated amplifier. I've been using this as a pre-amp for the Hafler P500 amplifier since the speaker terminals were junk. After the first two, the A and B R+'s broke, I wired in a six inch piece of wire on each to be able to use it with my Tuner out in the shop.

I've since brought it in and found all of the plastic on the terminals was crumbling. I haven't been fond of the old spring clips since I discovered the Banana Jack, so I am determined to replace the old obsolete clips with something this side of the stone ages. Problem is, there's no room for them.

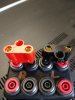
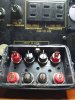
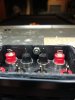
If I'm going to make this work I'll need to get creative, and ultimately never had to leave the comfort of thinking outside the box. Well, not since the solution was to stuff them in a box and screw it to the back of the amplifier in the old terminal plates place

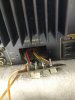
IMG_20230117_130812421.jpg IMG_20230120_221910236.jpg
 
Register to hide this ad
I eventually found a usable hobby box, after much looking I didn't think that I would find a size that would work but then I happened across one. It wasn't deep enough but I made up for that deficiency with rubber grommets.
16766872132144252947776525364862.jpg 16766872555142504619971533080190.jpg
16766873786575638547938553436356.jpg

I also decided that I would be able to plug these in so I can use the same cables with the Fisher as I have for the Hafler
 
Last edited:
Picked up a couple of fender washers and ground them down, I don't want all the force of pulling the jacks out being applied to just the small area around the screws, the washers will spread the force out and hold the backplate closer to to outside edges.
16766885278984535040529921957562.jpg

Edit: the fender washers need to be ground down on the bottoms for two reasons, they're keeping the box from closing and they're hitting the connection point on the left and right + channels of the B jacks. I figure I can maximize use of the washers by turning the two offending jacks 90°

16766940644302047092415080625698.jpg
16766944492557584478083697110693.jpg

Edit: Just took another approach, I just clipped off the offending jacks. Much easier and way quicker than grinding the washers down

16766951246392242438905879341881.jpg
 
Last edited:
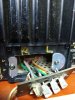
I have two soldering tools! An old Power - Kraft Model 84 gun, and a recently new 60W Weller Iron. Neither are doing much to melt the old solder!

I clipped one of the connectors from the original backplate in attempt to remove it from the factory soldered wire, the wire however seems to be wound around each leg(?) several times. Obviously I do not have much wire to lose but it looks like I'd be best off snipping these off and working with fresh wire?

I'm not what I would call proficient at soldering, I don't even know what temperature soldering gun/iron I need to do this properly
16766980055978017713378046594925.jpg 16766980930858772322547347214446.jpg
 
That 60W iron should be able to handle that. Be sure to melt a little bit of solder on the tip before trying to make a connection to help transfer heat.
If you have enough to spare, always trim, strip and tin any wire you will be working with.
Consider practicing your soldering on anything not working so mistakes won't matter.
 
Too funny!!! I thought you were asking about your last ever build.
How many times have I said that? Probably more than I can remember.
I've got one on the bench, gathering parts to build an input selector/volume control box to match an amp I previously built, and several other projects behind that. Then I'm done for real! :rolleyes:
 
That 60W iron should be able to handle that. Be sure to melt a little bit of solder on the tip before trying to make a connection to help transfer heat.
If you have enough to spare, always trim, strip and tin any wire you will be working with.
Consider practicing your soldering on anything not working so mistakes won't matter.

Thanks for the pointers, appreciate it!

I've seen the tinning done but I don't have the equipment do do it myself. To start with fresh tinned wire to solder I'd obviously need to just clip all the wires and strip insulation, I was hoping to avoid shortening the wires as they now must reach beyond the original backplate to terminate.

That said, how would one tin the wires? Certainly dipping them in a puddle of molten tin would be inconvenient, they only pull out about an inch beyond the back of the amplifier cabinet. Assuming there's another method of tinning?
 
Thanks for the pointers, appreciate it!

I've seen the tinning done but I don't have the equipment do do it myself. To start with fresh tinned wire to solder I'd obviously need to just clip all the wires and strip insulation, I was hoping to avoid shortening the wires as they now must reach beyond the original backplate to terminate.

That said, how would one tin the wires? Certainly dipping them in a puddle of molten tin would be inconvenient, they only pull out about an inch beyond the back of the amplifier cabinet. Assuming there's another method of tinning?

you heat the wire with the iron and feed solder into the hot wire til its "tinned"

when trying to heat up old solder, heat it up then add fresh solder. it will spread the heat and mix in.
 
You can tin the wire with your iron.
Strip to the appropriate length and tighten up the twist if needed.
Put some flux on the wire and a bit of solder on the tip to aid heat transfer. Touch it to the wire and add more solder. You may have to move the tip a little to distribute it but the flux should take care of that.
If done correctly (as per my Mil-Spec training) you should still be able to see outlines of the wires essentially meaning the solder isn't thick enough to make a blob.

Practice before you take on the wires in the amp. I don't know what the wiring in the amp is but vinyl insulation can shrink quite a bit or even melt.
 
You can tin the wire with your iron.
Strip to the appropriate length and tighten up the twist if needed.
Put some flux on the wire and a bit of solder on the tip to aid heat transfer. Touch it to the wire and add more solder. You may have to move the tip a little to distribute it but the flux should take care of that.
If done correctly (as per my Mil-Spec training) you should still be able to see outlines of the wires essentially meaning the solder isn't thick enough to make a blob.

Practice before you take on the wires in the amp. I don't know what the wiring in the amp is but vinyl insulation can shrink quite a bit or even melt.
Practice sounds like an excellent idea, especially since I only have about an inch of wire to work with and they'll need to be extended beyond the back of the cabinet since the speaker terminals will now be external
 
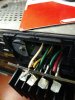
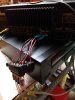
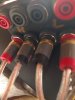
I finally got up the nerve to cut the old wires free and get this done. I came to realize that I had no room to solder without adding wire length, I soldered about six inches of wire to each A and B new banana jacks. Then taped them off first individually, then in two groups, A and B.

I'm listening to All Green's 'Unchained Melody' CD on the A speakers now, haven't tried the B channels yet but so far I'm happy. Next I have to stuff some wire and glue the box together. I'll do some more tape to hold the wires in place where they exit the cabinet.16792106908928836954458652856122.jpg
 
Now using the B outputs, looks like success. Providing I don't break a connection somewhere stuffing the wires inside, this Fisher will be ready for service again. We'll that and if the glue holds it all closed, still not sure what glue would be best for the plastic 16792111034855947524671139626583.jpg
 
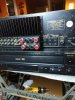
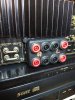
Wires stuffed! Still need to work out gluing but it's together.16792117720867144678703733875109.jpg 16792118397073712512277135105262.jpg

I bought this Fisher CA-2120 integrated amplifier probably forty+ years ago. I sold it once to a friend's son, then years later I found the matching FM2121 tuner. Years after that I was able to buy the integrated amplifier back and put it together with the tuner.

The speaker terminals began crumbling long ago, this project was way overdue
 
Last edited:
Back
Top Bottom