• The move to the new server is done. There are some software and database maintenance updates in process. This has us passing the hat around to help out. We appreciate any donations. Seriously, even a dollar helps. The payment page may be found here - https://www.audiokarma.org/support.html

Dim Bulb Tester for 230V?

Apekop

New Member
I've read a lot of info about dim bulb testers and it seems that a 100W bulb would fit most cases.
I'm planning to build one to help when I recap my SX-850.
The thing is that all the info is from people in the US where 120V is used and I live in the Netherlands where we have 230V.
Should I still use a 100W bulb or would that change?
I guess the power (watts) used by the receiver doesn't differ so the bulb shouldn't either but I'm not 100% sure...
 
Register to hide this ad
I've read a lot of info about dim bulb testers and it seems that a 100W bulb would fit most cases.
I'm planning to build one to help when I recap my SX-850.
The thing is that all the info is from people in the US where 120V is used and I live in the Netherlands where we have 230V.
Should I still use a 100W bulb or would that change?
I guess the power (watts) used by the receiver doesn't differ so the bulb shouldn't either but I'm not 100% sure...

The current will be roughly half for both the bulb and the receiver at 230V versus 120V so for sure use a 100W bulb, but it must be a 100W 230V bulb and not a 120V bulb.
 
Check out brooder or heat lamps as a alternative, since they are exempt from regulations. you can use a larger wattage lamp, 150~250w are fine for a quick test. If you can only get 120v lamps then put two in series. On my fixture I installed an additional switch across the lamp to short it out for full power. that way I do not have to move the plug to the amp from one supply to the other.
 
Last edited:
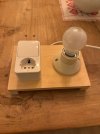
I build the Dim Bulb Tester and it seems to work well. :)
I've noticed that the lamp comes on fully for a second and then is completely dark after that. Does that mean I should use
a bulb with a lower wattage for my SX-850?
IMG_6764.jpeg
 
Does that mean I should use
a bulb with a lower wattage for my SX-850?
You clearly do not have a fault at the moment, so no need to change to a lower wattage bulb. However if you do get a continuous bright bulb then changing to a lower wattage could prevent damage occurring while you find the problem. I think I would use a 60watt bulb for this size of unit, only switching to 100Watt if you get no bright bulb and need a bit of extra functionality (like 'protection' de-activation, or bias current adjustment check), of the unit while testing.

The key thing is to use the DBT after each change however small, to your unit, as you progress through the restoration. ;)
 
Last edited:
No, the receiver has no faults. I just thought that the lightbulb would stay on a little bit. I was wondering if that was a problem.
 
No, the receiver has no faults. I just thought that the lightbulb would stay on a little bit. I was wondering if that was a problem.
Not a problem. The behavior you are observing it good and what you want to see.
 
Light bulbs have a very interesting characteristic. They have a very low resistance until they warm up, and then this resistance increases. Practically, this means that as long as the current is below a certain value, the bulb is almost not in the circuit, but once you hit this value, the resistance rapidly goes up and the current is limited. What this gives is short circuit protection, which seriously limits the damage to the device under test.
 
I have a little collection of bulbs for my DBT.

I try and match it to the expected power draw of the unit being worked on.

Something in the class of a 10-20W cap coupled amplifier needs a 40-60W bulb, something like 100W amp a 100W bulb and the monsters 200W.

Think of it in terms of maximum fault current you want to draw and maximum power you want supplied to shorting components.
 
This is all you have to know about DBT and how to use it


A DBT (Dim Bulb Tester) is a current-limiting safety device used when powering electronics—especially after repair—to prevent catastrophic damage if a fault exists.

What is DBT?

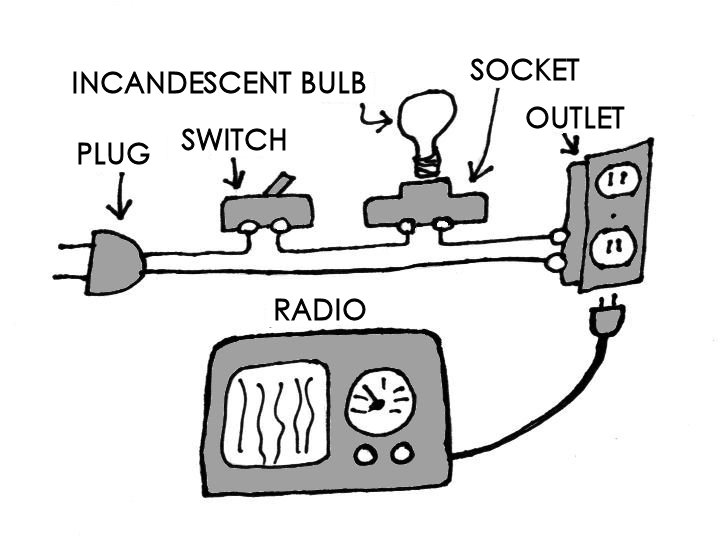
A DBT is simply an incandescent light bulb wired in series with the AC mains feeding the device under test (DUT).
https://antiqueradio.org/art/DimbulbSketch.jpg

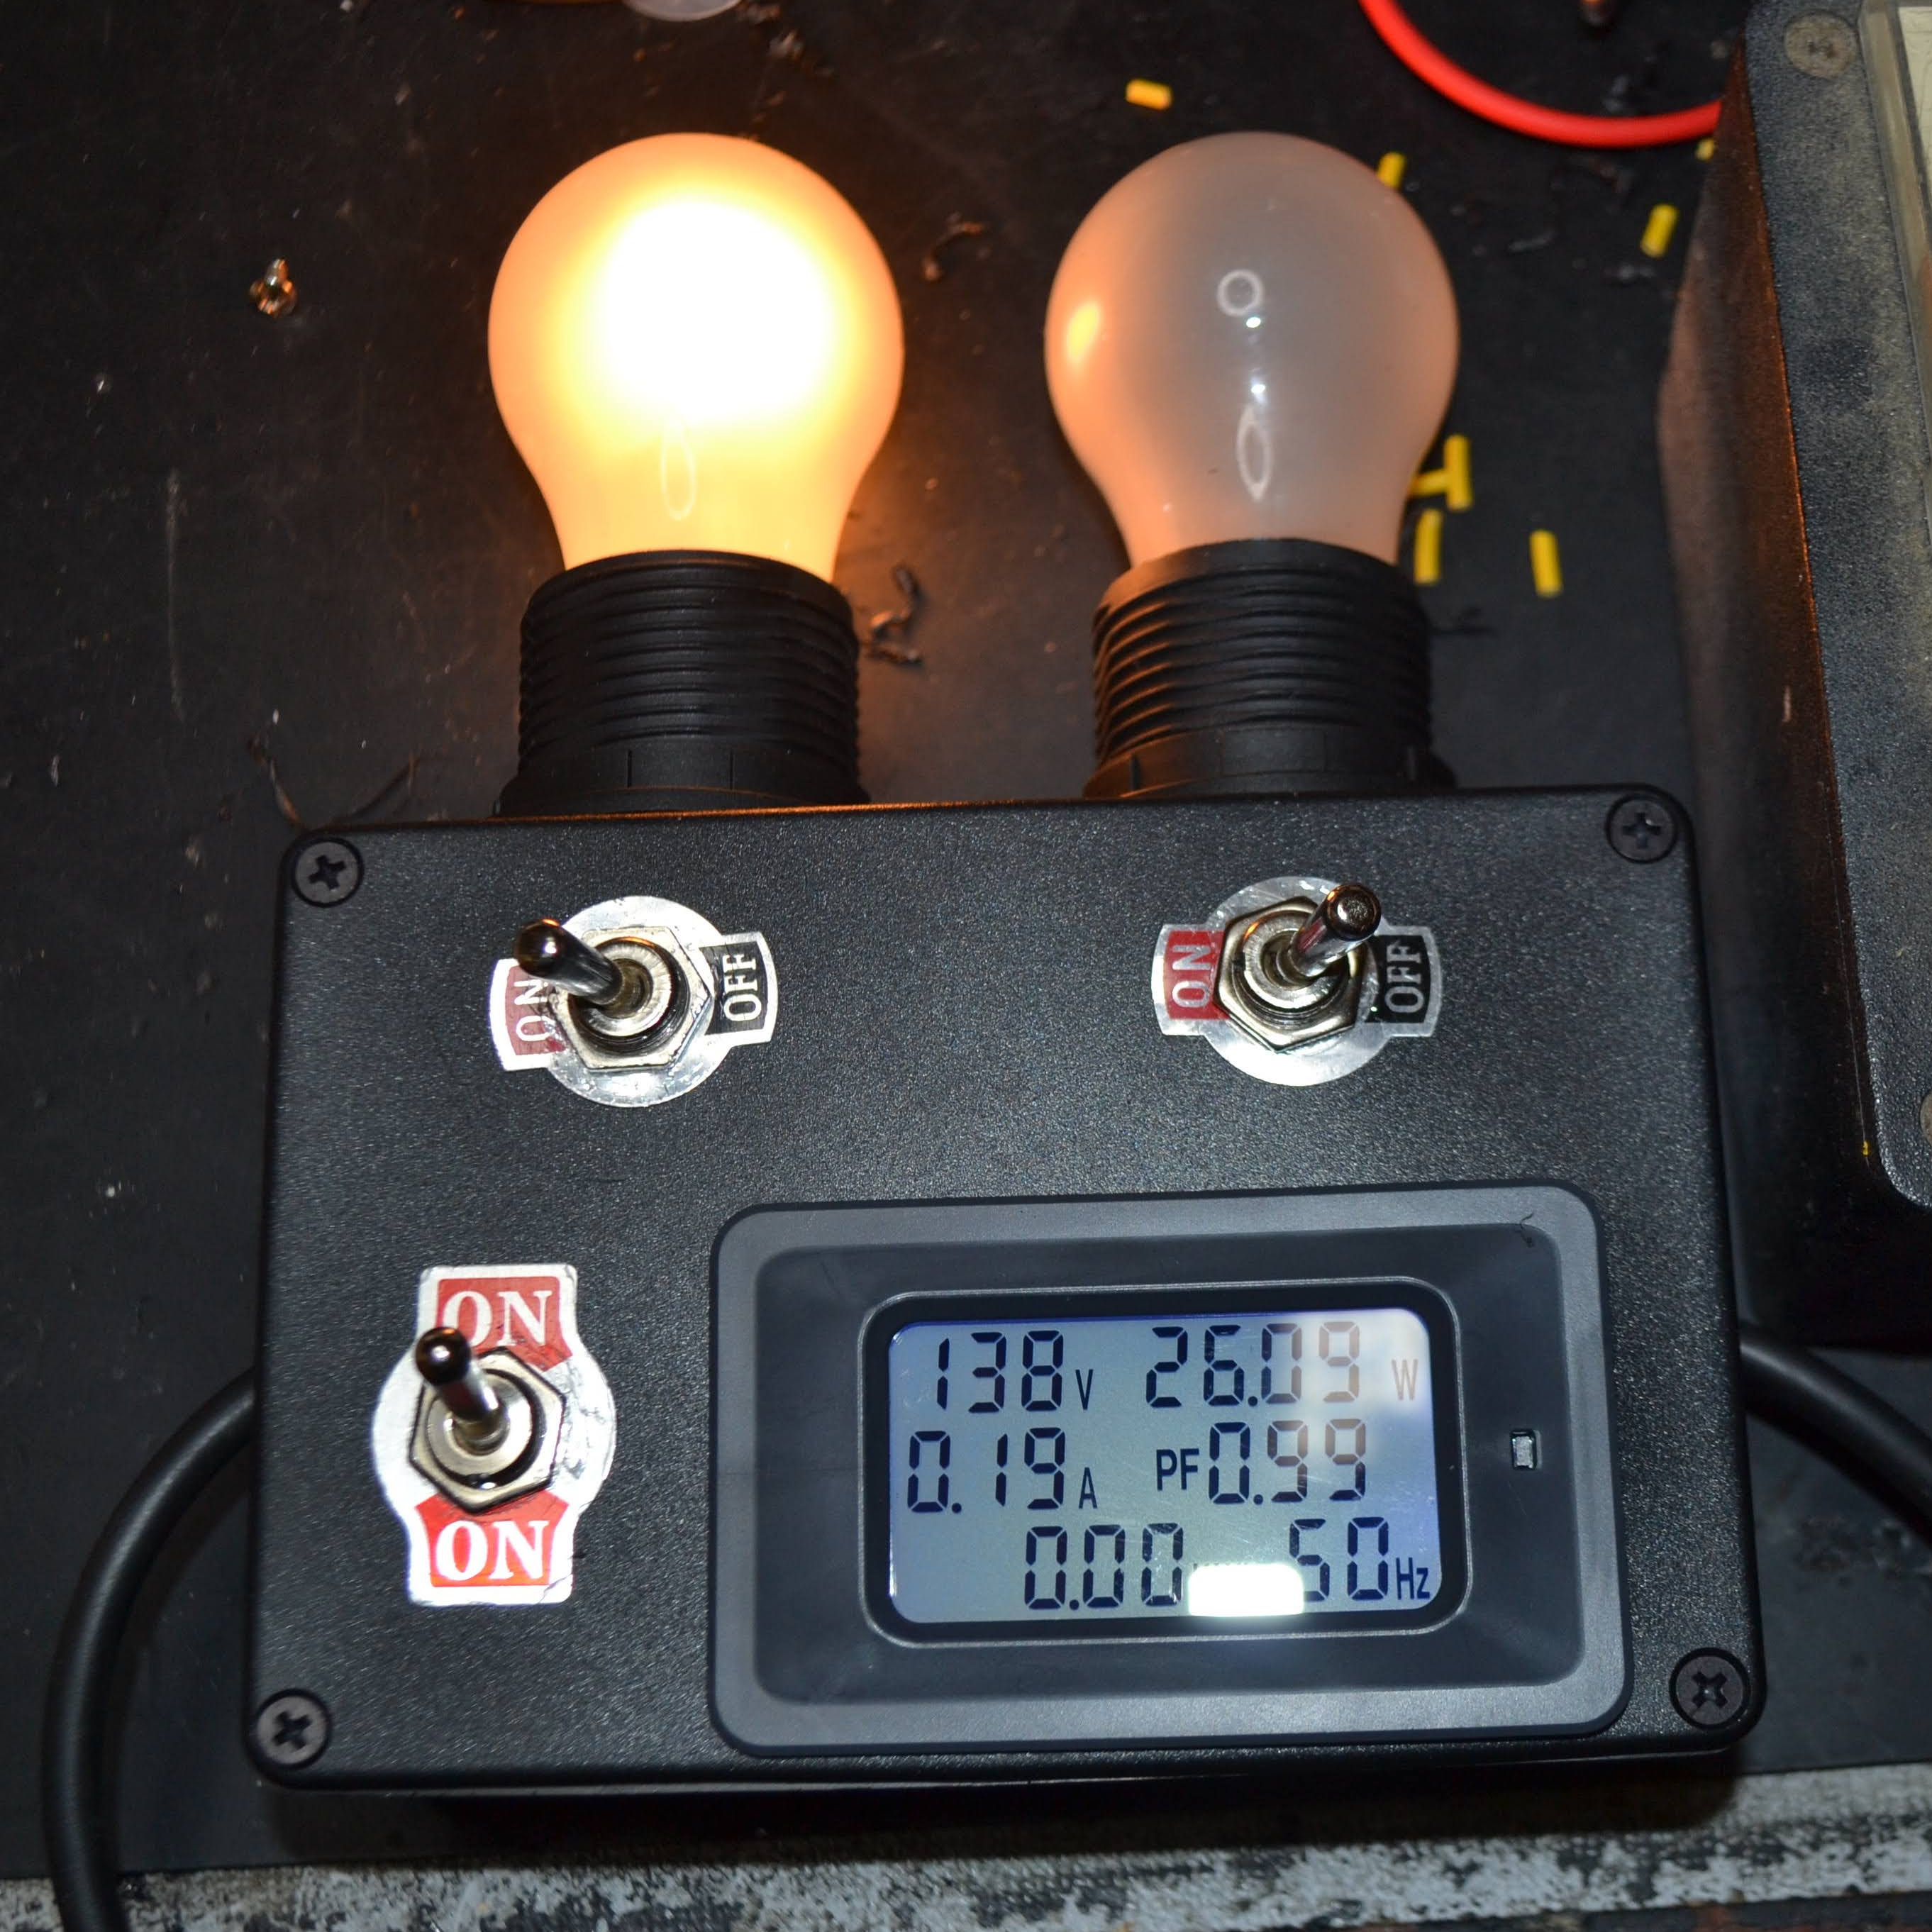
https://hackaday.com/wp-content/uploads/2022/11/dim-bulb-tester-DIY-2.jpg

Because an incandescent bulb’s filament has resistance that increases with current, it acts as a self-regulating current limiter.

How It Works (Electrical Principle)​

  1. Series connection
    AC → Bulb → Device
    The bulb and the device share the same current.
  2. Cold filament = low resistance
    At power-on, the bulb filament is cold and allows some current to flow.
  3. Excess current = bright bulb
    If the device tries to draw too much current (short, fault, wrong parts), the bulb heats up:
    • Resistance rises sharply
    • Voltage to the device drops
    • Current is limited
  4. Normal device = dim bulb
    If the device is healthy:
    • Initial brief flash (charging capacitors)
    • The bulb quickly dims or goes almost dark
    • The device receives near-normal voltage

How to Read the Bulb​

Bulb BehaviorMeaning
Bright and stays brightShort circuit or major fault
Bright flash → dimNormal startup (good sign)
Very dim / almost offDevice drawing little current (often normal)
No light at allOpen circuit, blown fuse, or device not drawing current

Why DBT Protects Equipment​

  • Prevents blown output transistors
  • Protects power transformers
  • Avoids burned resistors and PCB traces
  • Gives visual feedback instantly
A DBT does not “fix” anything—it buys you time and prevents damage while you diagnose.

Bulb Wattage Selection​

Choose the bulb based on the device's power consumption:
Device TypeBulb Wattage
Small electronics40–60 W
Integrated amplifiers60–100 W
Power amplifiers100–150 W
Large Class-A gearStart at 100 W, then increase
Rule: Start low → increase wattage as confidence grows.

What a DBT Does Not Do​

  • It does not regulate voltage precisely
  • It does not replace a variac
  • It does not allow full-power testing
  • Bias and rail voltages will be lower than normal
You must remove the DBT for final bias/offset adjustment.

DBT vs Variac​

FeatureDBTVariac
Current limitingYes (automatic)No
Voltage controlNoYes
Fault protectionExcellentPoor unless fused
Cost/complexityVery lowHigher
Best practice:
DBT first → then variac (if available) → then direct mains.

Typical Use Procedure​

  1. Connect the DBT in series with the AC mains
  2. Insert the correct wattage bulb
  3. Power ON the device
  4. Observe bulb behavior
  5. If dim → proceed with measurements
  6. If bright → power OFF immediately and troubleshoot

Important Safety Notes​

  • Use incandescent bulbs only (LED/CFL will NOT work)
  • Bulb socket and wiring must be mains-rated
  • Enclose all wiring—mains voltage is lethal
  • Never touch the DUT while adjusting the DBT

 
This is all you have to know about DBT and how to use it


A DBT (Dim Bulb Tester) is a current-limiting safety device used when powering electronics—especially after repair—to prevent catastrophic damage if a fault exists.

What is DBT?

A DBT is simply an incandescent light bulb wired in series with the AC mains feeding the device under test (DUT).
https://antiqueradio.org/art/DimbulbSketch.jpg

https://hackaday.com/wp-content/uploads/2022/11/dim-bulb-tester-DIY-2.jpg

Because an incandescent bulb’s filament has resistance that increases with current, it acts as a self-regulating current limiter.

How It Works (Electrical Principle)​

  1. Series connection
    AC → Bulb → Device
    The bulb and the device share the same current.
  2. Cold filament = low resistance
    At power-on, the bulb filament is cold and allows some current to flow.
  3. Excess current = bright bulb
    If the device tries to draw too much current (short, fault, wrong parts), the bulb heats up:
    • Resistance rises sharply
    • Voltage to the device drops
    • Current is limited
  4. Normal device = dim bulb
    If the device is healthy:
    • Initial brief flash (charging capacitors)
    • The bulb quickly dims or goes almost dark
    • The device receives near-normal voltage

How to Read the Bulb​

Bulb BehaviorMeaning
Bright and stays brightShort circuit or major fault
Bright flash → dimNormal startup (good sign)
Very dim / almost offDevice drawing little current (often normal)
No light at allOpen circuit, blown fuse, or device not drawing current

Why DBT Protects Equipment​

  • Prevents blown output transistors
  • Protects power transformers
  • Avoids burned resistors and PCB traces
  • Gives visual feedback instantly
A DBT does not “fix” anything—it buys you time and prevents damage while you diagnose.

Bulb Wattage Selection​

Choose the bulb based on the device's power consumption:
Device TypeBulb Wattage
Small electronics40–60 W
Integrated amplifiers60–100 W
Power amplifiers100–150 W
Large Class-A gearStart at 100 W, then increase
Rule: Start low → increase wattage as confidence grows.

What a DBT Does Not Do​

  • It does not regulate voltage precisely
  • It does not replace a variac
  • It does not allow full-power testing
  • Bias and rail voltages will be lower than normal
You must remove the DBT for final bias/offset adjustment.

DBT vs Variac​

FeatureDBTVariac
Current limitingYes (automatic)No
Voltage controlNoYes
Fault protectionExcellentPoor unless fused
Cost/complexityVery lowHigher
Best practice:
DBT first → then variac (if available) → then direct mains.

Typical Use Procedure​

  1. Connect the DBT in series with the AC mains
  2. Insert the correct wattage bulb
  3. Power ON the device
  4. Observe bulb behavior
  5. If dim → proceed with measurements
  6. If bright → power OFF immediately and troubleshoot

Important Safety Notes​

  • Use incandescent bulbs only (LED/CFL will NOT work)
  • Bulb socket and wiring must be mains-rated
  • Enclose all wiring—mains voltage is lethal
  • Never touch the DUT while adjusting the DBT
Excellent. This should be a sticky somewhere. :rockon:
 
I couldn't agree more, an excellent candidate for a sticky to refer newbies to.

Particularly excellent is the section on reading the dim bulb behaviour at power on, that is usually learned by experience and its great to see it laid out. I hesitate, not wanting to add complexity at the cost of brevity, but I would be tempted to add that there is a couple more dim bulb behaviour that might conceivably be encountered.

Slow flashing of the bulb, could indicate that the power supply is attempting to start up, feeding excess current into the amp and being shut down by some sort of resetting protection circuitry. Course of action is to power down and look for faults.

Rapid flashing of the bulb could indicate that the power supply is attempting to start up but is being shut down by the undervoltage detection circuitry of the power supply because the dim bulb in series is preventing it from being able to pull enough inrush current to charge up the primary capacitor to start up. This affect equipment with switchmode power supplies. Course of action is to start up on a variac monitoring current, or if you have faith in the repair, power up without a dim bulb.

not very common scenarios but I thought I would mention them for the sake of completeness.
 
Back
Top Bottom