jcmjrt
Addicted Member
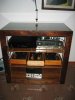
Just got finished with a DIY Audio Rack. We (my SO and I) have been working on it for a while. We wanted a rack that would dampen vibrations, be sturdy, provide good ventilation and access, short power runs, particularly good damping for TTs and be well lit. I was inspired by the Arcici suspension stand:
http://www.audiophileclub.co.uk/arcici.html
We decided to make it a three leg stand because that would provide never wobbly and good access and ventilation to all sides. Highly figured walnut is because it's strong and we like it...and wood always goes with wood. Every joint is either locking miter or mortise and tenon type. There is an I-beam type oak run between the front stretcher and rear leg. The shelves are 1/2 inch baltic birch veneered with walnut. Supports are underneath front and rear to support equipment weight. The top piece running between all three legs is 1/4" plate steel with a 3/4 plywood piece laminated to it. The shelves are suspended on 3/8" threaded brass rod. Each shelf is separated by a 1/8" rubber gasket, and brass washer top and bottom. Underneath there are two jam nuts to make sure that shelves don't move. The shelves are hung on the top 1/4" steel plate with two layers of 1/4" cork alternated with two layers of 1/8" rubber gasket material to provide shock absorption to the shelves.
The top piece is a little complicated. It's figured walnut all around the sides but the top is 3/4" MDF which is routed similarly to the plywood piece laminated to the 1/4" steel plate. The routed holes are round to accept handballs which provide a suspension between the top and bottom sections of the rack. This is to provide as much suspension as possible to the TTs which will live on top. The very top is 1/4" dark glass surrounded by brass plate trim to keep the whole brass and walnut theme alive and well and hopefully, easily cleaned.
Additional isolation/damping to each leg is provided by layering at the bottom. The very bottom piece is ultra high molecular weight (UHMW which is tough and slides easily) which is attached to 1/4" aluminum plate (just plain d*mn tough). The top of this space near the bottom of the leg ( is also topped by 1/4" aluminum plate. The space in between - about two inches on the inside of the legs - is filled by lead bird shot. Additionally, there is lead bird shot filling the I-beam space in between the front stretcher and rear leg.
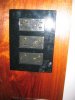
The power is run in the third/back leg. All wiring is 12 gauge solid copper. The outlets are commercial grade - similar to hospital grade but not water proof. There's a noise suppression capacitor across each outlet. There's a power switch for the whole power outlet run on the back.
The lighting is one halogen lamp on the top with it's own switch which will provide good lighting for the TTs that will eventually inhabit the top. There's LED lighting inside each front leg on it's own switch.
The finish is hand rubbed oil - 50/50 BLO and Tung. I sanded to 600 grit on all exterior surfaces. There are about (at least but there may be another coat or two) 11 coats of oil. I rubbed down with 0000 steel wool between each coat.
The whole unit isn't tweaked yet at all. We just got it finished and some equipment on the shelves but it has been a while in the works and I wanted to get some pics out.
http://www.audiophileclub.co.uk/arcici.html
We decided to make it a three leg stand because that would provide never wobbly and good access and ventilation to all sides. Highly figured walnut is because it's strong and we like it...and wood always goes with wood. Every joint is either locking miter or mortise and tenon type. There is an I-beam type oak run between the front stretcher and rear leg. The shelves are 1/2 inch baltic birch veneered with walnut. Supports are underneath front and rear to support equipment weight. The top piece running between all three legs is 1/4" plate steel with a 3/4 plywood piece laminated to it. The shelves are suspended on 3/8" threaded brass rod. Each shelf is separated by a 1/8" rubber gasket, and brass washer top and bottom. Underneath there are two jam nuts to make sure that shelves don't move. The shelves are hung on the top 1/4" steel plate with two layers of 1/4" cork alternated with two layers of 1/8" rubber gasket material to provide shock absorption to the shelves.
The top piece is a little complicated. It's figured walnut all around the sides but the top is 3/4" MDF which is routed similarly to the plywood piece laminated to the 1/4" steel plate. The routed holes are round to accept handballs which provide a suspension between the top and bottom sections of the rack. This is to provide as much suspension as possible to the TTs which will live on top. The very top is 1/4" dark glass surrounded by brass plate trim to keep the whole brass and walnut theme alive and well and hopefully, easily cleaned.
Additional isolation/damping to each leg is provided by layering at the bottom. The very bottom piece is ultra high molecular weight (UHMW which is tough and slides easily) which is attached to 1/4" aluminum plate (just plain d*mn tough). The top of this space near the bottom of the leg ( is also topped by 1/4" aluminum plate. The space in between - about two inches on the inside of the legs - is filled by lead bird shot. Additionally, there is lead bird shot filling the I-beam space in between the front stretcher and rear leg.
The power is run in the third/back leg. All wiring is 12 gauge solid copper. The outlets are commercial grade - similar to hospital grade but not water proof. There's a noise suppression capacitor across each outlet. There's a power switch for the whole power outlet run on the back.
The lighting is one halogen lamp on the top with it's own switch which will provide good lighting for the TTs that will eventually inhabit the top. There's LED lighting inside each front leg on it's own switch.
The finish is hand rubbed oil - 50/50 BLO and Tung. I sanded to 600 grit on all exterior surfaces. There are about (at least but there may be another coat or two) 11 coats of oil. I rubbed down with 0000 steel wool between each coat.
The whole unit isn't tweaked yet at all. We just got it finished and some equipment on the shelves but it has been a while in the works and I wanted to get some pics out.