Copa1934
My ears are bleeding
Assembly time...
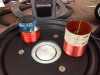
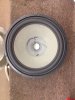
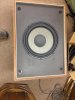
These images are taken during assembly. I allowed the glue to cure overnight. I really didn't want to take any chances of the pole shifting during cure time. Seems to be holding strong.
First shows the assembled pieces. In the video, due to angle and sunlight, the gap doesn't look even. I tried to get a better image. The one posted shows that the alignment is close to dead on. I say close because I don't have a non ferrous measuring device to confirm it. Needless to say there is positively NO rubbing with the assembled system.
One image shows the new and old VC before assembly. Then the spider. The second image with the spider is actually showing the needle I had to use to thread the new lead thru the rubber bushings. The leads are too soft, even tinned. Last is the cone, but VC not yet wired to the leads. I'm completing assembly tomorrow and will post additional images and listening tests.
Turning out better than anticipated, and I was able to reuse the cone and surround.
These images are taken during assembly. I allowed the glue to cure overnight. I really didn't want to take any chances of the pole shifting during cure time. Seems to be holding strong.
First shows the assembled pieces. In the video, due to angle and sunlight, the gap doesn't look even. I tried to get a better image. The one posted shows that the alignment is close to dead on. I say close because I don't have a non ferrous measuring device to confirm it. Needless to say there is positively NO rubbing with the assembled system.
One image shows the new and old VC before assembly. Then the spider. The second image with the spider is actually showing the needle I had to use to thread the new lead thru the rubber bushings. The leads are too soft, even tinned. Last is the cone, but VC not yet wired to the leads. I'm completing assembly tomorrow and will post additional images and listening tests.
Turning out better than anticipated, and I was able to reuse the cone and surround.