Hey
@bimmerlucas and yes, these things can be a real challenge to get right but believe me, there's an answer to the dilemma you have. It's just a matter of finding what it is......I know you have been hard at this and must feel pretty frustrated, I know I was! In my case, it was not
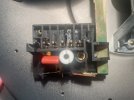
an answer but a number of them. First, and I trust you might have done a number of these things, let's rule out a power issue. Have you checked that your motor is properly powered and that you don't just have half of it doing the job like I did? That accounted for my slow start issues so do check that. If it is a table that was made for sale to the U.S. then the wiring block probably looks something like this, yes?

That is, of course, missing the plug that comes from the wall outlet and goes in the cavity only one way. Next, if your wiring inside this block looks like this, it's wrong.....I wasn't paying attention and put it back together wrong, which caused a number of issues but very, very slow start was the most prominent feature:

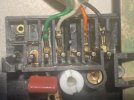
With the help of fellow AK'ers, I was able to fix that to look like this:

Notice the connector that is empty between the orange and white wires now? You have to be REALLY careful pulling those clips upward on the posts as they break easily.....make a lifter mechanism, a heavy paper clip will do, and shape the end into an L so you can use it to lift up uniformly and SLOWLY. If they've been on there a while, a very small drop of sewing machine oil might help to loosen them a bit. Clean up afterward with a q-tip and isopropyl. If these connectors appear as they do in the second photograph, you don't need to do anything as it is correct. Green on #3, White on #4, #5 is open, Orange on #6 and Black on #7.
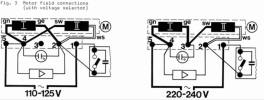
If your wiring block does not look like this, then you will unfortunately have to research the service manual for the particular schematic that applies. There are others here who own the 1229 who will know more. Mine is a 1219 and while I believe they are the same, might not be. This should resolve the slow speed-up issue and provide greater stability to your speed overall.
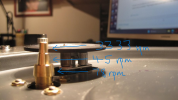
Next, the pulley that the idler wheel rides on has two screws, one is a set screw on the side that keeps the pulley from riding up on the motor spindle. Notice I said "up," and that is because there is a second screw accessed through the hole on the very top of the pulley. This screw keeps your pulley from going any farther downward and is used to set the speed and keep it there. A loose set screw on the side would be a possible cause for it not to hold speed properly as that allows the pulley to travel upward as it spins and the speed increases as a result, but since it's not secured, it can ride back downward also and that gives the wonkey speed readings. Besides, if the set screw is loose, the pulley would spin on the spindle and you can imagine how that would affect the speed......up and down, up and down.....etc. To begin, set the pulley height right in the middle of the 33 section, which is the top part of the cone which is divided into three tiers.
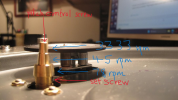
Then fine tune from there taking about a half turn with the screw in the top hole of the pulley either direction until you have it really close to 33.33. After that, you can adjust with your pitch control lever to make any slight adjustments necessary.

Those are some things that come to mind that I learned just a few weeks ago when I dealt with similar issues such as yours. Hope that helps a bit and let us know how it goes. Lots of help here, and many are very familiar with these tables, much moreso than I, but just thought I'd give you some ideas.....carry on, amigo