• The move to the new server is done. There are some software and database maintenance updates in process. This has us passing the hat around to help out. We appreciate any donations. Seriously, even a dollar helps. The payment page may be found here - https://www.audiokarma.org/support.html

Dust cover polishing. What am I doing wrong?

gary7

AK Subscriber
Subscriber
After reading about dust cover polishing on several threads, I gave it a go. Started with a sanding block wet paper 800, then 1500, then 2000 grit. Then hand applied rubbing compound, then buffing wheel, then fine plastic polish by hand then buffing wheel. Though the cover is smooth to the touch, I can still see fine scratch lines though the cover, making it look hazy. What did I do wrong?
 
Register to hide this ad
Only a guess, What type of buffing wheel and what Polish? I used a variable speed polisher, Like for detailing cars, Set at 1500rpm's, I used a foam cutting pad. You may need to get more aggressive with the Polish. I used Mcquires Ultimate polish. Cover came out good as new. Good luck
 
It takes for bloody ever.

I did what you did to a banged up Dual cover with the same issues. I ended up carefully using one of those headlight restoration kits and a small drill. It was the only way I could get the sanding scratches out. I would say "never again" but I'll probably do it again someday...
 
It's not so much what you did wrong, more along the line of what you didn't do quite enough. Think of it this way, you start with a dust cover, it's got scratches. The only way to get those out (believe it or not) is to put in bigger scratches. Fortunately, we control those, so we put in many, many, in an even consistent manner. From there, it is a process (yes, a long one) of putting in smaller and smaller scratches to the surface below the current scratch depth. For example, say you start with 500 and get a nice even haze. You move on to sanding with 800 and remove all evidence of any 500 grit scratches. That's the critical component for that and every subsequent step. (Use 1000 to remove all the 800 grit scratches, and so on.)

I also recommend a drill, it will help save your arm. As a point of reference, I spent six hours on my PL-630 cover, hitting all 10 surfaces, inside and out.

Good luck, it's worth it!

- Jeff

 
Also, make sure each pass with hand (wet) sanding is perpendicular to the previous pass. My only warning is be careful with a drill (I used one for final buffing but all sanding was wet, by hand, and with a sanding block), you can generate a lot of heat and actually start to melt plastic depending what is on the business end of the drill.
 
I'm using a hand pad to apply the polish, then. Then I use a 6" orbital buffer with a micro fiber pad.
 
If you don't have deep scratches, the headlight restoration kits with the 3 different pads work wonders
 
Hertzdonut nailed it! Specifically with the addition of more sanding steps in between. 1500 grit is not going to effectively remove all of the 800 grit scratches in any kind of timely manner which is why you're still seeing the evidence of them after the final polish.

I will also add that you may need a couple levels of polishing compound as well. The second level helps remove the swirls (that can be seen in the reflection) left by the first and so on.
 
The most likely thing is that you're not getting out all of the 500 grit scratches with the 800 before moving up to the 1500, as the others have said.

What type of buffing pads are you using? Different foam pads have different levels of "cut" regardless of the compound being used, so if your pad is too light it may not be doing you any favors as far as getting the 1500/2000 grit stuff out.
 
Went through the procedure again, but put a lot more effort into it. Worked a lot better this time. I need to get a 3000 grit I think before I use the buffer & polish, might get me were I want it.
 
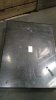
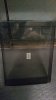
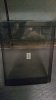
Believe it or not, I started at 8pm last night with this super scratched cover for my Marantz, and by 9:30 pm I was completed. I am going to try and make a pic step by step. Although this did have some deep scratches, some that I could not fully get rid of, the dust cover is 95% better. I did my pioneer cover the night before and I guess by last night I had my routine down.
 

Attachments

  • 20171022_182841.jpeg
    20171022_182841.jpeg
    32 KB · Views: 33
  • 20171022_213356.jpeg
    20171022_213356.jpeg
    32.9 KB · Views: 32
Start with 1200 grit waterproof paper and sand it wet. You can remove all but the worst scratches with this grit. 500 grit is just too course and the marks it leaves are too deep to be removed easily. Using 1200 or 1500 Makes it a lot quicker to polish out the rest. Make sure you keep the pad wet with polish and don't apply excessive pressure or let the cover get too hot or you will get spider cracks in the cover. They can't be removed. There are also 2 different materials that they make covers out of. One is softer and is easy to polish the other is harder and takes a lot more time.
 
Patience is the key--it takes time. Orbital buffers are better for not leaving "swirl" marks, but it it all about patience--it is not a 10 minute process. Let the buffer and the various levels of compound do the work and take your time.
 
20171021_182608.jpeg 20171021_215604.jpeg

This is from the night before my first attempt. Again, the pioneer had some serious deep scratches and of course they were not fully removed, what the previous owners did left some pretty gnarly marks in them. My first attempt at this took about 4 to 5 hours.
 
20171021_182326.jpeg

Another picture or the first cover. Before the polishing. You can see some of the super deep scratches.
 
Last edited:
I'm looking at the same issues with a Sony dust cover and a Technics dust cover. Both are Acrylic (according to the counter guy at Tap Plastics in Portland). He recommended two products from Novus - The Number 2 Fine Scratch Remover and Number 1 Plastic Clean & Shine. ( https://www.novuspolish.com/ ). I bought a bottle of each, $3-4 each, but haven't started work on the dust covers yet... I think I'll save that job for the coming winter months when it's to cold and rainy to go outside!

I'll try to make a post and reveal my successes!
 
Back
Top Bottom