• The move to the new server is done. There are some software and database maintenance updates in process. This has us passing the hat around to help out. We appreciate any donations. Seriously, even a dollar helps. The payment page may be found here - https://www.audiokarma.org/support.html

Faceplate Letters. How I did it.

cq.ab0nf

Active Member
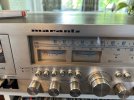
Couple years back I received a Marantz 4025 as a gift. It needed all kinds of repairs that were relatively easy to address, but one thing that I really didn't know how to fix was the partially scratched off logo on the faceplate. Drove me nuts! After doing a lot of researching, and going through lots of trial, lots of error, I got a good result today. If you or your spouse have a Cricut, this is relatively easy to do.

Here's what I did:
  • I created a clean graphic, with a clear background, of the logo. I did this by scanning the fragments off the receiver and filling in the blanks.
  • Then draw markings around the old logo to orient the new logo in the exact correct place.
  • Scrape off the old logo with a razor and window cleaner. This is now a no-name brand receiver!
  • Then use a Cricut to create a stencil, using "Smart Stencil". Basically you load the graphic into the app and it cuts out a stencil that can the be stuck to the faceplate of the receiver using transfer tape. Be sure to adjust the size to the original lettering. This one was 79mm.
  • Using blue painters masking tape, transfer the stencil to the receiver. Press hard to fully adhere the stencil, or it may come up when you remove the transfer tape (painters tape in this case).
  • This is important. After the transfer tape has been removed, the stencil needs to be completely adhered to the receiver. I failed at this a couple times, and paint bled outside the lines. What worked for me was covering the stencil material with a thin fabric and rubbing the back of it with a spoon handle. Without the fabric the stencil was was at risk of tearing or moving.
  • Now dab it with model paint.
  • Wait about 30 minutes and dab it again with the paint to ensure full coverage.
  • Let it dry for a few hours.
  • After it was dry to the touch take 1500 grit wet sandpaper, wrapped around a block eraser, and GENTLY moved it across the front of the stencil. I did this because in my other attempts, the paint had a tendency to come off with the stencil. Do this until the paint on the stencil is thin. Be careful to not overdo it and scratch the paint that is part of the lettering.
  • Finally, take a hairdryer, and on medium heat and medium air heat the stencil up to loosen the stencil glue and very slowly remove it while applying heat from the hairdryer. Most of the stencil should off. On mine, some fragments didn't, and there I used a razor and tweezers to remove the rest.
I think the results came out nice. Now who knows how well this will stick if you were to spray Windex on it, but I don't plan on doing that.

All that's left on this thing is to find a replacement metal cover for the Pause switch on the cassette portion. If anybody knows where I can get one, let me know.
 

Attachments

  • Marantz_LOGO_Clear Background.png
    Marantz_LOGO_Clear Background.png
    14.6 KB · Views: 114
  • Before.jpg
    Before.jpg
    118.2 KB · Views: 107
  • During.jpg
    During.jpg
    129.3 KB · Views: 113
  • After.jpg
    After.jpg
    112 KB · Views: 113
Register to hide this ad
I got someone to make some stickers (decals) for me on eBay, I've resprayed it and I'm just waiting for the new knobs. It's my first attempt so please ignore any mistakes! I finished this last night...
 

Attachments

  • IMG_20240628_091333.jpg
    IMG_20240628_091333.jpg
    40.3 KB · Views: 38
Couple years back I received a Marantz 4025 as a gift. It needed all kinds of repairs that were relatively easy to address, but one thing that I really didn't know how to fix was the partially scratched off logo on the faceplate. Drove me nuts! After doing a lot of researching, and going through lots of trial, lots of error, I got a good result today. If you or your spouse have a Cricut, this is relatively easy to do.

Here's what I did:
  • I created a clean graphic, with a clear background, of the logo. I did this by scanning the fragments off the receiver and filling in the blanks.
  • Then draw markings around the old logo to orient the new logo in the exact correct place.
  • Scrape off the old logo with a razor and window cleaner. This is now a no-name brand receiver!
  • Then use a Cricut to create a stencil, using "Smart Stencil". Basically you load the graphic into the app and it cuts out a stencil that can the be stuck to the faceplate of the receiver using transfer tape. Be sure to adjust the size to the original lettering. This one was 79mm.
  • Using blue painters masking tape, transfer the stencil to the receiver. Press hard to fully adhere the stencil, or it may come up when you remove the transfer tape (painters tape in this case).
  • This is important. After the transfer tape has been removed, the stencil needs to be completely adhered to the receiver. I failed at this a couple times, and paint bled outside the lines. What worked for me was covering the stencil material with a thin fabric and rubbing the back of it with a spoon handle. Without the fabric the stencil was was at risk of tearing or moving.
  • Now dab it with model paint.
  • Wait about 30 minutes and dab it again with the paint to ensure full coverage.
  • Let it dry for a few hours.
  • After it was dry to the touch take 1500 grit wet sandpaper, wrapped around a block eraser, and GENTLY moved it across the front of the stencil. I did this because in my other attempts, the paint had a tendency to come off with the stencil. Do this until the paint on the stencil is thin. Be careful to not overdo it and scratch the paint that is part of the lettering.
  • Finally, take a hairdryer, and on medium heat and medium air heat the stencil up to loosen the stencil glue and very slowly remove it while applying heat from the hairdryer. Most of the stencil should off. On mine, some fragments didn't, and there I used a razor and tweezers to remove the rest.
I think the results came out nice. Now who knows how well this will stick if you were to spray Windex on it, but I don't plan on doing that.

All that's left on this thing is to find a replacement metal cover for the Pause switch on the cassette portion. If anybody knows where I can get one, let me know.
That looks good, I wouldn't have the patience to do it myself though!
 
Back
Top Bottom