• The move to the new server is done. There are some software and database maintenance updates in process. This has us passing the hat around to help out. We appreciate any donations. Seriously, even a dollar helps. The payment page may be found here - https://www.audiokarma.org/support.html

Filter Caps

Richs_Trains

Well-Known Member
Ok, I know it is a dumb question, but that's why I am here, hopefully to learn. When I look at the values for filter caps from the suppliers, they offer several different terminations, i.e. 'snap in' , 'screw terminal', etc. What should I be ordering for the best connection? Thank you Rich
 
Register to hide this ad
It depends what you are replacing, and how much room you have... You should replace like-for-like wherever possible, unless there is a significant overriding reason why not. (like 'availability' which is becoming a common reason for altering the terminations. :( )

Absolutely not a dumb question.
 
The next question that will come up when you get a large snap in filter cap is "why are there 5 terminals?"!(or 3 or 4). If you look up the data sheet, you will find that the extras are for physical support. One is marked black (negative I think, but look up data sheet), and the positive is directly opposite - 180 degrees. The others are extraneous. If I was going to make a "things a noob will want to know" thread, I would put both of these pieces of information on it.:thumbsup:
 
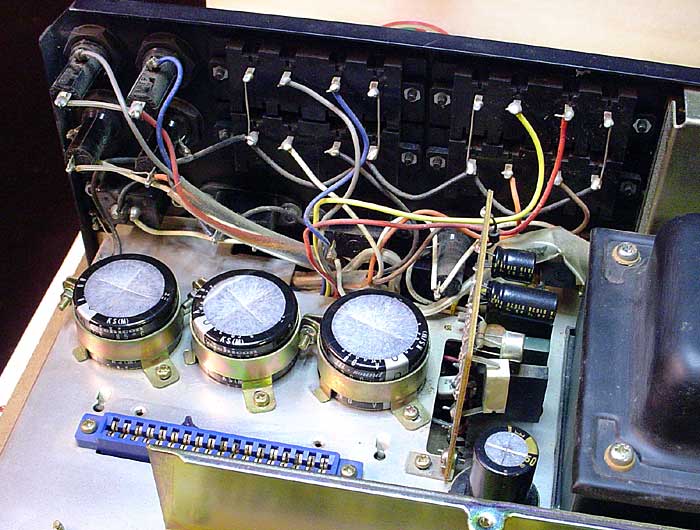
Screw terminal are the most expensive and probably the strongest device for mechanical reason at the terminals. They are frequently held in place with clamps.

The leaded terminal caps might not get large enough (high capacitance and voltage) to meet the needs, leaving the snap-in caps the choice for many mid-sized caps. Might not be the same as what came out but can usually be made to work.

Obviously, it is easiest to replace screw terminal with same especially if the lead spacing in the same, almost drop in but the hole in the wiring bracket might not be big enough for a larger screw (a short bolt, actually) sometimes used on newer caps. A simple drill out of that hole and with the same diameter cap the clamp will fit. Otherwise, folks use all manner of kludges to make the clamp tight on the cap, including using a smaller clamp since most caps are smaller today for the same specs.

On the snap-in, they many times replace a leaded cap and might fit just fine if the lead spacing is the same. If not, work is done to make the electrical connection and as Steven stated above to allow the dummy leads to be attached without any electrical connection, just mechanical. This is another way the recapper gets to use his abilities to get the cap in correctly and firmly mounted without compromising the electrical system.

 
One reason for the extra terminals is physical support. The other reason is that it makes installation dummy proof. If you put these caps in backwards you get a free fireworks show. :p
 
I cheat and snip off the blades from original caps, then pre-tin and solder those to the snap in terminals ... especially handy with more complex connections that would be a PITA to redo from scratch ...

power-cap-terminals.jpg
 
Another dumb question.... do they make a mount for the snap in style caps that can be added to the pc or frame?
If you look hard enough on the parts sites, you can usually find a replacement cap of the same width. Perfect fit for old clamp. If not, you can find a new bracket of the right width for the new cap or make a spacer from rubber, etc. I know Digikey has a 35mm clamp that is a drop in replacement for the 40mm caps in many Marantz.
 
I cheat and snip off the blades from original caps, then pre-tin and solder those to the snap in terminals ... especially handy with more complex connections that would be a PITA to redo from scratch ...

power-cap-terminals.jpg
Thinking outside the box! I may try this. :thumbsup:
 
Another trick you might like. Automotive windshield caulk - that black rope stuff - makes a nice gasket compound for fitting new smaller caps into an old bracket. Just roll it to approximately the right size and press it in place. Press hard around the clamp, and it cuts the excess off neatly. Bottom right corner for an example ...

f1360-power-left-bank-done.jpg


And ya ... you CAN usually find caps with the same diameter as the originals, but sometimes they just look plain weird. The main rail caps on this one were originally four times the height.
 
Back
Top Bottom