• The move to the new server is done. There are some software and database maintenance updates in process. This has us passing the hat around to help out. We appreciate any donations. Seriously, even a dollar helps. The payment page may be found here - https://www.audiokarma.org/support.html

finished Heathkit W4's

whatadish

Member
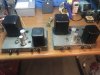
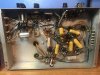
First a shout out to Dave G. for the stability mods...these actually sound very nice. I do have the WA-P2's but did not wire the octal sockets on the amps. Already enough strain on the power trannys' with 122vac at the wall. The one thing I love about these is the amount of room there is underneath. So these were pretty butchered when I got them...it was almost impossible to follow the rats nest of extra tag strips, splices, and mountains of solder globs. It was easier to strip all components and start over with new components. I did ground the heater center tap which is another reason I run the preamps on their own power supplies. The chassis both cleaned up very nicely with some maguires auto supplies. Couple of resistor changes to dial in B+, what was really cool is the pto octal for the preamps was the perfect size for the 3 conductor iec sockets. The aux ac outlet was removed in favor of a stackpole slider. Led pilot lamps, a couple bakelite knobs and rotatary scales for the bias balance. 25 watts before any noticeable clipping.
001(1).HEIC
001(36).HEIC
001(33).HEIC
001(32).HEIC
001(17).HEIC
001(14).HEIC
001(10).HEIC
001(3).HEIC
001(30).HEIC
001(20).HEIC
001(15).HEIC
001(28).HEIC
 
Register to hide this ad
Very nice! That's pretty much a model restoration, IMO. I imagine they sound lovely!
indeed they do....notice i did one heater supply string up away from the chassis and the other one against the chassis. Absolutely no difference. These are dead quiet. I am using a HifiMan EF2A headphone tube amp to drive them right now while I finish the WA-P2's. Klipsch Chorus II's on the output end. As most people know they are extremely efficient speakers and there is zero hum, zero hiss. Kept reading about using carbon comps instead of metal films and in the end after benchmarking both units with my scope...once again, no noticeable difference in noise or to my ears so I went with new. I have 10's of thousands of nos carbon comp resistors and do use them for guitar amp restorations and if requested by the owners. I love the look of these units. They are quite heavy and having tubes so close to the power tranny does make them hot. I did have to re-pot one of the power transformers....that is one of the smelliest, and messiest jobs in the world. I use moisture activated boat deck epoxy in a food saver vacuum container. Works like a charm...I have done several tranny's that way.
 
The chassis are both original...i used maguires swirl remover and carnauba wax to clean them. An interesting contrast to the gold preamps.
 
@whatadish, I have a pair A9’s look somewhat presentable. Most all of the wiring including twisted heater pairs looks like regular lamp zip cord. Same stuff was used elsewhere in runs. This brown stranded junk has cracked open throughout the years. I didn’t invest much in them luckily.
Found and original assembly manual that arrived last week. I know I really need to just completely gut these and start from scratch.
You have done a beautiful job on your restoration.
I only hope mine can come out in the end just working! I’m certainly not expecting them to look anywhere near as good as yours.
 
Beautiful job! Makes me want to strip and rebuild mine, but they're working fine the way they are. I like the mod on the bias adjustment.
 
@whatadish, I have a pair A9’s look somewhat presentable. Most all of the wiring including twisted heater pairs looks like regular lamp zip cord. Same stuff was used elsewhere in runs. This brown stranded junk has cracked open throughout the years. I didn’t invest much in them luckily.
Found and original assembly manual that arrived last week. I know I really need to just completely gut these and start from scratch.
You have done a beautiful job on your restoration.
I only hope mine can come out in the end just working! I’m certainly not expecting them to look anywhere near as good as yours.
thank you for the kind words....I have close to 6 hours a piece into these...not a lot of money in parts as I had 95% of the components I needed. They were a disaster when I got them...lots of #18 zip cord and silicone adhesive to clean up. Just make sure your transformers are within spec so you don't go chasing your tail when your done.
 
001(49).HEIC
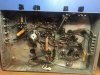
here are some before shots...interestingly enough the gentleman I bought them form said they just didn't sound good...Ya think? Look at that horrible sine wave. One of the power tranny's had been cooking as you can see from the potting, but still well within load specs. That one got repotted anyway. Just a terrible attempt at a "recap"?.
001(43).HEIC
001(42).HEIC
001(40).HEIC
001(48).HEIC
001(48).HEIC
001(46).HEIC
001(51).HEIC
001(50).HEIC
 
thank you for the kind words....I have close to 6 hours a piece into these...not a lot of money in parts as I had 95% of the components I needed. They were a disaster when I got them...lots of #18 zip cord and silicone adhesive to clean up. Just make sure your transformers are within spec so you don't go chasing your tail when your done.
I brought along one my Fluke 77 before money exchanged hands. Seller had all the tubes pulled and put away in boxes. I plugged them in long enough to check AC voltages both amps. Unloaded, the power transformers good. Next resistance checks on the outputs looked ok as far as I could tell.
I ran a small sine wave through them after I got them home. No scope traces, just the cheap test speakers I use near the bench. So at least they’re not open or shorted. As expected the Heathkit IT-28 confirms the main filters are no good. Imagine that. I keep pencil type caps around for restuffing anyways.
This is what I will be dealing with on my weekends.
Only in my dreams could I finish one of these in 6 hrs!image.jpgimage.jpgimage.jpgimage.jpgimage.jpg image.jpgimage.jpgimage.jpg
 
Dang, oops.... here I go double post on pictures. Taking up AK servers space. Sorry about that.
 
001(49).HEIC
here are some before shots...interestingly enough the gentleman I bought them form said they just didn't sound good...Ya think? Look at that horrible sine wave. One of the power tranny's had been cooking as you can see from the potting, but still well within load specs. That one got repotted anyway. Just a terrible attempt at a "recap"?.
001(43).HEIC
001(42).HEIC
001(40).HEIC
001(48).HEIC
001(48).HEIC
001(46).HEIC
001(51).HEIC
001(50).HEIC
001(53).HEIC
 
Dang, oops.... here I go double post on pictures. Taking up AK servers space. Sorry about that.
looks like you're of to a decent start with good iron....if you use a heat gun with a small nozzle you can really soften up the wiring which makes it much easier to unsolder without cracking it all. See if the potting of the power transformers is cracked. If they are deep cracks I usually repot them; but that is not a fun or easy job. I have had good success injecting JB weld into the cracks and then sealing the bottom with the same. I have an old roaster oven that i heat them up enough to reflow the pitch and remove all the moisture from them. I am a better detail person than tube techie. There are tons of people on this forum that can figure feedback circuit math and the like in their heads and on the fly. I am just an above average tech who enjoys restoring just about anything.
 
Back
Top Bottom