• The move to the new server is done. There are some software and database maintenance updates in process. This has us passing the hat around to help out. We appreciate any donations. Seriously, even a dollar helps. The payment page may be found here - https://www.audiokarma.org/support.html

First time veneering Heresy 1.5s

fernarias

Super Member
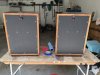
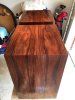
I took my time and this is the result (in an apartment with a balcony). I now think anyone can do it and it would be much easier in a garage/workspace. The cabinets, which were birch raw, were trashed and most of the corners smashed in. Using epoxy paste and lots of sanding, I made them square again. I used birch veneer which were lacquered since I've been fascinated by a pair of raw lacquered birch la scala's that I saw once (on the net of course) and crites sold me the fake cane cloth. I used the iron on method for the veneer and if it didn't stick (mostly the epoxy areas) I was able to add more glue and iron it for a longer time. It's hard to tell from the pictures but the veneer runs from the bottom and then all the way around. If you find some cheap, birch raw heresy (or others) that look pretty tattered, buy them and veneer them (I had another set and they were fixed and then painted black). Good luck if you go my route. Materials were a little more than 100 dollars.
 

Attachments

  • 20180710_134134[1].jpg
    20180710_134134[1].jpg
    86.6 KB · Views: 102
  • 20180710_134232[1].jpg
    20180710_134232[1].jpg
    84.9 KB · Views: 94
  • 20180710_134250[1].jpg
    20180710_134250[1].jpg
    108.2 KB · Views: 91
  • 20180710_134302[1].jpg
    20180710_134302[1].jpg
    67 KB · Views: 101
Register to hide this ad
Nice job.

As it happens, I'm just in the middle of a re-veneering job as well, on the wooden case of an A&R Cambridge A60 Amp. - just about finished the veneering, but still need to sand it all, then apply some kind of finish (still experimenting with a couple of finishes).

I used a similar approach to repair the main wooden structure of the amp case (lots of glue, sanding, wood filler, etc. to rebuild the loose panel & damaged areas), then paper-backed veneer, with Titebond Cold Press Veneer glue. Rather than the rather 'drab' 80's style veneer it had before, I opted for a more 'interesting' Rosewood.... that gave me a few head-scratching moments trying to sort the grain pattern around the corners, but I got lucky, and I think it worked quite well.

Thanks also @steveUK, for veneering advice he provided via another forum.

Before:

A60 (2).jpg A60 (6).jpg

After:

DSC08663.JPG DSC08664.JPG DSC08665.JPG
 
Fernarias,

Great job on the H's. Birch looks great.

I just finished a redo with Rosewood on a set of H1's. Going to sell them but can't list them here for sale I understand.

Did you use the Heatlock veneer glue from Joe Woodworker? I've had good luck with it. Had some bubbling when I used Titebond II.
 

Attachments

  • IMG_4399.JPG
    IMG_4399.JPG
    78.2 KB · Views: 42
  • IMG_4408.JPG
    IMG_4408.JPG
    51.8 KB · Views: 46
Fernarias,

Great job on the H's. Birch looks great.

I just finished a redo with Rosewood on a set of H1's. Going to sell them but can't list them here for sale I understand.

Did you use the Heatlock veneer glue from Joe Woodworker? I've had good luck with it. Had some bubbling when I used Titebond II.
I used titebond III (should have used II since it's a light color). No bubbling whatsoever. Went on easy and like I could reposition the veneer so that the grain matches all the way around. Used birch as it was also cheap (as this was a first time, backs were veneered also). The lacquer (it stinks) was a pain but it sanded nice. I'll use better veneer for the next time (turntables and receivers need refinishing).
 
Back
Top Bottom