• The move to the new server is done. There are some software and database maintenance updates in process. This has us passing the hat around to help out. We appreciate any donations. Seriously, even a dollar helps. The payment page may be found here - https://www.audiokarma.org/support.html

Fisher 400 Find, Upgrade, ??? All Welcome

TubeJunkie

Master of None
Hey guys, I bought a working Fisher 400 Receiver last night. Well, I know the tuner works..... I've not had time to thoroughly check it out yet, but it will be restored soon. I restored a Fisher 800-B a while back, so I think I'll be following the same "things to replace" list, As far as caps, rectifier, bias & power supply, and safety resistors on output tubes. Does anyone have a Fisher 400 upgrade list, from an upgrade kit? What are your thoughts on buying an upgrade kit from Ebay? Any thoughts / advise here are welcome and appreciated too. Thanks for your time.
 
Register to hide this ad
If you drop by the Fisher forum, you'll find loads of info on 400 restores. The metalbone kit from Ebay is a good one, it will make your 400 safe and reliable for daily operation.
 
Moved to the Fisher Forum.

Do a search, you'll find enough reading on restorations to keep you very busy!

And have fun!
 
Fisher 400 Restore/Uprade Parts List ?

Hey guys,
Looking for an Upgrade / Parts List for my Fisher 400. One of the later serial number models. Any and all help will be greatly appreciated. Thanks
 
Hey guys,
Looking for an Upgrade / Parts List for my Fisher 400. One of the later serial number models. Any and all help will be greatly appreciated. Thanks

Send Jim McShane a note. I'm sure he's got what a list of suggested parts replacement/upgrades.
 
Hey guys,
Looking for an Upgrade / Parts List for my Fisher 400. One of the later serial number models. Any and all help will be greatly appreciated. Thanks

It was so long time ago so I don't have anymore, sorry.

But I'm saved BOM/parts list for Pioneer SM-83 restoration, its in my blog Pioneer section.
 
I'm the proud owner of LinuxGuru's 400. Still going strong after 3+ years! I've added an individual bias board and grid stoppers plus a couple of minor mods but it sounds as lovely as the day I got it.

Many thanks, Andrei :thmbsp:

Wow! Glad to hear everything is OK!
Which vacuum tube projects you had later?
 
Wow! Glad to hear everything is OK!
Which vacuum tube projects you had later?

Your Fisher 400 started me in this crazy pass time. I've restored two Fisher 400s and done mods to yours... a bunch of tube radios and other amps/receivers.

I see some of your posts on DIYaudio - good to see you posting over here too.


TubeJunkie, what's your plan of attack?
 
Hey Bruce, Thanks for looking at my pics. On this 400, I've ordered all the parts to replace caps and some crucial resistors. I'll stick close to the McShane parts list on what I replace. As for multi-section can caps, I;ve already replaced the 1000/1000uf under chassis (had those on hand). I'll have to wait till next month for the remaining ones on top. But they will be replaced before much use. Oh, Thanks Again for your help. Are you really located in the UK?

And to LinuxGuru: Thank You also. I've restored (2) Fisher 100AZ mono-blocks, Fisher 800-B (still needs can caps), Dynaco PAS-3, Heathkit W5M mono amp, Heathkit WAP2 preamp, (With the help from my favorite AK member: dcgillespie) He's incredible....... and around (5) vintage tube guitar amps, made by Silvertone, Gibson, Vox, Harmony, and ???? Cant remember. I should be a pro by now, but each project is so far apart sometimes, that I can't retain every bit of info. But, I do what I can. I love working on this stuff so much, I've about given up my music playing & recording career..lol So, I know what ya mean. I've been bitten by the tube bug myself...... Talk to ya guys soon.
 

Attachments

  • DSC04228.jpg
    DSC04228.jpg
    70.1 KB · Views: 24
Last edited:
TubeJunkie. If you want to replace the CAN's outright, contact TOM @ Hayseed Hamfest.com. They manufacture custom Can caps to your basic specification, while upgrading them. In other words the 50UF-250V/50UF-250V/200uf-350V will probably end up as a 47/47/220UF with voltages of 300/300/400V and have a temp rating of 105*C (221*F) vs the old temp rating of 65*C(149*F). Makes for a robust can cap. His prices are a little less than those JJ's or FP's @ AES. And they FIT!!! Physical dimensions will be less than 1/4" variance in height. Diameter is dead on. And no modifications are needed. He consistantly raises the voltages to the next higher 50 on all cans due to higher line voltages and associated higher B+ with the line voltage. Where else can you get that except to do it yourself. He does the 3 clip-1" diam, 4 clip 1-3/8" diam, and custom sized Clamp on's. Just tell him what you have and what you need. he's been doing this for Ham operators for a long time and audio for the last few years. He's building up as demand increases.

Or you can stuff the originals, provided you can find pencil caps in the values you need. (Granted if it's a single sectioin use what ever will fit inside.)

With my FISHER's I'm lazy. My 400(now sold), my 800C both have Hayseed can's as does the Sansui 1000A I sold to Bugle Girl. All of my FISHER consoles have them also. It's about as plug and play as you can get. He supplies the Phenolic or Fiber isolation Shim/gasket as needed. Tom has a growing database of FISHER amp/receiver/tuner/Preamp can requirements, and can go from that most times. But being safe give him all the info on the can, the model unit, serial number, and the can # (C57, etc.). His turn around time is usually 2-3 weeks although I've received cans from him in as little as 5 days. They manufacture strictly by order and have very little stock sitting on shelves (keeps you from getting a stale product.)

I think my total for 3 can caps for my 400 from him almost 2 years ago was about $90. Thats with shipping.

Quality is very good to excellent. ID Stickers are legible in a 12-16 point font. The can shells are polished to a high lustre, with the tops having a machined look.

And the best thing is he communicates with his customers, if there is a hangup on the line he notifies those customers whose caps are being produced. He tells you what happened and whats being done to rectify the problem. He doesn't have to, but I'll bet at least 60% of his customers come back to him for that reason alone.

The can's are beautiful, work well, stay cool, and blend right in to the look of the FISHER without being gaudy or flashy. And it looks like they've been there the whole time until you look at the label.

Time to turn of the gushy praise.

Larry
 
Thanks Larry, for the info on Hayseed. Sounds like thats the best replacement out there for the multi-section caps. Money is tight, so I'm not sure which way I'll go, as of right now. But trust me, If I can afford it, I'll use those Hayseed caps. I actually got excited just hearing about em' No, seriously. ha ha

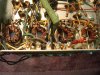
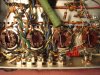
bhamham: Asked me to take some pics as I go, so here are some of installing the 10 ohm 1/4 watt "safety resistors" on each 7868 output tube. Let me know if I missed something. I removed the yellow wires & bare wires, from pins 3 to ground, and added said resistor. Before & After. Maybe this will help the next rookie on their journey? Thanks Guys, You all kick asssssssssss.
 

Attachments

  • DSC04257.jpg
    DSC04257.jpg
    97.7 KB · Views: 88
  • DSC04259.jpg
    DSC04259.jpg
    115.2 KB · Views: 82
Tube -- Very nice work!

If I may however, on your left most output tube, it appears that the 220 ohm heater balancing resistor located on that tube is still being returned to pin #3, since that pin used to represent ground. With that pin now lifted from ground by your new 10 ohm cathode sensing resistor, continuing to "ground" the 220 ohm heater balancing resistor there causes that 10 ohm resistor to be in error by about 2.5% -- not a lot, but then what's the use of getting precision resistors if the circuit is only going to make them be in error?

To correct, disconnect the 220 ohm resistor from pin #3 on that tube, and connect it directly to ground.

Good luck with your 400!

Dave
 
Dave,
Thanks for spotting my snafu. I'll fix that tomorrow and let ya know how it goes. If my memory serves me, I dont think that I moved that resistor, thats the way it was originally. Correct if I wrong. I may have some earlier pics. I'll try to look at them and see if I'm wrong. Then, On to the next step. My parts order should be here tomorrow. Much apprciated my friend.

So far, I owe you at least a half dozen steak dinners......ha ha ha. Thanks Again

I owe Dave a steak dinner and a few pints too, I think we all do.

You're right, that's the way that resistor was originally but since you've put the 10-ohm resistor on pin 3 it's block its path to ground - needs its own path to ground.

Think about stuffing your own cans. It's pretty easy and adds another dimension to self-satisfaction, not to take business away from Tom at Hayseed.
 
...If my memory serves me, I dont think that I moved that resistor, thats the way it was originally. Correct if I wrong. I may have some earlier pics. I'll try to look at them and see if I'm wrong. Then, On to the next step. My parts order should be here tomorrow. Much apprciated my friend.

So far, I owe you at least a half dozen steak dinners......ha ha ha. Thanks Again

You are correct, you didn't move it, but what Dave is saying is that you have to move it, and here's why...

Those #3 pins were originally connected straight to ground. That 220 ohm resistor was connected to that pin, so the 220 ohm resistor was originally connected to ground. However, you removed the ground connections and substituted 10 ohm resistors. Now, that 220 ohm resistor is connected to ground through a 10 ohm resistor, so it's now showing 230 ohms to ground. So, you need to disconnect it from the "top" of the 10 ohm resistor and connect it directly to ground.
 
Fisher 400 - Safety Resistors - Revised

Thanks guys, for explaining that issue clearly & presise. Make sense now. I plan on tearing back into it after the weekend. My honey-do list is pretty lengthy right now. "___________________" (((( Insert a few choice words.) And I just got my parts order in today.

Dave saved my tail, on my Fisher 100AZ rebuilds. Incredible indivual... I can say, All of you folks have been real helpful & generous with your hard earned knowledge. I only hope that someday, I can have that plethora of vast wisdom.

Bhamham: As for the multi-section cans, Hayseed seems the perfect way to go, but for my budget, I may have to stuff em'. I've done one before, a lot of work getting the old crap out. But, worked out OK. Any suggestions to make things smoother on that subject? Talk soon.
TubeJunkie
 
Last edited:
Back
Top Bottom