• The move to the new server is done. There are some software and database maintenance updates in process. This has us passing the hat around to help out. We appreciate any donations. Seriously, even a dollar helps. The payment page may be found here - https://www.audiokarma.org/support.html

fisher X100-3/-A IBAM install ???

ferninando

Lunatic Member
the fisher X100-3/-A has no bias adjust capability.
I would like to attempt to install an IBAM. I have previously installed one in my fisher X100B but had the help of an AK friend and dcgillespie here on AK but it was adjustable to start with.
Figureing out how and where to cut and what to change to make in the existing bias circuit has got me stumped. Maybe it's not feasable so I need to know that as well. And R value changes??
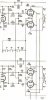
I attached the bias circuit schematic for those of you adventureous souls
who mite want to tackle this.
Thanks much to anyone willing to lend a hand

PS: the full schematic can be seen in the AK fisher manual database(fisher X100-3)
 

Attachments

  • X100-3 bias.jpg
    X100-3 bias.jpg
    16.1 KB · Views: 128
Last edited:
Register to hide this ad
Ditch the heater string. It will simplify your IBAM. If I were looking to do this, I would put in a separate transformer with a rectifier to create 6VDC.
 
Ferninando -- The task wouldn't be all that hard, requiring you to change the value of one resistor, add in six new resistors, four new caps, and four adjustment pots. The pots and new resistor/caps could all be built onto a little perf board for an easy installation.

The overall output stage current draw cannot be reduced with this approach, as then there will not be enough current draw to properly light the heaters in the those tubes included in the heater string. However, it will allow you to make sure that the output tubes are all sharing that load equally, which will make for a very nice improvement.

If you want to pursue, I can help you through the process.

Dave
 
Dave, the offer of your assistance is always well come by me.
I have built an IBAM for my X100B so thats not a prob.
the Rchange and where to cut and fit is the kind of info I need.
I can see where each new pot will tie in, at the 1k grid Rs after removing the 330KRs.
I have all the needed trim pots so no prob there. and other parts.
I leave you to do your wizerdry..
Thank you very much.
 
Last edited:
Ferninando --

1. Disconnect pin 3 of each output tube socket from the junction of R65, R66, and C3B. These three component need to remain connected together (for now) and the point where they connect together becomes known as the "cathode buss".

2. Connect a precision 10 ohm .25W resistor between the cathode buss, and pin 3 of each output tube socket.

3. Connect a "common" Test Point to the cathode buss, as this test point is where the negative lead of your meter will connect when setting the bias on each output tube. You WILL NOT connect your meter negative lead to ground when checking the current draw of each tube.

4. Connect a Test Point to pin 3 of each output tube socket. Your positive meter lead connects to these Test Points when setting the bias on each output tube.

5. Remove R66 and replace it with a 2.7K 2W resistor.

6. Remove and short out R65.

7. Install four 5K bias pots, and wire all the "left" outside terminals together, and wire all the "right" outside terminals together.

8. From the four control terminals that you want to represent the low current draw end of these controls, connect a 10K .5W resistor to ground.

9. From the four control terminals that you want to represent the high current draw end of these controls, connect a 5.6K .5W resistor to the cathode buss point.

10. From each wiper of each control, connect a 22 uf, 35 volt cap to ground, with the negative end of these caps grounded.

11. Disconnect each 330K grid return resistors from the connection where these resistors all connect together at. Connect the free end of each resistor to one adjustment control wiper connection, based on which control you want to adjust for which tube.

12. Use each control to adjust the bias on each respective tube, with your meter negative lead connected to the new Common Test Point, and the positive lead to the respective Test Point for the tube you are adjusting.

13. Adjust the controls so as to achieve +33.0 volts from the Common test point to ground when the tubes are all balanced.

This process will be somewhat time consuming in trying to achieve a balance between all four tubes, while also targeting 33.0 volts between the Common test point, and ground.

The time involved can be greatly minimized by the addition of a fifth control that would act as an over all bias control. Then you could use the four individual controls to achieve a balance between all four tubes, and the fifth control to dial in the 33.0 volt reading at the Common test point once all the tubes have been balanced. If you want to pursue that option, let me know.

Good luck with your project!

Dave
 
thanks for that Dave. I will draw up a schematic of the instructions. I plan to put the bd. for above chassis with 4 TPs to make for easy adjustment. Along the lines of one I think you did awhile ago. I have yet to convert my X100B from under chassis to top of chassis IBAM.
 
Last edited:
where/how would that 5th pot attach?

I may have more questions as I progress, but so far it's pretty clear what needs to be done.
 
I haven't run any numbers yet, but the 5th pot -- likely a 5K value as well -- along with likely two more fixed value resistors (TBD) would replace the 10K resistor of the modification I explained previously, and may even require an adjustment of the 5.6K resistor as well. If you like, I can run those numbers later on today.

Dave
 
no rush on 5th pot. now in parts ordering stage.

when completed will try to post a schematic and pics of finished perf board stuffed and wired.
I plan to install topside of chassis for ease af access to adjustments.
 
Fisher X100-3 IBAM schematic per dcgillespie's instructions
for critque or corrections.
Hope I drew it right.
 

Attachments

  • fisher X100-3 IBAM 002.jpg
    fisher X100-3 IBAM 002.jpg
    44.5 KB · Views: 177
Ferninando -- It looks perfect. The only things you might add are polarity markings for the new caps, and that the cathode buss should operate at +33 vdc above ground.

Let us know how it turns out!

Dave
 
OK Dave. this was a afternoon exersize done quick as possible.
My amp bias voltage measures 28 volts as opposed to the 30 volts in the schem. so would the TP measured value be 31 volts?
Also, the removal of the R65 from the heater string doesn't affect anything?
I'll see what the measurements look like after installation.
At least I drew the schematic right. Building will be a snap when parts cme in.

If sometime you feel like running the #s on the 5th pot job. I would like to see it.
At your liesure.
 
Last edited:
Ferninando -- The biasing method used in the X-100-3/A produces a significant compromise against two opposing needs. It can be summarized as follows:

1. From a biasing only standpoint, each output tube in your amplifier should operate with a quiescent cathode current of 32 ma. This level of current flow will keep output stage distortion at bay, and based on schematic B+ information, will cause each tube to dissipate just shy of 11 watts at the plate.

2. However, the 12AX7 heater string needs at least 33 volts across it (11 volts per tube) to not only produce normal operation in the line and phono preamp stages, but also to let the unit warmup up in at least this millennium. The tubes will operate with as low as 10 volts heater, but this is based on an individual tube basis, with warmup time being quite significant. The problem is however, that when you connect a number of identical tubes in series, the heater characteristics of each tube are rarely identical -- and particularly so at a reduced operating voltage. And, the heater characteristics can vary from one tube manufacturer to another. As a result, at 30 string volts, one tube may in fact get 10 volts, but another 10.5, while another only 9.5. This will significantly compromise performance in the tube with the starved heater, and almost never let that tube fully warm up. By operating the string at at least 33 volts, there is enough current flow to ensure that ALL the tubes will operate properly even though the heaters are powered from a reduced voltage string arrangement. Fisher was able to push this concept to the edge, by using tubes of identical manufacture, and pushing a reasonable warmup time right to the edge of that definition. With the changing times as they were (coming into SS), Fisher likely considered that the tubes would outlast a reasonable period of use, and so any consideration for tube changes down the road that ended up with different manufacturer's tubes being used in the heater string received little concern.

3. As for R65, well it was an insurance policy. With no possible means of adjusting the bias, it helped to cover any sins of high heater current draw in V3, that would result in a low grid bias condition for the output stage, and the resulting high current draw/high dissipation that would produce. With the individual tube adjustment capability now being added, the need for R65 is moot.

You can see then that there is a gap between good output stage performance/small signal tube warmup time, and good output tube life. Frankly, this bias system worked better with the 7591 based amplifiers, because they naturally operate with a tad more quiescent current, which eliminates the overly long warmup time, without over dissipating the output tubes under quiescent conditions.

In your amplifier, there is a slight gap between what's good for the output stage tube life, versus what's good for output stage and small signal tube performance. The 33 volt cathode buss voltage I stipulated assures reasonable warmup time and good performance from the small signal tubes and the output stage, but causes each output tube to dissipate just under 12 watts at the plate. This is a dissipation level that the Russian tubes should be readily able to deal with, remembering that the more modern Design Maximum plate dissipation rating for the 6BQ5 family of tubes is actually 14.4 watts. I would suggest that you at least try this level of output stage quiescent current draw, and judge the overall performance it provides for yourself. You can always adjust down accordingly if you want.

In view of all the preceding, you might ask then what is the purpose of R66? All it would seem to do is to add even more current draw through an already nearly maxed out output stage, from a quiescent condition standpoint. Well, again, the heater characteristics of a vacuum tube are anything but linear with respect to voltage and current. As the amplifier is asked to produce more and more power output, current draw through the heater string bias system will cause the bias voltage to increase at a very nonlinear rate, which can endanger the heaters of the small signal tubes, and increase distortion significantly in the output stage. Therefore, to help keep a lid on this unacceptable behavior, R66 is used as a shunt to help contain the worst of the extreme voltage changes that can occur with such a bias system.

I address all of this even further in the thread I did on the Fisher X-101C. That amplifier uses the same bias system approach, although it does include a single bias adjustment pot to adjust the quiescent bias current of all four tubes at once. In any event, the original bias system was removed in favor of installing a separate DC heater supply, and EFB(tm) to bias the output stage. The changes that move made to the overall performance of that amplifier were quite significant.

I hope this helps!

Dave

 
Thats quite a mouthful and will take awhile to digest.
Bottom line question I have then is will this bias network
be neutral in how it affects the amp?. In otherwords
nothing will be adversly effected if I install it, based on all the gotchas you speak of? .
Also, how much bias current are we looking at per tube thru that 10 ohm R?
Thanks for your help so far.
 
No adverse affects at all. You can try for 32 ma -- just be ready to take a nap while it warms up, but I suspect you've already gotten into that habit!

Dave
 
My TA-600 is the same way. The phono tubes are part of the bias string and take a couple of minutes to fully heat up, but the unit is running on tuner within a minute. With you running the heaters @ 11V they should be nice and warmed up within 3 minutes at most and conducting within a minute and 1/2-2 minutes.

Later on you could modify it like Dave suggested and get the bias right, and have the tubes heated by a separate source.
 
Back
Top Bottom