• The move to the new server is done. There are some software and database maintenance updates in process. This has us passing the hat around to help out. We appreciate any donations. Seriously, even a dollar helps. The payment page may be found here - https://www.audiokarma.org/support.html

found my first tube gear....now where to go?

riveraXVX

Active Member
greetings everyone! been a while since I've posted on the forums - wife and I just bought our first home together back in December and been busy getting settled in.... I am a complete amateur when it comes to tube audio gear. (I just barely know my way around solid state as it is)

I'm component enough to open things up, clean them, lubricate the things that need/should be, follow instructions, solder (though I really should practice...a lot) - and more or less... we bought this knowing it had a potential pitfall (burn marks on case) but given this thing seems like a micro oven in design - I can't imagine eve with normal use the case wouldn't get charred a bit by stock design.

this afternoon ended up picking up a Heathkit AA-100 and matching AJ-41 tuner. there were obvious burn marks on the case of the AA-100 - but seemed to be completely/untouched for many years. decided to grab them once they were half off (estate sale purchase) - and brought them home!

I know not to just power them up and should replace caps/resistors/etc (will be following directives on Gordons thread on the AA-100s with guidance from a friend) or getting someone else to do the work. just wanted to ask some general opinions- with the burn marks on the case - should I have just let this sit? I'm not into both of them TOO much and with all the original tubes and all but the feet being in tact - at least I wouldn't totally eat the cost... just wondering. what would you do?

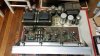
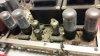
inside looking around the boards and at the base of the tubes - nothing looks "off" to me, nothing burned or charred down there. nothing cracked - still need to clean it up to get a better look but initial inspection the only noticeable areas of problem visually are the marks on the case.

I sent GordonW a message this afternoon being as his thread and modifications to help correct some of the design issues seems to be a good person to bug about such things ;) for advice also but figured I'd post up here also!

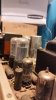
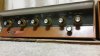
attached are some photos after minorly cleaning up the outside of the case. I'd love to get both these ready to go and give them some enjoyment.
 

Attachments

  • aa-100-outside.jpg
    aa-100-outside.jpg
    61.3 KB · Views: 106
  • AJ-41-outside.jpg
    AJ-41-outside.jpg
    67.6 KB · Views: 104
  • aa-100.jpg
    aa-100.jpg
    35.3 KB · Views: 105
  • aa-100-3.jpg
    aa-100-3.jpg
    72 KB · Views: 110
  • aa-1002.jpg
    aa-1002.jpg
    56.4 KB · Views: 107
Register to hide this ad
Wow, they look great. I don't see any burn marks and I wouldn't be too concerned about them. Tubes get hot and dust or older paint can char on it over time. Get at first all dust out of them and than follow the thread. Should be easy to get the boards out for rework, just be careful to not screwup the solder pads but they can be fixed if one goes down.
Have fun with this pair.
 
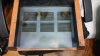
those photos just don't show them haha ;) I can see why i that case it could be an issue though - at some point at the rear towards the 7591s and over by the GZ-34/5AR4 tube

hopefully a good sign that the only signs of any of the damage I've found so far in a quick lookover are on that part of the case not anywhere on the chassis/boards
 

Attachments

  • aa-100-4.jpg
    aa-100-4.jpg
    50 KB · Views: 50
Ah, you meant the inside of the case. Somehow insides are always treated badly by manufacturer and it looks like burned dust. No big deal I would say. Tubes get hot and the constant hot air flow can affect that. How is the bottom of the case made? Are there any holes in it to enable air flow from bottom through the luvers at the top? If not might be a thing to think about if. Helps not only the tubes but also all other parts in the casing like caps and resistors. Can imagine it gets pretty hot inside this thing.
As long as the top case isn't rusting I would just clean it off.
 
yeah, looks like common heat spots. You'll find that over the hot running tubes in most tube gear. I'll wager it lines up with the 4 output tubes and the rectifier tube.

The standard stuff on these involves replacing capacitors. Specifically you'd be looking at the cans on top and the ones soldered to the boards. There may be some underneath too. And cleaning, though hopefully mostly that can be sorted with a paint brush to evict the dust. Not sure if there are specific problem areas on this model or not, but be careful on those circuit boards. Early ones are not the most robust things on the planet, and they get crappy with heat. The traces are prone to lifting when you change parts, and with excessively rough handling they can just crack.
 
yeah, looks like common heat spots. You'll find that over the hot running tubes in most tube gear. I'll wager it lines up with the 4 output tubes and the rectifier tube.

The standard stuff on these involves replacing capacitors. Specifically you'd be looking at the cans on top and the ones soldered to the boards. There may be some underneath too. And cleaning, though hopefully mostly that can be sorted with a paint brush to evict the dust. Not sure if there are specific problem areas on this model or not, but be careful on those circuit boards. Early ones are not the most robust things on the planet, and they get crappy with heat. The traces are prone to lifting when you change parts, and with excessively rough handling they can just crack.

appreciate it! yep the hot spots are directly on those areas, right over the 7591s and then on the right side above the rectifier tube.

it wasn't till we were home with them that I started worrying about the heat spots on the case - since I couldn't pop it open and inspect inside at the time. it is no wonder these things run hot too, the case has very little clearance on the internal components - coupled with the vinyl clad cage - I imagine that thing gets REAL hot inside. weather is nice here the next few days planning on taking it outside and begin cleaning it up on the porch to get a better look at everything! tentative plan:

A) clean chassis, and boards to best of ability (soft paint brush, vacuum and compressed air
2) clean/lubricate pots
3) replace caps/etc per recommendations on Gordans thread
4) build my first dim bulb tester
5) see what happens!
6) laugh or cry

as for the case, there is rust on the top on a few of the fins on two of the four vent spots as of right now they are about 1" long and on just 1 or 2 fins. makes it a real eyesore in those spots - the rest of the vinyl looks to be in pretty good shape just needed a good scrubbing
 
Notwithstanding the effort that you are going to have to put into the cleaning,I think you did really well scoring these. From what your photo's show,that AA-100 seems to be untouched.Believe me,getting an unmolested piece of equipment is almost unheard of these days,and often (always?) makes for a much easier repair or restoration.
Those 7591's and 7199's look like they could be original to the unit,and if they're still good,that's a big bonus! Nothing beats old stock tubes.

As Gadget has mentioned,the circuit boards in these are not of the most ''robust'' variety,and will require a very light touch. The power tube board in mine looks like it was soldered with a flamethrower.....I really don't think it's salvageable at this point.I'll either have to make a new one or just go point to point.

Gordon has really gone to town on this model,and his thread is a great resource. You'll end up with a sweet machine when all's said and done:)

Good luck, Art

Working out on the porch,eh? It was snowing here today:mad:
 
Notwithstanding the effort that you are going to have to put into the cleaning,I think you did really well scoring these. From what your photo's show,that AA-100 seems to be untouched.Believe me,getting an unmolested piece of equipment is almost unheard of these days,and often (always?) makes for a much easier repair or restoration.
Those 7591's and 7199's look like they could be original to the unit,and if they're still good,that's a big bonus! Nothing beats old stock tubes.

As Gadget has mentioned,the circuit boards in these are not of the most ''robust'' variety,and will require a very light touch. The power tube board in mine looks like it was soldered with a flamethrower.....I really don't think it's salvageable at this point.I'll either have to make a new one or just go point to point.

Gordon has really gone to town on this model,and his thread is a great resource. You'll end up with a sweet machine when all's said and done:)

Good luck, Art

Working out on the porch,eh? It was snowing here today:mad:

wish I had taken a photo of the cage before putting some elbow grease into cleaning up the vinyl they were absolutely disgusting - when the folks said it looked like it had been in the attic for decades - I believed it. once cracking it open and taking a peek inside looks like it was assembled well by the original owner (which was former owner of the estate being sold). other than thick amounts of dust and random expected dirtiness inside looks to be untouched and most of the tubes look to be made for daystrom - most by mullard - which I am assuming would have been the stock tubes with the unit but can't verify

Great Britan GZ-34/5AR4 tube x1 (mullard)
Daystrom 12AX7 x4 (Mullard)
daystrom 7591 by GE/westinghouse x4
7199 - daystrom x2
EF-86 - daystrom x2

will keep folks posted as I get into it as I'm sure I might run into some questions along the way. I look forward to hopefully getting to give a new perspective on some old sounds! I may pass along the soldering job to my dad who has been an electronics nerd for longer than I've lived (34 years old) - he is a whiz with that stuff - and I'd hate to damage something i think looks so nice!

thanks everyone! mid 60s here outside in a t-shirt and shorts doing yard work! suppose to be almost 70 tomorrow! North Carolina weather is bizarre!
 
A nice looking amp. I'm running my AA-50 (similar, just different chassis) right now.

The main thing is to treat those PCBs with great care, otherwise fixing breaks to them is a PITA. Don't forget to clean/lubricate all the switches too. I'm still having an intermittent problem with my selector switch.

The only down-side of these amps is that they need to have all the caps and some resistors replaced. (Apart from the d**n fool engineer who thought it would be a good idea to locate the inputs under the chassis!) Enjoy your new kit.
 
Apart from the d**n fool engineer who thought it would be a good idea to locate the inputs under the chassis!


That was not that uncommon for a while in the late 50s. I'm not certain the reasoning behind it but Heatkit wasn't the only one. I've got a Knight preamp that works that way, and I know Knight made some integrated amps with the same bottom input setup. I guess it works for skinny cables but with anything more than spaghetti thickness you run into trouble.
 
I have my units in a home built rack and if you need to reroute or add cables, it is really awkward. This partly because an integrated tube amp is simply quite heavy. Maybe they thought the amp would be located on the top of a cabinet back in the day?
 
oh I agree its a pain, I was only saying that it wasn't just one guy who thought it was a good idea. Not sure the reasoning honestly, luckily it doesn't seem to have lasted for an especially long period of time though.
 
Back
Top Bottom