• The move to the new server is done. There are some software and database maintenance updates in process. This has us passing the hat around to help out. We appreciate any donations. Seriously, even a dollar helps. The payment page may be found here - https://www.audiokarma.org/support.html

Garrard SynchroLab motor assistance needed – Z2000B particularly

Stockman

New Member
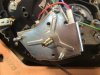
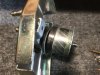
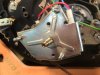
I recently picked up this turntable. It is in xlnt shape except the motor rattles horribly. Does anyone have experience with this motor (picture attached)? It seems a bit different than the other 100 motors on the outside, but I suspect it is the same inside. Advice and/or an exploded diagram would be great. On disassembly (see pics) there is a big thick metal washer floating loose above a non-metal black piece that is glued to the armature. I suspect this loose metal washer is the rattling piece. If so, should it be glued to the armature and will where I glue it affect the balance? (I note drilled balance holes on the end of the armature stack.) Also, the bottom cover cap has no real bearing in it, but looks like it should have a ball bearing or something? The end play of the motor when assembled seems acceptable. Thanks.
 

Attachments

  • IMG_1989 1280.jpg
    IMG_1989 1280.jpg
    80.7 KB · Views: 63
  • IMG_1990 1280.jpg
    IMG_1990 1280.jpg
    70 KB · Views: 60
  • IMG_1992 1280.jpg
    IMG_1992 1280.jpg
    57.1 KB · Views: 59
  • IMG_1991 1280.jpg
    IMG_1991 1280.jpg
    85.4 KB · Views: 62
Register to hide this ad
I have one like that. I believe it is the weight that is drilled and balanced to stop vibration when rotating at speed. It should be glued to the rotor, but it comes loose - the glue fails with heat/age. If you remove it you will likely see the drill holes on top where it was balanced. It can be glued back on but there is no way of getting it back in the same place (360 degrees and no mark or key to locate the correct rotation) as it was originally so the balancing will be way off. You could try it, maybe using some temporary glue (blutac?) until you find a position where the motor is vibration free enough to use, but it is unlikely it will ever be as good as new.

Edit: OK, I should read more closely, seems like yours might be slightly different, and the balancing has been done on a different piece. I suspect this means that is is more likely that you will be able to glue it on and have a serviceable motor.
 
A couple of months ago I experienced the same scenario with a Zero 100C and posted about on the VE Garrard sub forum. Re-attaching was unsuccessful for me - the tolerances were just too tight and I did not get things centred properly. Since it looked like I had just the one shot at repair and blew it, I located a salvaged motor for $25 + shipping. The transplant was successful, the table works well and I saved further aggravation.

A Garrard guy on VE informed in that thread, of there being this problem in the plant that went on undiscovered for a time. Apparently some control, sensor or operator malfunction prevented an oven from curing that glue properly. How many units were affected over whatever the period of time was, he did not speculate
 
Greetings from Hurley NY.

Read your post. Was on a Girrard kick for awhile. Playing with 95s. They have a Sychrolab motor. Looks to be the same as yours. Never quite got the SL95 to work quite right and went back to playing with my Dual family. I did the motor on it. Ready to go. Could not get the auto start to work. But auto return works. Bottom line, you can have the motor. Has a nice wood base, if you need it. Free to a good home.

Eric
 
Thank you all for your helpful and confirming replies. If you're interested, here's what I did: took off the capstan and pulled the motor apart. The black (phenolic?) spacer was also loose from the armature stack. Fortunately, there was a glue residue pattern on the three parts (see attached pic), so I dry-assembled the stack matching the glue residue, made alignment marks on the three pieces, and then glued together with 2-part JB Weld Metal. As vauxhall notes, lining up the three sliding parts was a challenge, but done and then clamped overnight. A quick static balance check (rolling on two razor blades) showed that everything was close. After mounting on the baseplate, the motor runs very smoothly - no shimmies or sounds. It was a bit of work but very satisfying.
 

Attachments

  • Garrard Z200B motor apart.JPG
    Garrard Z200B motor apart.JPG
    77.4 KB · Views: 35
Hi, I have the same problem. I disassembled the motor but can't remove the capstan drive from the end of the shaft to get the bearing plate off. Do I pry it off? I see threads inside the piece is it screwed on or do I insert a screw and press it off? Any help would be appreciated. Thanks..
 
Hi, I have the same problem. I disassembled the motor but can't remove the capstan drive from the end of the shaft to get the bearing plate off. Do I pry it off? I see threads inside the piece is it screwed on or do I insert a screw and press it off? Any help would be appreciated. Thanks..

Usually there is a grub screw or two from the sides that clamp it onto the motor shaft.
 
What he said, pull the screws then it should let go. If it still refuses, heat the brass pulley a bit. Probably a pocket lighter would be enough, you just need to expand it a tiny bit so it lets go. Do not heat the steel shaft coming out of the motor.
 
Before you start, make a mark or carefully measure the position of the capstan on the shaft, otherwise reassembly and adjustment will be aggravating, don’t ask me how I know this. On mine, the capstan/pulley drive at the end of the motor shaft was a push-on tolerance fit, no screws. In a perfect world we would all have a gear-puller (like in the slot car days) that grabs the capstan and then pushes the shaft through, but nooooo. I made my own by padding my vice to protect the parts, closed it just enough to enclose (but not clamp) the shaft and that left the capstan outside the jaws of the vise. I then used a flat ended nail set that fit in the capstan shaft hole and very gently tapped the shaft through, making sure the motor and shaft had a soft place to land when free. On reassembly I put the whole assembled motor shaft in the vice and gently pushed the capstan back on the motor shaft, a little at a time, to where I
marked it at the beginning. Good luck.
 
ah, no set screws? I was into a Type A just last night and it has screws. I actually had to pull the pulley off to take the motor apart to oil it. I can't quite recall what my Zero-100 does for mounting but it may well be a shrink fit. If its shunk on there, heating the brass piece before installation should let it slide right on, but you'd definitely want to know how far to go.
 
My Type A has set screws also, but my Z2000 does not. I attach some photos here that may be helpful, particularly the one showing the capstan height in relation to the deck height.
 

Attachments

  • IMG_1990 (Custom).JPG
    IMG_1990 (Custom).JPG
    72.3 KB · Views: 25
  • IMG_2003 (Custom).JPG
    IMG_2003 (Custom).JPG
    73.5 KB · Views: 25
  • IMG_1988 (Custom).JPG
    IMG_1988 (Custom).JPG
    26.4 KB · Views: 25
hm, is the hole down through the center tapped? That would make for a clean removal solution, just tread a screw of appropriate size down there and use that to press it off.
 
Just fixed a Dual 1219 with a seized motor. Turned out that the magnet had un-glued, just like your Garrard. But Dual made things easy, as the rotor is machined in such a way that the magnet fits in snug, and re-glues with no balance issues. And the best part is it seems that this motor fell apart a very long time ago, as the bushings are so very perfect and unused.
 
Back
Top Bottom