I picked up a pair of Genesis 320s a while ago. They needed refoaming, there were some pushed in dust caps, and I suspect the caps were probably the originals as well.
Since the dust caps had been pushed in, I decided to remove them and shim the woofers. I forgot to take pictures of the old foams, but here are two of the woofers with the surrounds gluing to the cones (I got the surrounds from Rick Cobb).

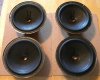
Here are all four woofers, with the surrounds glued to the basket.
To make sure I got the new dust caps perfectly centered, I measured from the surround lip, and used a strategically placed piece of masking tape as a guide. I always stick the tape on my shirt or jeans first to reduce its stickiness. I also made some new gaskets for the front.

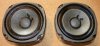
The midranges looked like they had suffered the pokey finger syndrome as well.
After looking at a bunch of snake oil recommendations for stabilizing a paper cone, I eventually ordered some of the black wet look speaker paint from Parts Express.

Old crossovers had the original caps on. Notice the really thin wire used to connect the drivers.
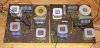
I replaced these with new caps from Erse Audio. The crossovers in my 320s differ from all the schematics over on the Human Speakers web site. My woofers have two 30uF caps shunted across them, and then another two shunted as well but these ones have a 4 ohm resistor in series with them. Erse didn't have any 30uF electrolytics in stock, so I doubled up a pair of 15uF. I also used thicker wire for the connections to the drivers.

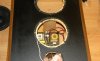
The midrange sub-enclosure goes all the way from front to back, making an effective brace for the top of the cabinet. I added this brace between the two woofers.
Here they are all put together, without the camera flash...
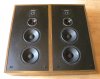
...and with it.

Lee.
Since the dust caps had been pushed in, I decided to remove them and shim the woofers. I forgot to take pictures of the old foams, but here are two of the woofers with the surrounds gluing to the cones (I got the surrounds from Rick Cobb).
Here are all four woofers, with the surrounds glued to the basket.
To make sure I got the new dust caps perfectly centered, I measured from the surround lip, and used a strategically placed piece of masking tape as a guide. I always stick the tape on my shirt or jeans first to reduce its stickiness. I also made some new gaskets for the front.
The midranges looked like they had suffered the pokey finger syndrome as well.
After looking at a bunch of snake oil recommendations for stabilizing a paper cone, I eventually ordered some of the black wet look speaker paint from Parts Express.
Old crossovers had the original caps on. Notice the really thin wire used to connect the drivers.
I replaced these with new caps from Erse Audio. The crossovers in my 320s differ from all the schematics over on the Human Speakers web site. My woofers have two 30uF caps shunted across them, and then another two shunted as well but these ones have a 4 ohm resistor in series with them. Erse didn't have any 30uF electrolytics in stock, so I doubled up a pair of 15uF. I also used thicker wire for the connections to the drivers.
The midrange sub-enclosure goes all the way from front to back, making an effective brace for the top of the cabinet. I added this brace between the two woofers.
Here they are all put together, without the camera flash...
...and with it.
Lee.
Last edited: