• The move to the new server is done. There are some software and database maintenance updates in process. This has us passing the hat around to help out. We appreciate any donations. Seriously, even a dollar helps. The payment page may be found here - https://www.audiokarma.org/support.html

Help with cleaning up a dust cover

goldswimmerb

Failed out of engineering, but look at me now!
Subscriber
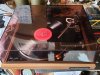
Hey all, so I have a dust cover here that I am looking for suggestions on how to clean up. Long story short it had a run in with some acetone. From what I can tell these markings are only on one side of the plastic and don't appear to be very deep.
o7ByE4J_d.webp


Anyone have any suggestions? Probably going to have to break out the abrasives for these.
 
Register to hide this ad
Hi,
I'd treat it like a hazed headlight lens repolish, and yes that does involve abrasives!

Yeah, probably going to mess up a dummy cover first to try and get the feel for it. Don't want to make this one beyond salvation.
 
I polish lids daily. I restore turntables constantly. I really enjoy it. I have the polishing process down to 1 hour.

1) assess the damage and start with the appropriate grit of wet sanding paper. I use soapy water and a black and decker mouse. Just a light skim of soapy water from a spray bottle.

2) 800 through 3000 - overlapping circles and then crosshatch grid.

3) mcguires ultimate compound on wool buffer

4) mcguires scratch x 2.0 on finishing foam pad on buffer

5) carnuba wax on ultra soft random orbit pad

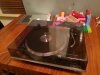
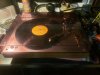
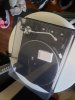
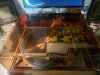
6) hand buff off residue with flannel cloth or high quality micro fibre....20221227_170241.jpg 20221212_175029.jpg 20221123_145442.jpg
20221031_152418.jpg
20221027_023342.jpg
20220502_130854.jpg

To do the inside or just the sides....place your buffer upside down in a vice and hold the lid in your hands and hit the front and sides....interior can be tricky and use caution as to not hit the inner sides with the edge of the polisher. Sometimes you will need to repeat the process, but more often than not it will be a huge improvement.

Cigarette burns, melt lines from cords stored on top of the lids are my specialty. One time I had to start at 100 grit, because the original owner went for a frosted look with 220 standard paper....lol.

I usually blaze a fat spliff and enjoy the process.

 
Last edited:
I polish lids daily. I restore turntables constantly. I really enjoy it. I have the polishing process down to 1 hour.

1) assess the damage and start with the appropriate grit of wet sanding paper. I use soapy water and a black and decker mouse. Just a light skim of soapy water from a spray bottle.

2) 800 through 3000 - overlapping circles and then crosshatch grid.

3) mcguires ultimate compound on wool buffer

4) mcguires scratch x 2.0 on finishing foam pad on buffer

5) carnuba wax on ultra soft random orbit pad

6) hand buff off residue with flannel cloth or high quality micro fibre....View attachment 2751912 View attachment 2751913 View attachment 2751914
View attachment 2751918
View attachment 2751921
View attachment 2751922

To do the inside or just the sides....place your buffer upside down in a vice and hold the lid in your hands and hit the front and sides....interior can be tricky and use caution as to not hit the inner sides with the edge of the polisher. Sometimes you will need to repeat the process, but more often than not it will be a huge improvement.

Cigarette burns, melt lines from cords stored on top of the lids are my specialty. One time I had to start at 100 grit, because the original owner went for a frosted look with 220 standard paper....lol.

I usually blaze a fat spliff and enjoy the process.
:bowdown::bowdown::bowdown::bowdown::bowdown::bowdown::bowdown:
 
I polish lids daily. I restore turntables constantly. I really enjoy it. I have the polishing process down to 1 hour.

1) assess the damage and start with the appropriate grit of wet sanding paper. I use soapy water and a black and decker mouse. Just a light skim of soapy water from a spray bottle.

2) 800 through 3000 - overlapping circles and then crosshatch grid.

3) mcguires ultimate compound on wool buffer

4) mcguires scratch x 2.0 on finishing foam pad on buffer

5) carnuba wax on ultra soft random orbit pad

6) hand buff off residue with flannel cloth or high quality micro fibre....View attachment 2751912 View attachment 2751913 View attachment 2751914
View attachment 2751918
View attachment 2751921
View attachment 2751922

To do the inside or just the sides....place your buffer upside down in a vice and hold the lid in your hands and hit the front and sides....interior can be tricky and use caution as to not hit the inner sides with the edge of the polisher. Sometimes you will need to repeat the process, but more often than not it will be a huge improvement.

Cigarette burns, melt lines from cords stored on top of the lids are my specialty. One time I had to start at 100 grit, because the original owner went for a frosted look with 220 standard paper....lol.

I usually blaze a fat spliff and enjoy the process.

Thanks for the encouragement and detail! For this one I was mostly just trying to fix my mess up, wasn't going for a total restoration as it wasn't my table.

I was able to get them out, starting at 400 grit and working my way up. I stopped at 1500 grit before using ultimate compound (already have it because my car is black and shows scratches like a mother****).

I actually enjoyed working through this, so in the future I may be following your guidance much more closely to get a perfect cover.

Thanks guys!
 
Cigarette burns, melt lines from cords stored on top of the lids are my specialty. One time I had to start at 100 grit, because the original owner went for a frosted look with 220 standard paper....lol.

I usually blaze a fat spliff and enjoy the process.

Very nice work, may I ask what buffer do you prefer and recommend?

I have one in pretty good shape but it looks like painters tape glue is stuck to it in a few spots.
Best to use a solvent for that and then buff with the polish?
 
Last edited:
Very nice work, may I ask what buffer do you prefer and recommend?

I have one in pretty good shape but it looks like painters tape glue is stuck to it in a few spots.
Best to use a solvent for that and then buff with the polish?

I use an automotive 7" buffer .....type that looks like a grinder with variable speeds and a wool then foam pad for the compound and scratch x2.0 and a ultra soft pad on a drill for the wax.

For tape residue I would reccomend just wet sanding it away. No solvents. It takes me 1 hour to sand from 800 to 3000. You can start at 1000 if there are no heavy scratches that catch your fingernail. Spend 2x as much time the next grit up. If you use ultimate compound.....I find adding a few drops of water to dilute it slightly helps to keep from hanging up and sending the lid flying.

For securing the lid....I use a insulating foam with slits to help secure it. Of you get to the end and it still needs work.....take a picture and just focus on those trouble areas with the appropriate grit and feather it out.

Get a bag of high quality microfibre cloths....cheap ones will ruin your work.

Good luck
 
Back
Top Bottom