Božo Kaurić
New Member
Hi all!
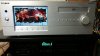
As someone who likes old Hi-Fi gear and collects old Sanyo Hi-Fi components, I decided to take one old Sanyo amplifier and integrate my computer inside of it. That way I can have my PC as a part of my Hi-Fi tower!

I used standard desktop components I had in my PC, but my goal was to have the whole front completely functional, all the knobs and switches.
I know this is not the top of the line PC, but it is my baby I have been using for years now and its still serving me great, so be gentle

Original amp had to be gutted, and many modifications had to be made to the main shell. While I was at it, I also customized almost all the components inside, and made many parts out of copper and wood.
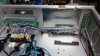
Bottom part of the case had to be separate from top so I could fit original 1978 switches inside, and to make room for three hard drives. I separated bottom and top sections with one piece of hand cut copper plate (2mm thick). Purpose of copper is purely cosmetical, there is no special reason (heat etc) behind it. That plate sits on four steel feet with anti vibration rubber on bottom and top, painted in copper.
Back plate is made one part from copper (where motherboard comes), and one part in wood (where graphics card comes).
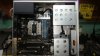
Since there is a serious height problem with that kind of case, I had to use PCI-Express riser to place graphics card horizontally and Noctuas low profile CPU cooler in order for everything to fit inside.

Graphics card and motherboard both got a new paint job and wooden inserts.
Front functionality, starting from left to right:
- Top two knobs control fan speeds
- Power switch turns on the computer
- Green light for HDD activity
- USB 3.0 port hidden behind a knob
- 2 switches to turn on/off fans
- 2 switches to turn on/off LCDs
- Above switches - left LCD shows case temperature and the right one - CPU temperature
- Largest knob is for volume control
- below it, another USB 3.0 hidden behind a knob
- Big red power light

Outer shell has been made from scratch, using 1.5mm aluminum mesh and profiles. Top plate is hinged, so it is extremely easy to take a look inside
And finally, all the copper got a nice polished finish and the rest was painted in mat black.
I hope you will like it as much as I liked working on it. It took me some time, but to me, its more then worth it.
And don`t judge it by the old components... I worked with what I got


Since I am a 3D designer, I decided to design a completely new case for PCs in this style, but more about it in another thread
Have a nice day everybody!
As someone who likes old Hi-Fi gear and collects old Sanyo Hi-Fi components, I decided to take one old Sanyo amplifier and integrate my computer inside of it. That way I can have my PC as a part of my Hi-Fi tower!
I used standard desktop components I had in my PC, but my goal was to have the whole front completely functional, all the knobs and switches.
I know this is not the top of the line PC, but it is my baby I have been using for years now and its still serving me great, so be gentle
Original amp had to be gutted, and many modifications had to be made to the main shell. While I was at it, I also customized almost all the components inside, and made many parts out of copper and wood.
Bottom part of the case had to be separate from top so I could fit original 1978 switches inside, and to make room for three hard drives. I separated bottom and top sections with one piece of hand cut copper plate (2mm thick). Purpose of copper is purely cosmetical, there is no special reason (heat etc) behind it. That plate sits on four steel feet with anti vibration rubber on bottom and top, painted in copper.
Back plate is made one part from copper (where motherboard comes), and one part in wood (where graphics card comes).
Since there is a serious height problem with that kind of case, I had to use PCI-Express riser to place graphics card horizontally and Noctuas low profile CPU cooler in order for everything to fit inside.
Graphics card and motherboard both got a new paint job and wooden inserts.
Front functionality, starting from left to right:
- Top two knobs control fan speeds
- Power switch turns on the computer
- Green light for HDD activity
- USB 3.0 port hidden behind a knob
- 2 switches to turn on/off fans
- 2 switches to turn on/off LCDs
- Above switches - left LCD shows case temperature and the right one - CPU temperature
- Largest knob is for volume control
- below it, another USB 3.0 hidden behind a knob
- Big red power light
Outer shell has been made from scratch, using 1.5mm aluminum mesh and profiles. Top plate is hinged, so it is extremely easy to take a look inside
And finally, all the copper got a nice polished finish and the rest was painted in mat black.
I hope you will like it as much as I liked working on it. It took me some time, but to me, its more then worth it.
And don`t judge it by the old components... I worked with what I got
Since I am a 3D designer, I decided to design a completely new case for PCs in this style, but more about it in another thread
Have a nice day everybody!