• The move to the new server is done. There are some software and database maintenance updates in process. This has us passing the hat around to help out. We appreciate any donations. Seriously, even a dollar helps. The payment page may be found here - https://www.audiokarma.org/support.html

Hollow Log Speakers. Yep, just what it sounds like.

FireGuruMN

Active Member
Spoiler alert.
Finished product:

upload_2020-9-28_19-24-21.png
upload_2020-9-28_19-24-41.png
And yes, there are two of them.
Let me get at least some of the obvious jokes out of the way first. I'm sure you will come up with more.
They have a very NATURAL sound but its a bit HOLLOW.

This summer I have been building speakers instead of just hoarding them. I'll write up a few of the successes now that leaves are falling and it's getting too cold to apply finishes anymore. But I thought I would start with this one because it turned out very very well.

Disclaimer:
I don't honestly expect anyone to follow in my footsteps and build a pair of these but it is interesting to some just to follow through the process.

I also have been working with live edge wood making tables and such. So it seemed fitting to combine the two into this interesting project. And I got really really tired of pouring resin and sanding and pouring and sanding. You've been there.

I usually find my wood on craigslist in the free department. These logs showed up last year. My daughter picked them up and discovered they were infested with ants. Raid took care of the ants but she wanted nothing more to do with them. So they sat in the back drying out for last winter. You have to let wood dry out for at least a year unless you have a kiln to dry it in. I don't have a kiln but I do have time.
This is what they looked like when I started:

upload_2020-9-28_19-33-44.png
Continued. . .
 
Register to hide this ad
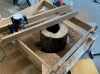
I built a jig so I could flatten out the ends and make them parallel.
upload_2020-9-28_19-39-44.png
I actually built the jig to flatten other log projects but this was the first project I actually used it on.
Once I had the ends flattened I did a calculation to determine the volume allowing for the irregular shape and allowing for front and back covers to be inset into the ends. I ended up with about 11 liters or 0.38 cubic feet. So then I had to find a speaker design that fit into that volume. Yes, totally backwards from the way most speakers design is done. I found Paul Carmody's Hitmaker design which needed 0.5 cubic feet and I was really really tired of googling speaker designs so I went with that. My volume calculation is not that exact anyway since it is not a perfect cylinder inside the logs. I ended up making the speakers different depths to adjust for differences in the internal diameter. So at least I cared a little about the overall volume.
Here is a link: https://sites.google.com/site/undefinition/hitmakers
I built a pair of Paul's Amiga speakers and was blown away so it seemed like a good idea to build another of his designs. And the drivers were relatively inexpensive so that left failure a less costly option.
I sanded out the router marks down to 220 grit. Good enough. On most projects I go down to 600 but not this time.
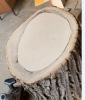
I routed out a grove on the front and back to allow for a plywood piece to be fit in. I wanted to leave as much end grain exposed as possible.
upload_2020-9-28_19-50-9.png
Traced out the shape onto plywood and cut it out.
upload_2020-9-28_19-53-6.png
I had to do some sanding on the edges to get it to fit but it's an imperfect world.
upload_2020-9-28_19-54-46.png
Now there was a problem. The woofer was going to take up almost all of the plywood area. So no where to put the tweeter. So I went down the Bowers and Wilkens path and decided they would look nice mounted on top:
upload_2020-9-28_19-57-5.png
I went back to the wood pile and found some logs the same diameter as the tweeters with enough bark showing to make it look natural.
Here is my prototype which actually ended up in the finished product due to unforeseen disasters.
upload_2020-9-28_19-59-54.png
I should have made it just a bit deeper to allow for thick wire but I managed to mash it all in at the end.

Continued. . .
 
My next problem was that they kept rolling off the workbench. Back to the wood pile:
upload_2020-9-28_20-2-3.png
That's better.
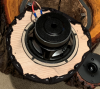
I did a really nice job of routing a recess for the woofer and then realized that the foam on the woofer sticks out past the surface. Since I was planning on putting fabric directly on the surface I ended up mounting the woofer behind the front panel. But I got good at routing recesses. Maybe next time.
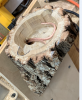
The bark was too grey for me. So I actually went to the trouble of applying a stain to the bark and the other exposed surfaces. It's a "natural" stain color but it does darken things up a bit. It really helps to bring out the grain in the ends. This picture shows the difference in depth on the two logs to make the volume the same.
upload_2020-9-28_20-7-0.png
Progress:
upload_2020-9-28_20-8-38.png
See the concrete bags in the background. Yep, I made concrete speakers this summer also. I'll write them up eventually. If I ever find my sanity somewhere.
Crossovers:
upload_2020-9-28_20-10-26.png
It is a bit of an art form to convert a crossover schematic into a real-world crossover. I cut a backboard from 1/8 inch masonite, used lots of hot glue and reinforced the heavy bits with tie wraps. There seems to be some sort of coating on most caps that prevents hot glue from attaching very well. But it makes for a nice bed to tie them down with. The top one is finished but the bottom still needs more glue to hold down all the wires. Vibration will kill any wiring that is loose. Get them all locked down. I mounted the inductors so their magnetic fields would not interact as much. That seems to be a crossover thing. All labels visible and pointing in the same direction. I also attached a copy of the schematic to the back for someone in the future. Just being nice.
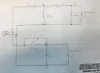
you can get a clean copy of the schematic from the link above but here is my marked up one:
upload_2020-9-28_20-15-44.png
I number each of the "nodes" in the diagram starting. Nodes being any point that is electrically equal. Then I choose the node with the most components and lay all those components such that they can all be connected without any wire extensions. Then I hope that there is some way to get all the rest of the connections without adding leads. In this case I was able to connect everything without any extra leads. But that is rare.

Continued. . .
 
This is a strange picture but it is looking from the back to the front. I added the brackets so there would be no visible screws on the front of the speaker. I will add grill cloth later which will partially explain this insanity:
upload_2020-9-28_20-26-53.png
I don't really have any pictures to show how I attached the tweeter and the legs. It was hard because I could not fit a drill inside the speaker to drive screws in. I ended up getting some 6" long screws and driving them from the lip where the front and back panels fit. you can see two of the screws in the bottom of the picture above. It takes a powerful impact driver to push them into 6 inches of oak. And don't ever try backing them out. They are stuck.
At this point I did a dry run to see if I created something that would possibly sound good.
WOOHOO they do sound good. A surprising amount of bass. I ran a REW and it says TOO much bass:
upload_2020-9-28_20-39-17.png
But REW does not give you a full picture. The bass was "poppy". I like smooth bass. But the story is not over yet.
Feeling a bit reassured that this was not going to end up in the bonfire I continued with the project:
upload_2020-9-28_20-32-10.png
I grabbed last year's can of polyurethane and slopped it on every exposed surface. I never use old poly on projects I really care about. It is often half hardened and it does not allow bubbles to escape and will often show brush strokes. But in this case no one was going to see bubbles or brush strokes on bark or end grain. And it was thicker so it was easier to apply to the bark. And yes, I still saw bugs crawling out of the bark after everything these have been through. They are now mummified for future generations.
It's always good practice to put foam on the front and back panels where they meet the rest of the box if you are not gluing everything permanently together. Things warp. I also applied foam to the front of the woofer since the factory applied foam was on back.
I cut some 1/2 inch felt carpet pad and lined the interior and back panel. I added some loosly packed polyfill because that's what people do for lack of any other reason.
Here is the REW after the polyfill, felt and gaskets (green line is AFTER, red line is BEFORE:
upload_2020-9-28_20-48-57.png
The offset in the high frequencies is probably because I did not match the volume level exactly. Lazy.
But you can see the the bass peak is mellowed out and the low end goes a bit deeper it seems. Best of all it is now smooth bass. Not poppy or thumpy. Are the better words for that?
I managed to mount the crossover on the back panel. It was not possible to mount it well on the sides since there are no sides. I had to cut some corners (literally).
upload_2020-9-28_20-52-10.png
I stapled the speaker cloth directly to the front panel. I also painted the front panel black and used two layers of cloth. I wanted it to be black black black to give the impression of being an empty (hollow) space.
upload_2020-9-28_20-55-13.png

Continued. . .
 
Final thoughts:
upload_2020-9-28_20-56-30.pngupload_2020-9-28_20-56-57.png
There will never be another pair like them. I am absolutely relieved that the sound great. Wifey was out over the weekend and I was able to rattle the windows. They are easily capable of rattling windows and more. They do take a lot of power. My Amiga speakers also take a lot of power. I have to be careful when using my speaker switcher box. If I don't lower the volume I can make some very very loud sounds on some of my more efficient speakers.
WAF (wife acceptance factor) is absolutely 0 on these. But I made these tables so I was forgiven:
upload_2020-9-28_21-1-26.png
I'll try to write up more of my summer time builds when the snow starts flying. Gotta enjoy the leaves now.
 
Oh,
I was at my local log supplier (everyone has a log supplier don't they?) and I saw these:
upload_2020-9-28_21-6-31.png
Anyone for a matching sub woofer project? NOT.
Those are about 4 feet in diameter.

I was letting my mind wander about future strange speaker builds. A toilet. Think about it. It's a very rigid enclosure. It already has a port built in. Holes pre-drilled for wall mounting. Ok, I'll stop there. Sorry.
 
Wow - these are great.

Did you do any calculations for internal volume/space for these? Or just took a punt they would sound OK?

Lets have a Flintstones party!
 
Awesome! You could have someone air brush cute little forest critters hiding in the shadows of the log for some WAF. Me?, I would go for snarling possums with gleaming white teeth and red eyes. :D
 
My next problem was that they kept rolling off the workbench. Back to the wood pile:

I got a much needed chuckle out of that line. Thanks!
After all that work, nice that they actually sound good to you.

Reminds me of a slightly off-topic story.
A friend of mine owns a recording studio, and at some point he had odd sound showing up on tape.
A barely noticeable unidentifiable noise.....and it was driving him nuts.

Turned out to be coming from a pair of "traditional" drums made out of hollow logs.
Some kind of insect had hatched inside.
The drum head was amplifying whatever it is that critters do inside a hollow log.
 
Did you do any calculations for internal volume/space for these? Or just took a punt they would sound OK?

I did a basic calculation for the volume of a cylinder but one log was flared out at the end so it was more of a cone. Really I just wanted to get in the ball park so I could find a speaker design that matched the volume close enough. I think I accomplished that. As I mentioned above, I did leave one log longer than the other so the volumes would be closer. If I was really into it I would have filled the log with sand or something and then measured the volume of sand. But none of this speaker volume calculation is an exact science (forgive me speaker design scientists). My dad always says "close only counts in horseshoes and hand grenades". Well it counts in speaker volume design also. Adding felt and polyfill can also adjust for being off on the volume some also. You can add super huge overpriced capacitors to your crossover to take up some of the volume. Or bricks. Or other logs. Maybe the bugs will start breading and take up some volume.
 
Nice...very nice!

They def belong in a log cabin!;)

Little or no resonance. Long lasting. Unique.

Now to work on a suitable name for them that suits their design.

Listeners can now sit back and log in the hours of pleasant tunes by the fireplace.

Q
 
What is the scale of these?

Main logs are about 16" diameter so good guess there. Those are 7" woofers Dayton Audio DA175-8 7" Aluminum Cone Woofer and the tweeters are Peerless by Tymphany BC25TG15-04 1" Silk Dome Tweeter based on Paul's design. I do want to thank Paul for some fabulous designs. I ran out of time this summer to build a set of Tarkus but the wood is sitting in the garage. Gotta clear some space out of the basement first. I wonder what I should to make those unique. . .

Overall the height is about 24". Depth is about 14 inches. They are heavy. Maybe 50 pounds? I did not check but my back say they are around 50 pounds.
 
This is just too much fun. Reminds me of speakers I saw years ago at an audio meet except the builder used basalt columns and hollowed them out. Yours are probably easier to move about.
Thanks for sharing this one.
John
 
Back
Top Bottom