• The move to the new server is done. There are some software and database maintenance updates in process. This has us passing the hat around to help out. We appreciate any donations. Seriously, even a dollar helps. The payment page may be found here - https://www.audiokarma.org/support.html

I bought an MC2255 with the front glass disassembled

Pat59

New Member
Hello everyone, I managed to finally purchase the amp I’ve wanted for many years, a MC2255 - the catch is that someone else took it apart to replace the lamps, and decided it was too much of a job for them. Well, I got it at a good price and I’m trying to piece it together and I’ve never seen or had one apart - ever.

If anyone can help, I’d appreciate it.

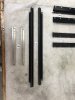
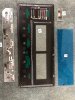
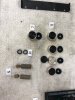
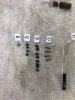
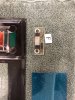
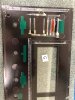
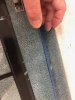
Some pictures of the parts:
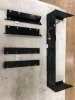
A127D36C-43E3-48BC-821D-681BC72DF73C.jpeg 2446C2AF-3971-442B-8CE8-1834E6E8E9FE.jpeg DEFCB107-82EA-4CE6-AC01-EF4865EA28E8.jpeg C818C374-EACC-42F1-ACA3-D53A93F8FC27.jpeg 4CF37468-DEDD-43A0-9C96-E0F4E0E2A166.jpeg

I’ve ordered new front glass, but how does it go together?
I think the front corner goes together like this?
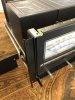
6DA2898C-85E1-4115-8329-6D5B185ED3CB.jpeg

But I’m left with some questions
1) does the clear and blue plexiglass (F,H,I) get mounted to G with foam tape? Or to the face with the meters?
2) is the white ink on the clear plexiglass (H) correct? There seems to be segments missing.
3) the front panel sides don’t have finger cutouts - leads me to believe I’m not the first one in here and these are replacements?
4) the knobs are different, 4 are marked on the back as “A” and 1 is marked “M”?

I’ve searched and searched for pictures of front glass assembly for MC2255, but there isn’t much.

Pat
 

Attachments

  • 8BAAF934-EB46-4320-99D4-C331E1BCDBEE.jpeg
    8BAAF934-EB46-4320-99D4-C331E1BCDBEE.jpeg
    106.4 KB · Views: 71
  • 4D6E5DF9-314B-4A20-9FA8-A3CCB65A0DF2.jpeg
    4D6E5DF9-314B-4A20-9FA8-A3CCB65A0DF2.jpeg
    104.3 KB · Views: 68
  • A09A4FD2-AEC8-4A5A-A5FF-98D0E5A83081.jpeg
    A09A4FD2-AEC8-4A5A-A5FF-98D0E5A83081.jpeg
    73.1 KB · Views: 69
  • FB27F66B-ED66-4D50-8872-67EAD5B8ADD3.jpeg
    FB27F66B-ED66-4D50-8872-67EAD5B8ADD3.jpeg
    76.8 KB · Views: 68
Register to hide this ad
Hello Pat59

Welcome on AK

I think that the front glass has been deleted like this because the previous owner's wanted to replace it by a new one . Ordered a new one is a ggod idea.

I saw on your pictures that the top and bottom rail secure are not identical . They should be ! I don't know how it is possible . The one with two insert is the bottom one , the other is the top one .

You should be on a very clean and dust free area

1) you have to know that the new front glass are no more iddentical to original type . They are "blank" of colored filters. You should take them off the old one , clean them and stick them on the new glass (on the back side of course)
2) regarding meters windows you should clean the back of the glass with anti-static product to avoid any attraction of any dust flying around you . If you don't take care of that you will "catch" them in the meter window, and you will see them all the time
3) once these windows are cleaned you use strong double side adhesive tape making a rectangular form . This is to keep the meters windows dust free all the time (even after ten years)
4) clean the big blue plexi "I" and when you are ready (with protective material band off) put it above the right place . Be carefull because you have one try only (double side adhesive tape will not allow you to move anything after)
5) the light deflector ( H ) is easy to install but take care about the good way (don't place it on bad side = reverse) because the light of letters of front panel will be dark on power ON ;
6) the little deflector "I" goes behind the MC INTOSH logo on the corner of the glass
7) the round parts "M" are headphones jack "bezel"
8)you have two lamps , normally there is more than that in chassis lamp sockets. The carton "tubes" goes around each #1866 lamp
9) once your panel is ready you put top and bottom rail secure on the glass . The bracket hold the both rails, one on each side.
10) the part we can see mounted on the left of your MC2255 should taking off and goes on the side of the front glass . One for each side .
11) put the lamps and carton tubes in due place .
12) screw the end cap with the yellow screws two for each end cap . Than your front panel is rebuild
13) put your front panel in place , then felt washers , and knobs

MC2255.JPG
 
Last edited:
As to the knobs, you have the correct set. "A" is American sized and "M" is Metric. The Meter switch is the Metric sized shaft - the others are American.

Larry
 
The L knob looks to be shallower than the others, like a MC7270 knob.

Every MC2255 I have had my hands on since their introduction have had the same SAE standard knobs in all five locations.

Also the center plastic insert to isolate the metal knob from the control for static control is missing for the one knob.

Looks like a repair attempt to a bad shipping experience gone bad.
 
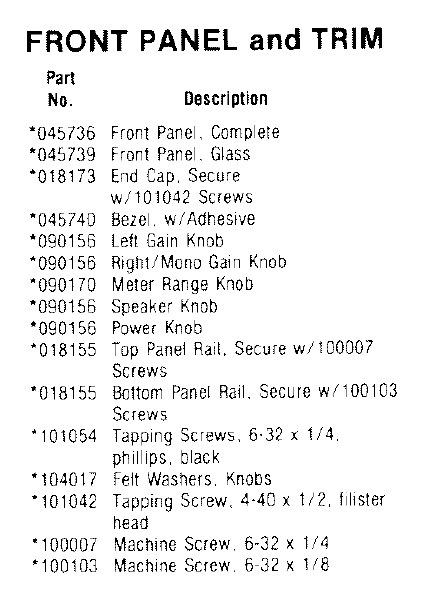
Here are the parts for the MC2255 front panel:
Mc2255 Front Panel Parts.jpg

The 090170 is a Metric-sized knob - different from the other 4.

Larry
 
Thanks everyone! I checked the stems and knobs with a caliper and for my amp the meter selection stem is the metric one, the other 4 are all the same. The knobs are all the same height - my bad picture. The center of one has come unglued, but I have it.

One last question, if you have the patience - is the clear plexiglass piece (H) in the right orientation with the front glass, and is the white ink on it complete?

Thanks again, especially clinic-audio for such a detailed explanation.

And, yes, an amazingly heavy beast....
 
is the clear plexiglass piece (H) in the right orientation with the front glass

Difficult to say from here , your picture is not clear enough

The right way is easy to find . You have two little piece of original double adhesive tape . They should be againt the glass
 
The front panel knob positions are not symmetrical because of the headphone jack. If you lay the plastic piece down on the back of the glass it should be obvious there is only one correct orientation.
 
Back
Top Bottom