• The move to the new server is done. There are some software and database maintenance updates in process. This has us passing the hat around to help out. We appreciate any donations. Seriously, even a dollar helps. The payment page may be found here - https://www.audiokarma.org/support.html

JBL C35 Score and Restoration

efrance45

Active Member
Just picked up a pair of pretty much barn find JBL C35s yesterday, and working to restore them to their former glory! The pair was in the attic of an outbuilding of an old furniture store near me, where some extra merchandise for the store was kept. About a month ago, I just so happened to be there with my parents checking some new patio furniture out, when I noticed a pair of massive speaker cabinets against one wall!

After some investigation in the AK forums and elsewhere, I figured that they must've been C35s with an 030 load. Finally got in contact with the owner, and met him yesterday to check them out in person again - it was really great to hear some of their history as he was the original builder of the speakers. He had a buddy who was a cabinet maker cut the boxes to spec before the owner assembled them and veneered them in cherry. As of right now, the main focus is going to be restoring and veneer, cleaning the grille fabric if possible, and cleaning the pots.

FYI - probably will be a picture-heavy thread

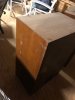
Here they were after pulling them into the attic a bit more for initial inspection
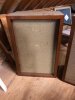
IMG_0474.jpeg IMG_0474.jpeg IMG_0475.jpeg IMG_0476.jpeg IMG_0477.jpeg IMG_0479.jpeg IMG_0480.jpeg IMG_0481.jpeg IMG_0482.jpeg IMG_0483.jpeg IMG_0484.jpeg IMG_0475.jpeg IMG_0476.jpeg
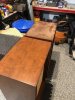
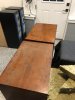
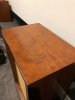
Quick damp rag wipe down comparison - I was very surprised at how the veneer looked underneath all that dust!
IMG_0479.jpeg IMG_0480.jpeg
Backs of the speakers
IMG_0482.jpeg IMG_0483.jpeg IMG_0484.jpeg
 
Last edited by a moderator:

Register to hide this ad
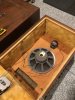
Some more pictures of the inside of the cabinets! I only opened one cabinet to start, and it looked pretty much pristine inside. I'm guessing it hadn't been opened since being built somewhere around 50-60 years ago (the owner couldn't specifically remember how long ago). The 030 load had both a D130 woofer and an 075 bullet tweeter.

Inside of the cab with closeups of the drivers
IMG_0489.jpegIMG_0490.jpeg IMG_0490.jpeg IMG_0491.jpeg

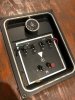
Quick questions on the treble adjustment pot
1. This looks pretty clean to my untrained eye, except for the cover falling off. Yet there is still some scratchiness in the pots. Some deoxit or other cleaner would work well, right?
2. How should I go about attaching the pot cover, since it is cracked?
IMG_0487.jpeg IMG_0486.jpeg IMG_0493.jpeg

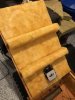
Port (not super well cut) and rear bracing pictures
IMG_0492.jpeg IMG_0494.jpeg

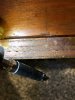
And finally, one picture to show the thickness of the cherry veneer, if you zoom in a bit.
IMG_0495.jpeg

I'll post a couple more pictures tomorrow of my temporary setup with them! Currently they are both nearly fully functional besides the pots, and cleaned up really well. I'll need some suggestions for that pesky ring mark on the one speaker - got it off a decent amount with just water and elbow grease, but something is really caked on there! Can't wait to get these looking even better soon.
 

Attachments

  • IMG_0488.jpeg
    IMG_0488.jpeg
    86.3 KB · Views: 112
  1. Nice ear;y 16 ohm Plywood examples.
  2. My first jbls were the much later particle board ones. Loaded with the 130a's and 175DLH horns.
  3. I still have the innards, and had the speakers re-coned.
  4. don't worry too much about the pot cover. hidden anyway. JB weld fixes anything metal.
  5. don't get any on the inside O/S only
 
  1. Nice ear;y 16 ohm Plywood examples.
  2. My first jbls were the much later particle board ones. Loaded with the 130a's and 175DLH horns.
  3. I still have the innards, and had the speakers re-coned.
  4. don't worry too much about the pot cover. hidden anyway. JB weld fixes anything metal.
  5. don't get any on the inside O/S only

Thank you! Pretty cool that they were bought as components by the owner and then he had the cab build commissioned. Too bad newer stuff doesn't come as modular systems like this anymore (unless DIY flatpacks), with full factory supplied plans and build specs.

For your 5th point, what do you mean by O/S?
 
Outside.
I didn't know your cabs were DIY. they look close or the same as Real ones.
Do they have the JBL signature metal emblems?
 
Ahh gotcha!

And yeah, I'm 100% sure they were DIY. No signature JBL emblems, unfortunately. But I think full plans were provided when components were bought at that time. If you look closely at the inside view of the front baffle where the slot port is cut, you can see it it not smooth and fully squared off!
 
Looks awesome, thanks for posting all this for us to follow along with.

It's interesting that they are configured to stand vertically and not horizontally like the standard C35 cabinet. Do they have t-nuts for legs on the non-veneered bottoms?
 
Looks awesome, thanks for posting all this for us to follow along with.

It's interesting that they are configured to stand vertically and not horizontally like the standard C35 cabinet. Do they have t-nuts for legs on the non-veneered bottoms?

Of course! I'll upload more pictures when I can - AK isn't letting me add pics to my replies as of this moment. I'll check for the t-nuts and report back.

I honestly didn't know that C35s could have had a horizontal orientation. Is there a different model that you were thinking of? I've only ever seen them vertical. This page on Lansing Heritage shows them upright as well, though the C37s were horizontally configured.
https://www.lansingheritage.org/images/jbl/plans/c35-c39/page1.jpg
 
No t-nuts on the unfinished bottoms, but it looks like there were small feet attached at one point, just with screws
 
Of course! I'll upload more pictures when I can - AK isn't letting me add pics to my replies as of this moment. I'll check for the t-nuts and report back.

I honestly didn't know that C35s could have had a horizontal orientation. Is there a different model that you were thinking of? I've only ever seen them vertical. This page on Lansing Heritage shows them upright as well, though the C37s were horizontally configured.
https://www.lansingheritage.org/images/jbl/plans/c35-c39/page1.jpg

Oh dang looks like I was thinking of the C37. So yeah cool. I guess the C35 to the C37 must be like the C34 to the C40!
 
I am able to upload pics again, so here they are after a quick wipedown with damp rags! Currently they're setup in my dads theater room that I helped him put together and set up, as that is the only room big enough to do the C35s justice. Definitely going to play around some more with placement - any tips on how they like to be placed, from people who have experience?

The veneer is in MUCH better shape than it looked to me originally. The cherry veneer looks really nice, but there is a lot of smaller wear marks, slight gashes, and short scratches. Still have that pesky ring of buildup that could also be stained in, which I need ideas on how to get rid of. Rubbing alcohol, paint thinner, etc. I don't know what exactly the finish is, but I don't want to mess it trying to remove the circle.

Running them just off my laptop through a Schiit Modi 3 into a Denon x3100w in pure direct mode since that's what I have available.

IMG_0500.jpeg IMG_0501.jpeg IMG_0502.jpeg IMG_0503.jpeg
 
It's interesting that they are configured to stand vertically and not horizontally like the standard C35 cabinet. Do they have t-nuts for legs on the non-veneered bottoms?
C35 was vertical. C37 was horizontal. C35 had a plinth and C37 had legs. I have some of each. I've had one with the 030 load in my house since I was 4-years-old—that's over 65-years!
 
If its surface muck , paint residue or somesuch here's a plan.

Get some picture frame glass and smash it up. Look for a gently convex curved edge. Use that edge to scrape the crud off.
Glass scraping is an old school woodworkers method for surface finishing prior to oiling or french polishing.
Way better than any sandpaper as it does not leave any residue buried in the grain.
Try it out on an old bit of hardwood that you may have lying about.
You can be very gentle and still remove the junk. you will not hurt the veneer.

 
I think that there is some sort of varnish on top of the veneer

If it were me, I'd strip that varnish off and see how the veneer looks underneath. Then decide whether to keep it raw (maybe oil it), or re-apply fresh varnish (lacquer / shellac / some other durable clear that would preserve that shimmery grain look underneath). But I'm out of my depth recommending anything, I usually just use Watco or Howard's or something like that.

The circular black mark is interesting though, I thought that water only turned wood grain black, it wouldn't happen with a varnish? What do you think is going on there? Can you take any close-up pics?
 
If it were me, I'd strip that varnish off and see how the veneer looks underneath. Then decide whether to keep it raw (maybe oil it), or re-apply fresh varnish (lacquer / shellac / some other durable clear that would preserve that shimmery grain look underneath). But I'm out of my depth recommending anything, I usually just use Watco or Howard's or something like that.

The circular black mark is interesting though, I thought that water only turned wood grain black, it wouldn't happen with a varnish? What do you think is going on there? Can you take any close-up pics?

I'll take some more close-up pictures! I was thinking of stripping the current finish and going with something like Watco, since I used it on some walnut Frazier's and I love how they turned out. However, I don't know what to do about the grille fabric, since I can't really sand or chemically strip the front lip edges without affecting the grilles
 
Back
Top Bottom