• The move to the new server is done. There are some software and database maintenance updates in process. This has us passing the hat around to help out. We appreciate any donations. Seriously, even a dollar helps. The payment page may be found here - https://www.audiokarma.org/support.html

JR149 Full take apart - anyone done that?

ecoak

Active Member
So, I was lucky enough to score a pair (matched in good nick, with the white lettering on chocolate brown label) and I have some replacement foams coming over from Mr. Hartle (hopefully soon). The foam is costing me twice as much as the speakers did - but I shouldn't complain - I did get them for a song!

The wood top and bottom cheeks are almost mint, but that old two tone effect where the edges are darker, and I would like to have them re-finished. I got as far as removing the x-over, below that nut there is a second 9mm(?) nut deep in the base that my socket wrench can not reach - the access hole is too small. Has anyone taken these apart successfully?

I have gently pulled to see if this nut is what is holding the assembly, and there is no movement, and I don't want to damage the units. How to remove the nut??? I am thinking there may be adhesive as well.

I think that it would be next to impossable to do a nice re-finish without removing the wood entirely. So I wonder if anyone else here has given it a try?
 
Register to hide this ad
I would think it would be worth getting a socket driver shaft extention, or a long socket driver. A lot less hassle that trying to refinish in place without screwing up the speaker.
Wish I had your luck...
 
Well yes and no. Yes, I did mine in order to replace the woodwork so, as you could imagine, that involved a complete stripdown. The bad news is that I did it about 5 or 6 years ago and I have difficulty remembering what I did yesterday. The bottom line is (really) if I can do it then anyone can.
Seems like a fair amount of work to achieve a cosmetic change. Would it be worth just masking the metalwork and sanding down the old varnish to bare wood although I think there were quite a few variations in that. Mine were basically veneered chipboard and I replaced with Tasmanian blackheart sassafras. They're now my pride and joy and in daily use. The Hartle foams are a must but I think they've doubled in price since I did mine. Sorry I can't really be any help but I wish you good luck. Lucky b.......:D
 
Thank you Nat and thilaseen, ha!, your memory is as good as mine! Yes mine are Venneer on chipboard as well. I plan on using Quatered Fir - I have a lot of that. But maybe Pear. I suppose a Burl would be nice as it has less directionality, which may suit a circular form.

Well, the offending nut is only an inch down but the hole is too narrow for any of my sockets, and they are thin walled - but maybe I need a Snap-On set. Even then, the nuts are not centered at the base of the hole, so it would be a problem to seat the socket. I still think I am 'missing' something.

The rod inside the case is not threaded and there are no visible nuts on the inside. Maybe I will grab that with a vise grip and give it a turn, and maybe losen the offending nut a bit.

...

Anyway, so the reason I got these units cheap is 'cause the shop owner could not find where to connect the speaker cables to see if they were even working. Me, not knowing these speakers, honestly didn't know either, but I knew a KEF B110 when I saw one, so I said I would pay what he wanted - I spent $25. So, a deal can still be had, you just need to be patient.

I do have some 3.5a's and that is why I wanted the drivers, but I must say, that as of this moment, I prefer the fullness (I almost said roundness) of the sound of these 149's, and I think that when the are re-foamed, re-finished and on nice new fat tube stands, well, they will look as good as they sound. What more can you ask for?

Except maybe a matching Tube Shaped Sub taken from the AB1.
 
Yes, so loosening the center rod with a vise grip did the job! One unit is now in pieces. I will take a few photos for record.
 
Last edited:
Hi there,

My first post, so hope you don't mind me resurrecting this thread...

Anyway, I was forwarded to this thread via a Lenco Heaven member, as I'm having a similar issue with my JR149s. I bought them a while back online and whilst replacing the crossover caps with Falcon caps, I uncovered the fact that both speakers' threaded rods have snapped into two inside the speakers cabinets...

Can I ask:

# Do you know the size/pitch of the threaded rod? (Although I'm thinking of enlarging the rod dia as I have some M5 studding already)
# Do the wooden end caps come off easily, without any damage, once the rod is undone?
# Did you manage to take any photos of the speakers in pieces?

Thanks!
Martin
 
I owned a pair and have had the speakers apart. Be very careful with the rods that extend the length of the cabinets, as they are flimsy. They will snap if too much pressure is applied. I snapped one and then decided to replace both with stronger steel rods. The rods are there to add rigidity. They don't hold the caps on. The wood caps are affixed with adhesive. The metal mesh protecting the drivers is relatively easy to remove. Once the mesh has been removed, it is a simple task to remove the drivers. The only reason I took mine apart was to check a non-functioning tweeter and replace the deteriorating foam above the tweeters.
 
Thanks for the info. Sadly, my threaded rods are already snapped (something I've just found out since buying them). I'm thinking of doing what you have done: fitting stronger, M5 steel rods.
So removing the wooden caps - just got to break a glue seal? Then everything will be exposed to fit a new rod? Do you know if you had to remove the bottom wooden caps, too?
Huge thanks for your help,
Martin
 
My feeble memory tells me that it is a case of breaking the glue seal. Actually I'm pretty sure of it. On the subject of the metal rod I was of the belief that it was meant to be tightened enough to ensure the top and bottom internal surfaces were a little concave but I don't remember the source of the info.

BTW I agree with Sealy on the subject of not removing the woodwork unless absolutely necessary i.e. replacement.
 
Last edited:
Soundcarrier, sorry, I just found your question now, but yes I can tell you about the innards.

The steel rod is threaded solid rod, chrome finish.
Below the top and bottom 'cheeks' is built up masonite board sections (tempered type I think).

I can upload photos, if you like. Let me know if I am not too late.
 
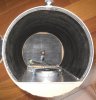
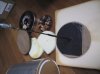
OK then here are some photos, not pretty but I hope enough to help understand things...
 

Attachments

  • IMG_5456.jpg
    IMG_5456.jpg
    66.5 KB · Views: 159
  • IMG_5457.jpg
    IMG_5457.jpg
    46.3 KB · Views: 158
  • IMG_5458.jpg
    IMG_5458.jpg
    36.7 KB · Views: 140
  • IMG_5459.JPG
    IMG_5459.JPG
    132.4 KB · Views: 132
  • IMG_5460.jpg
    IMG_5460.jpg
    45.5 KB · Views: 129
I too picked up a pair of JR149's this summer for only a song and no dance... Mine are gold lettering on black label. The ends are solid wood and not particle/veneer.

Mine look to have rubber surrounds and not foam.

I'm not sure I understand the pic with the threaded rod. Looks like if you tightened the rod to pull the top and bottom together, the blind nut would just pull out of the bottom piece??
 
Ha! Good spotting! Yes I was looking at that too trying to remember the sequence and what its' function is. I may need to check my second when it comes apart. But it sits inside the cab, on the woofer end. I think it is pulled in to position by the upper outise nut that sits below the Crossover, which in turn is held in place with a sleeve nut w/ grub screw. I think then that when the lower nut is tightened it then can not rotate the rod.

What is your serial number? These are 8586. Do you have a fuse in your X-over? Solid wood - Nice! What type of wood?
 
I too picked up a pair of JR149's this summer for only a song and no dance... Mine are gold lettering on black label. The ends are solid wood and not particle/veneer.

Mine look to have rubber surrounds and not foam.

I'm not sure I understand the pic with the threaded rod. Looks like if you tightened the rod to pull the top and bottom together, the blind nut would just pull out of the bottom piece??
Rubber surrounds are standard on the JR's. Any other type of surround is probably not original.
 
Ha! Good spotting! Yes I was looking at that too trying to remember the sequence and what its' function is. I may need to check my second when it comes apart. But it sits inside the cab, on the woofer end. I think it is pulled in to position by the upper outise nut that sits below the Crossover, which in turn is held in place with a sleeve nut w/ grub screw. I think then that when the lower nut is tightened it then can not rotate the rod.

What is your serial number? These are 8586. Do you have a fuse in your X-over? Solid wood - Nice! What type of wood?

My serial number is in the 15k range. The wood looks like walnut. The sticker says rosewood.

There is a fuse in the crossover and I just notices there is a spare fuse tucked in there. Wonder if that was factory??

IMG_3513.jpg
 
Yeah, the last 149's used Dalesford or so I've read. All the earlier (arguably better but I don't want a flaming) use the KEF's they may not have been select as found in the original Rogers BBC but fine old drivers. You have a good set there and the X-overs look good. Spare fuse? Who knows.

Solid Rosewood? How do you decide it is solid? Can you see endgrain on the edge?

BTW your speaker cables are a liability - get some spade connectors on those and loose the frayed wire - it could lead to damage. If you don't mind my advise.
 
Back
Top Bottom