• The move to the new server is done. There are some software and database maintenance updates in process. This has us passing the hat around to help out. We appreciate any donations. Seriously, even a dollar helps. The payment page may be found here - https://www.audiokarma.org/support.html

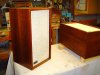
KLH 6 - got a pair at a tag sale this AM!

Agreed...you can buy one of those little tools for removing paint can lids at Home Depot for a buck...they work well for removing masonite grills that have been stapled or nailed on.

If you use one of those I'd suggest grabbing the edge of the grille and pulling rather than levering it up. The rather thin "barrel" of the paint can tool can make little dents in the lip of the speaker cabinet.

John
 
Pictures:

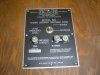
1. The unmolested back of the first speaker

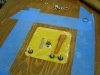
2. Cover plate removed, exposing the brittle yellow potting compound. The brown strip is the 2X2uf capacitor.

3. Couple of whacks and the potting compund has been broken out - you can see the 2X4uf cap mounted on the front panel.

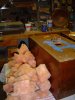
4. The insulation is cut into hunks that are about the size of the hole in the back.

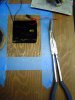
5. The one internal connection I had to make. Most of the wiring is extra long - must have something to do with how these were originally assembled.

6. All rewired and set to be reassembled.
 

Attachments

  • DSC00135.jpg
    DSC00135.jpg
    89.5 KB · Views: 172
  • DSC00137.jpg
    DSC00137.jpg
    76.1 KB · Views: 245
  • DSC00139.jpg
    DSC00139.jpg
    62.6 KB · Views: 257
  • DSC00144.jpg
    DSC00144.jpg
    76 KB · Views: 225
  • DSC00145.jpg
    DSC00145.jpg
    84 KB · Views: 213
  • DSC00146.jpg
    DSC00146.jpg
    90.5 KB · Views: 250
Great work! Have you given any thought to mounting the 8.2 uF cap to the crossover plate? That's what I did with the Seventeens I just redid and it worked out well.

John
 
Great work! Have you given any thought to mounting the 8.2 uF cap to the crossover plate? That's what I did with the Seventeens I just redid and it worked out well.

John

I'll stick either there or to the back of the cabinet with some hot melt.
 
Work continues and expands

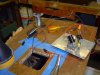
Photo 1: I set the 2nd speaker on its side so less of the potting compound would fall into the cabinet. Proceeded to redo the 2nd crossover when at some point I realized that the front baffle was loose. Being the curious type, I decided to pry it off so I would be able to reseal it properly. It came off with minimal damage to the veneer.

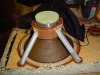
Photos 2-3: Show the unique construction of these woofers, which doesn't allow for driver replacement, unless you are in possession of a jackhammer.

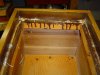
Photo 4: Inside the box.

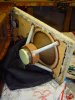
Photo 5: Another view of the woofer.

Photo 6: The tweeter is pretty firmly secured, too.

The potting compound in these seems to be some high melting temperature wax. I was able to melt it easily with a heat gun. This might be a better way to remove the x-overs from the cabinets.
 

Attachments

  • DSC00157.jpg
    DSC00157.jpg
    95.5 KB · Views: 194
  • DSC00155.jpg
    DSC00155.jpg
    79.8 KB · Views: 195
  • DSC00154.jpg
    DSC00154.jpg
    91.9 KB · Views: 169
  • DSC00152.jpg
    DSC00152.jpg
    89.1 KB · Views: 222
  • DSC00150.jpg
    DSC00150.jpg
    65.4 KB · Views: 178
  • DSC00158.jpg
    DSC00158.jpg
    92.2 KB · Views: 200
I swear, those woofers have always struck me as being twins to some alien spacecraft. I heard a pair hooked up to a Pioneer SX-828, it was simply outstanding! Great synergy.

Thanks for a view to the inside works!
 
on the home stretch

Here's the last of this project:

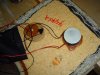
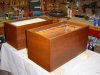
1. The cabinets were pretty beat up. Here's a typical side.

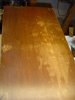
2. So I tried some Howard's. Looks wicked mo bettah but not quite good enough for me.

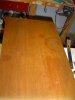
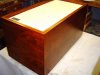
3. So I did a complete strip and refinish. Had to re-glue a little veneer along one side. Also filled a few dings and recreated a corner with epoxy/sawdust. Most of the scratches were in the original shiny finish and didn't really penetrate into the wood. There were some bad water stains, too. I was not all that enamored with the original finish and had kind of planned on stripping off the old stuff, regardless.

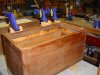
4. After staining with Minwax Special Walnut- looking pretty good here.

5. Used two coats of Watco teak oil to shine them up.

6. Gave them a final shine with Howard's Wax and Feed which really made them look good.

Now I am going to drag these upstairs to my living room and swap them with my AR 2-ax speakers. They are in need of a little TLC. But that is the subject of an upcoming thread. Stay tuned!
 

Attachments

  • Before Howards.jpg
    Before Howards.jpg
    71.1 KB · Views: 114
  • After Howards.jpg
    After Howards.jpg
    73.6 KB · Views: 107
  • After stripping.jpg
    After stripping.jpg
    86.8 KB · Views: 120
  • Stained.jpg
    Stained.jpg
    80.8 KB · Views: 138
  • Watco Oil.jpg
    Watco Oil.jpg
    82.4 KB · Views: 158
  • Howards Wax and Feed.jpg
    Howards Wax and Feed.jpg
    60 KB · Views: 150
Nice going, Able.Baker--good to see you're going for the restoration. Kind of like searching for buried treasure, finding that crossover eh? ;)

If the cabinet scratches aren't too deep, the surfaces can be significantly improved. I've not yet tried the hot iron approach for prominent scratches, but a number of people here have said they've gotten terrific results with it. Anyway, looks like your technique has paid off--those cabs look significantly better. Great work! :)
 
Thanks for the woofer pics. Very wierd. I had the newer removable woofer Sixes. I kinda regret selling them. Had to thin the herd because we are moving.
 
So I dragged these upstairs and hooked them up - they sound great! Crisp highs and tight bass. Then I asked my wife - "What do you think of the new decor?" She said "Are those new speakers?" She probably wouldn't have noticed if I hadn't mentioned it!

One thing I forgot to mention: One of the grills had a light brown stain on it. I was able to remove it completely with a shop vac and a spray bottle of plain water.
 
Last edited:
I'm about to start on a similar project, though I'll need to replace the veneer and find replacement grills & logos.

I got mine yesterday from the original 1963 owner. Interestingly, my pair have different tweeters though they were bought at the same time. One has the screw in tweeter. One would never know since the grills could not be removed. At some point the PO removed them, so that saved me a bit of work.
I gave them a quick listen and as expected the tweeters are not working.

Your pics and descriptions will be extremely helpful, and your look great!
I'm interested to see the difference between these early 6's & my late 6's sound. The late 6's have been recapped and the woofers re-sealed.

Glenn
 
thanks for the photos! i will be restoring a pair soon and these photos are gonna save me!
any other tips on restoring these speakers?
 
@rmeade , granted this is a much older thread, but in post #14 the link for interior pics of your model 6 don't render. Might they be hosted elsewhere to view?

Thx!
 
...interior pics of your model 6 don't render. Might they be hosted elsewhere to view?

@oldNslo

Click on link below, in post #5, already posted in your current thread, then see pictures in post #2,

 
@rmeade , granted this is a much older thread, but in post #14 the link for interior pics of your model 6 don't render. Might they be hosted elsewhere to view?

Thx!
Sorry oldNslo, I sold these speakers some time ago and deleted my pictures. I do, however, have a KLH 6 utility version from 1972 in my project pile. Is there something that you were looking for ... like wiring .... that might be in this later version? (I am on the road and will look in my old picture repository [old backup on removable drive] but it is not in my cloud storage).

Sorry, I went through my backup folders and no KLH pictures were found.
 
Last edited:
@Meade , thanks for the offer, but no need. I was on a search for what is "behind" both the baffle board, or the back board, and found there are support railings to further support the depth of the boards upon manufacturing. Case closed on my end.
 
Back
Top Bottom