• The move to the new server is done. There are some software and database maintenance updates in process. This has us passing the hat around to help out. We appreciate any donations. Seriously, even a dollar helps. The payment page may be found here - https://www.audiokarma.org/support.html

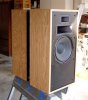
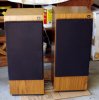
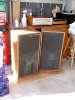
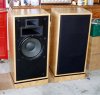
Klipsch Forte's @ $20.00:)

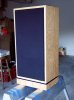
Well I have started the BIG re-veneering project.... :banana:
I ordered 2 rolls (2'X8') pre-Iron-on-glued of red oak. The rolls had some blemishes on one side but that was O.K. with me as they were 1/2 off... Cost about $30.00 with shipping. The grill cloth replacement material was more than the veneer... about $60.00... Had to buy 2 saw horses and a few other odds and ends... Bag of clamps... etc. ..etc. So here is what I have done so far...
1. removed the base
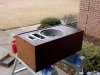
2. Re-painted the face and back of each speaker.
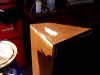
3. Sanded down both speakers with my B&D mouse and 80 grit to remove ALL the old finish. (If one of the speaketrs did not have a big gouge i the top I could have just refinished the veneer...)
4. Re-veneered both bases
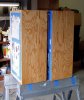
5. Have re-veneered the sides and top of one speaker. Have the edge banding to go onthe front and that one speaker will be done with the application of the veneer.

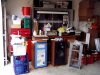
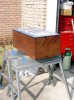
Picture below of work in progress and of my HIGH TECH wood working / electonic repair shop:)
 

Attachments

  • work shop.jpg
    work shop.jpg
    115.2 KB · Views: 91
  • gouge.jpg
    gouge.jpg
    96.6 KB · Views: 107
  • painted face.jpg
    painted face.jpg
    114.3 KB · Views: 112
  • masked and painted and one left.jpg
    masked and painted and one left.jpg
    114.3 KB · Views: 114
  • masked and ready to sand.jpg
    masked and ready to sand.jpg
    117.3 KB · Views: 113
  • sanded.jpg
    sanded.jpg
    113 KB · Views: 108
  • before.jpg
    before.jpg
    114 KB · Views: 130
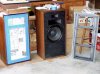
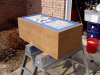
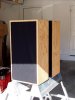
pics above were work in progress... Pic above has a "BEFORE" shot of both speakers. Had some time today and finished all the veneering. Placed 4 coats of Watco Danish oil on the cabs and stands. Wet sanded the first 3 coats with 320/400/600 sand paper. Removed my masking so all can dry. I think I will add 2 or 3 coats of wipe on ploy in 3 days. The Watco Danish oil can says to let the stuff dry for 72 hrs if you are going to poly it. Had to touch up the woofer ring in a few places where the masking tape took off the paint. When I do the poly I will re-mask the cabs. Looking good so far.... I give myself a 8/10 so far:) Will say that it is a PAIN to lug these cabs up and down from the saw horses.... So far I have NOT put my back out yet...

The first pic is the cabs with the raw red oak veneer on. The second pic is after a few coats of Watco Danish oil. The Watco Danish oil sure pulls out the character of the veneer when you do a side-by-side of the 2 pics.….. The last pic is after all 4 coats had been applied and wiped off.

Just looked at my invoices and cost was $57.00 for veneer (with shipping) and I have almost 1/2 of material left. The grill cloth was $59.00 with shipping and I just re-did the grills a few mins ago. I also have a big chunk of the material left over also... Pics in the morn...
 

Attachments

  • veneered and ready for oil.jpg
    veneered and ready for oil.jpg
    118.2 KB · Views: 95
  • oiled.jpg
    oiled.jpg
    107.8 KB · Views: 95
  • finished.jpg
    finished.jpg
    107.4 KB · Views: 129
Last edited:
OMI,

from the pics, that looks like a great job you've done there.

Might inspire a few more of us to tackle this type of refurb job. A little more explicit step-by-step instructions woulda helped though....like how the heck do you cut and fit that dang veneer, and how does that iron-on business work?

:scratch2:
 
My 3 rd veneer job... Did a case for a KR-9095, then a cassett deck and now this... CK out the DIY section and there is the making of a veneering sticky with some good info from Merrylander and others. Do a search with "VENEER" and read some of the old post (that is what I did). The first 2 veneering projects were using tightbond II wood glue. With the cabs being so big I did not want to mess with taping smaller sections of veneer together. I came accross the tapeease site and they advertised veneer with pre-applied glue that is heat activated by a household iron (I got one from the TS for $3.00.... Wife would KILL me if I used her iron ..) They had some red oak veneer that was 2 ft X 8 ft and had a minor blemish on 2 rolls. 1/2 off reg. cost and the cabs were a bit over 12 inches wide, so I got 2 rolls. Worked quite well. Layed out the roll and cut the sides and top about a 1/4 to 1/2 inch wider all the way around. Used the veneer saw that I got from http://www.rockler.com/product.cfm?page=1094 to help cut, along with an exacto type knife. Ironed the veneer into place and trimmed it using a trim tool from roclkler http://www.rockler.com/product.cfm?page=1266 and the saw. Used 3/4 inch pre-glued edge banding on the front from Lowe's. Same deal.. Cut to size and iron on... Read one post and Watco Danish oil was used. I tried it on the casette deck and liked the outcome so used it here. One of these days will try out tung oil....

Read some of the post and see what some of the folks can do.... I am just a begineer and still have a LOT to learn.... So I learn by doing:) I have a LOT of Awwww SHITS, but that is how I learn:)

I read up all I can and then JUMPED IN!!!
 
Last edited:
Hey Kencat - I see you're in a posting frenzy tonight. Been away, have you?

OMI - the veneer looks terrific - love that red oak :thmbsp: . - Mark
 
Finished replacing the speaker grill cloth...
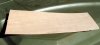
One pic is of the front of the red oak veneer, and the other is of the back showing the heat activated glue that was applied to the back of the veneer. Good heavy application. There were minor application glitches at the start? / end? of each roll. About 3 to 4 inches into the roll. I did not notice that on the first roll and started my first side panel from that end. I put a good heavy coating of tightbond II in the areas that looked light just in case...

Now to do the 3 or 4 coats of poly in a few days and put the bases back on:)
 

Attachments

  • glue backer.jpg
    glue backer.jpg
    115.6 KB · Views: 49
  • veneer.jpg
    veneer.jpg
    91.7 KB · Views: 62
  • completed with grill.jpg
    completed with grill.jpg
    112.1 KB · Views: 84
My Cornwalls aren't horrible but, if I had the savvy, I'd try to veneer them. Things look great!
 
MarkAnderson said:
Hey Kencat - I see you're in a posting frenzy tonight. Been away, have you?

OMI - the veneer looks terrific - love that red oak :thmbsp: . - Mark

No, must have been in the mood....... or maybe too much :beer:

:D
 
Zeke,

If they are veneered in wood why not refinish 'em. Not to hard a job and it seems that the veneer is guite giving as long as you dont use a power belt sander to remove the old finish:). Here are 2 pics of a pair of JBL L80T's that needed new surrounds and I also sanded and refinished the cabs.... If I can do it ANY ONE CAN..... I wish I had the patients to slow down and not rush things.... But that is the differance between a 10/10 job and 8/10 job.
 

Attachments

  • JBL 1.jpg
    JBL 1.jpg
    40.1 KB · Views: 70
  • jbl 6.jpg
    jbl 6.jpg
    53 KB · Views: 83
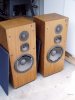
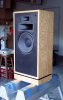
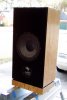
FINISHED :banana: :banana: :banana: :banana:

Give myself an 8/10... Every project I do I learn a little more and find out what NOT to do next time:)

Red Oak veneer with clear Watco Danish oil and 5 or 6 coats of wipe on poly, lightly sanded between coats...

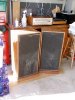
First pic is a BEFORE... and the rest are this afternoon ....
 

Attachments

  • before1.jpg
    before1.jpg
    114 KB · Views: 76
  • finished1.jpg
    finished1.jpg
    75.4 KB · Views: 47
  • finished2.jpg
    finished2.jpg
    59.6 KB · Views: 43
  • finished3.jpg
    finished3.jpg
    78.4 KB · Views: 41
  • finished4.jpg
    finished4.jpg
    118.2 KB · Views: 93
  • finished5.jpg
    finished5.jpg
    117.7 KB · Views: 105
TY Bolly.... Still have a looooooong way to get as good as some on the site... Most likely I never will... I am always in a rush and push myself to do too much too soon:) 8/10 may be my optimum level of veneering skill:)
 
I'm not sure which is worse... OMI getting a pair of broke down Forte's for $20, or him turning them into outstandingly beautiful speakers that work. deal vs. result, deal vs. result... Tough choice!

Outstanding thread OMI!
 
OMI said:
TY Bolly.... Still have a looooooong way to get as good as some on the site... Most likely I never will... I am always in a rush and push myself to do too much too soon:) 8/10 may be my optimum level of veneering skill:)
So now are they coming out of the garage? They look great!
 
Vint Age,

Will have to make room first... I am waaaaaaay behind on my LP cleaning, so I now have to get that caught up and the room cleaned up. Then the grand move from the garage into the music room:)...
 
Back
Top Bottom