• The move to the new server is done. There are some software and database maintenance updates in process. This has us passing the hat around to help out. We appreciate any donations. Seriously, even a dollar helps. The payment page may be found here - https://www.audiokarma.org/support.html

Lenco / PTP Solid12 turntable

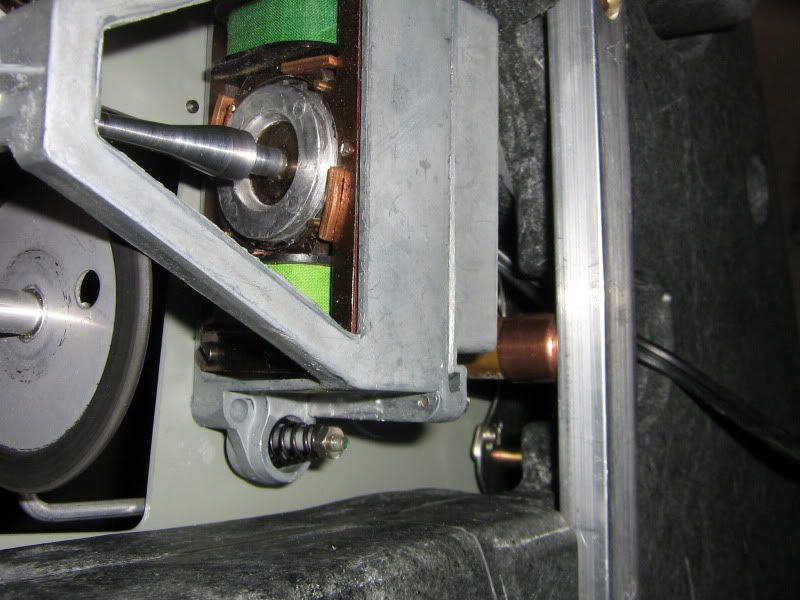
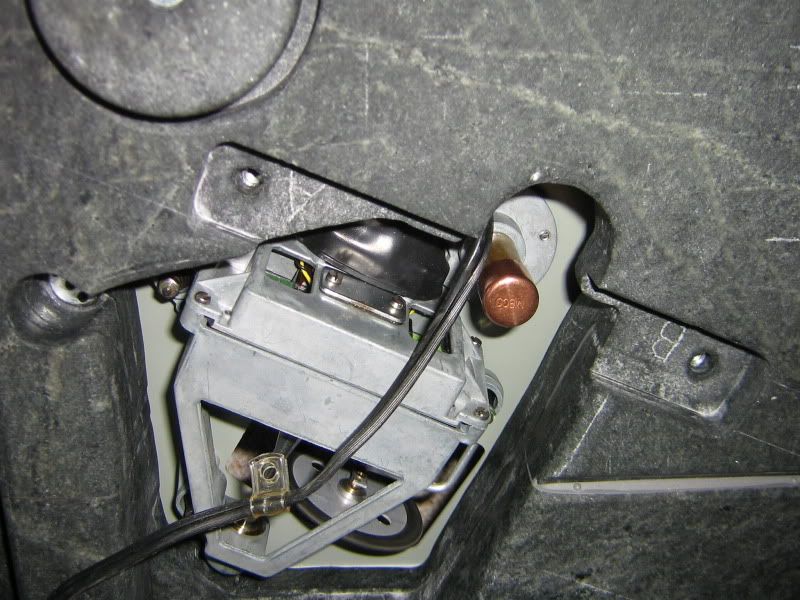
Wow, that's fantastic. Very clever to use a micro switch to shut off and a pin in the top plate to move the idler. I'm definitely inspired to have a go at copying your work. Why did it require a different cutout in the plinth as compared to the standard template?
 
Wow, that's fantastic. Very clever to use a micro switch to shut off and a pin in the top plate to move the idler. I'm definitely inspired to have a go at copying your work. Why did it require a different cutout in the plinth as compared to the standard template?
Because the standard cutout doesn't support the motor plate.
 
I've just checked my box of Lenco parts and find that I need an idler arm and platter. Any suggestions for a good source?
 
I'd note that one reason the PTP was developed was supposed to be that the original Lenco top plate was not sufficiently thick. It seems to me (and this not borne out by anything except my intuition) that minimizing the area of the thin top plate and securely clamping what remains to a high mass plinth should work as well as the PTP in reducing effects of the 'thin' plate. Can anybody think of a reason why that might not be so?
 
I did a top plate cut-away similar to Bobs, without doing the motor isolation, with an L75. I just screwed the pan to the second plinth layer, as suggested at lencoheaven. I felt that it was an effective modification for both eliminating the top plate flex/resonance, and, for controlling the bearing movement. I used the plinth plan schematic from over at LH, and thought it to be a great solution.

I also did a bearing brace on a deck that had an even thinner gauge top plate. It was a light platter deck in its original life form (now converted to a heavy platter deck). I really liked the top plate design though, as it had really wide radius corners, and I didn't want to alter it, or cut it.
IMG_1175JPG.jpg

IMG_1171JPG.jpg

IMG_1173JPG.jpg

This bearing brace fits so snugly that there is no chance of lateral movement. And, I swear that its strong enough that you can stand on the platter, and rotate at your chosen speed without flexing the top plate.
 
Last edited:
The thinner gauge top plate is not so much a factor if supported properly. You see on my motor cut out the weird shape is because I wanted to maximize how much of it lays on the plinth. You will also notice I have 6 screws holding it down firmly to the plinth. I also agree with Mike that the bearing has to be supported. You will see on my plinth there's 2 layers of plywood built into the plinth that the bearing rest on for support.

Also you will notice the circle on the bottom where the bearing sits in tight to stop lateral movement. Then on the top plate I made a 1/4" Aluminum Disc that sandwiches the top plate between the bearing and the Aluminum Disc to stop flexing. Plus add 7 more screws to secure the top plate to the plinth. So bottom line if done properly the stock top plate works just fine.
 

Attachments

  • bobs 133.JPG
    bobs 133.JPG
    58.1 KB · Views: 27
  • switch 008.JPG
    switch 008.JPG
    57.4 KB · Views: 27
When I built my high mass plinth (pics of which used to be here but are now seemingly lost forever after the site upgrade) I added a brace directly under the motor to which I can attach a clamp for the bottom of the bearing. I had a phone conversation with Jeremy (the guy who is/was selling a custom bearing over at LH) and came away thinking this would be a cheap, easy thing to do. Now I don't recall if I ever got around to putting a clamp on the bearing, and I am loath to move the TT to find out.

BTW as long as we are discussing Lencos, I'd add that replacing the spring that holds the idler wheel arm in place with some dental floss and a fishing line weight actually made an audible difference. Details over at LH.
 
i got the first gen PTP a number of years ago, along with a nice L78, fully intending to follow through with a build. i even had a Linn Ittok arm to go with. i bodged it up, removing the stock arm and put the Linn in, and set it up on the stock plinth. i ran it that way for a while, but my limited skills, limited wood working, etc inhibited my progress up to the next level of complete disassembly and substitution of the PTP and the heavy custom plinth. i sold off the stock headshell. so now i have what is essentially a pile of parts, a hunk of unrealized possibility while my two Technics tables get daily exercise. i'd love to finish, but don't even know where to start. and yes, i've been on and off Lencoheaven for years

 
i got the first gen PTP a number of years ago, along with a nice L78, fully intending to follow through with a build. i even had a Linn Ittok arm to go with. i bodged it up, removing the stock arm and put the Linn in, and set it up on the stock plinth. i ran it that way for a while, but my limited skills, limited wood working, etc inhibited my progress up to the next level of complete disassembly and substitution of the PTP and the heavy custom plinth. i sold off the stock headshell. so now i have what is essentially a pile of parts, a hunk of unrealized possibility while my two Technics tables get daily exercise. i'd love to finish, but don't even know where to start. and yes, i've been on and off Lencoheaven for years
Wow! That's to bad you couldn't finish it because you would have ended up with a killer TT.
 
I'd start by finding a copy of the PTP layered plinth template, and have it printed at Kinkos or some place that does oversized prints.
 
I'd start by finding a copy of the PTP layered plinth template, and have it printed at Kinkos or some place that does oversized prints.
Also on ebay a guy from Moldova sells some nice plinths for cheap even after paying for shipping. If you can't build a plinth then look in to buying.
 
Back
Top Bottom