• The move to the new server is done. There are some software and database maintenance updates in process. This has us passing the hat around to help out. We appreciate any donations. Seriously, even a dollar helps. The payment page may be found here - https://www.audiokarma.org/support.html

Lokerola’s Cerwin Vega VS-120 cabinet refresh and veneer project

lokerola

AK Subscriber
Subscriber
This will be a multi part post on the refresh of my Cerwin Vega VS-120 speakers. It’s almost 100% dedicated to the cabinets and my attempts to make them look good. There’s not much happening in the way of electronics; the crossovers were left alone and the woofers were re-foamed when I bought them. There’s a change to the tweeters, but you’ll have to read through to the end to see what I changed.

I am not a professional by any means, and most woodworking pros would have a good chuckle about my misadventures in carpentry. But there’s a happy ending despite my fool’s errand. So read on if you’re so inclined!

Phase 1 - The Cerwin Vega’s arrive.

I bought these big three way Cerwin Vega VS-120’s off of the List of Craig about two years ago. They sounded really good in my open, reflective living room.

But there were problems.

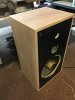
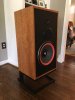
They were ugly. Wife hating ugly. And I admit she was right. The walnut vinyl veneer was truly fugly. It just looked plasticty. But they sounded good. Rock was great, but wait, what’s that? Jazz sounded good too? Sinatra, Davis, and Brubeck sounded good through these speakers. Yes they can RAWK!, but they can play some jazz too. Hmm...I was really liking these Cerwin Vegas. The tweeters could be a little harsh, so maybe a change was needed there - but in general, I really liked these big boys.

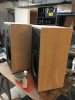
They also needed to be raised up about a foot and slightly tilted back to sound their best in my living room. I played around with a few cheap homemade speaker stands and while I could get them sounding even better- they got even uglier with the homemade stands.

All the corners were a bit beat; none of them had held a sharp edge in many years. The screw holes in the MDF for the crossovers, mids, and tweeters were loose. They weren’t stripped out, but they had seen tighter days.

So, ugliness won out over sound. They went to the basement while I put some EPI 100’s in the living room. The EPI’s are beautiful with their walnut wood veneer, and they sound sweet too. But - they are no substitute for big, stately, three way speakers with 12” woofers

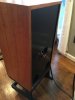
vs120-orig.jpeg
 
Last edited:
Register to hide this ad
Phase 2 - The beginnings of an idea. And total failure.


I saw the thread from @KrautNotRice on his listening space. And in post #148 of this thread, he posted pictures of some beautiful ADS L520’s that he veneered with cherry. Hmm….an idea was starting to form. Veneering the VS-120’s with cherry would certainly make them look a hundred times better than the old brown vinyl covering.


http://audiokarma.org/forums/index....w-listening-space.738382/page-8#post-11723807


From the brief reading I did on removing old vinyl, the general consensus seemed to be to first remove the old vinyl with a heat gun and scraper, then sand the MDF, and finally apply the veneer on top of the stripped MDF.

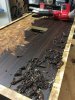
So I broke out a heat gun and scraper. And I failed. Failed miserably! I spent three evenings with the heat gun and putty knife - heat and scrape, heat and scrape, heat and scrape. Half inch by quarter inch by eighth of an inch. That old vinyl was NOT coming off. It had literally melded like a Vulcan mind meld to the MDF. I scraped the vinyl off the bottom and part of the back of one of the speakers before I gave up in disgust and frustration.

I have to admit - the speakers were disassembled and the electronics were in an old cardboard box. One cabinet was partially mauled by my heat gun antics, and the second cabinet was looking forlorn and, well, ready for the trash heap.

I shoved everything into the corner for a few weeks and pondered my next steps.

After screwing up the courage to start reading about veneer again, there were folks who were applying veneer on top of vinyl. There were naysayers of course; the bond will fail and everything will fall apart, the new veneer won’t stick properly, etc. But I was encouraged by the endless results of searching pinterest for amatuer veneer projects. And of course drinking some Guinness beer. About three pints into the dark mysteries of draft beer and I said “What the heck - let’s veneer over vinyl!” And that’s what I did…….but first…...

cv strip 1.jpeg

IMG_0331.JPG

IMG_0330.JPG
 
Phase 3 - Dowels and putty. The ugly intensifies


I mentioned the loose screw holes for the crossover, mids, and tweeters, right? I could not, in good faith to myself, not fix all those loosey goosey holes that were almost stripped out.

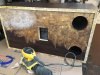
So I got a handful of dowel rods and drilled out the crossover, tweeter, and mid screw holes and filled them in with dowels and wood glue. After hacking them down I used copious amounts of wood putty to fill in the hammer and saw gouges, I felt enough good to move forward. To veneer? No, not yet Padawan.

IMG_0362.JPG

IMG_0363.JPG


IMG_0374.JPG
 
Phase 4 - Paint


Looking again at @KrautnotRice’s ADS speakers, he painted the front of the speakers black. I was looking at the profile of the VS-120’s, and at first I wanted to veneer all sides, front and back; but there was no way with my amateur skills that I could tackle the complex small veneer inserts required to veneer the whole shebang. So I decided to paint the front and the back of the cabinets black.


I got the crummy base knocked off of the second cabinet and bought a pair of the best tools ever invented for working on big boxes - lazy susan’s. These low profile little gems let me spin the speakers and fling paint everywhere - I mean carefully apply painters tape and paint the cabinets.


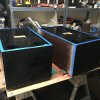
I wasn’t sure how to best paint over the vinyl. I decided to go with a three layer approach that was probably overkill. First layer was primer (2 coats), next layer was Rustoleum flat black paint (2 coats), and the last layer was satin poly (three coats). I was disappointed that the poly was more glossy than I was anticipating. So I broke out the flat black and re-painted the fronts flat on top of the poly. I now have like, 6 layers of paint and primer on the fronts. So much for a quick paint job! The still glossy backs will be out of sight, and while they don’t look bad, mildly glossy black paint is not the norm for speakers. Rack one up for the amateur!


After a lot of taping, priming, painting, polying, and throwing away foam brushes, the paint part was done. At least until the next steps when I had to sand the veneered edges, and invariably the sanding cut into my paint job - so there was a lot of paint touch up. Rack one up for the amateur!

CV-primer-2.jpeg

CV-pimer-1.jpeg

IMG_0380.JPG IMG_0388.JPG IMG_0518.JPG
 
Phase 5 - Edge banding


I bought cherry veneer edge banding and a 4x8 sheet of paper backed veneer from JSO wood products - again referencing @KrautnotRice’s post. The veneer arrived in perfect condition. And of course I mis-measured and didn’t order enough edge banding, so I ordered more and waited. After another week I finally had enough veneer and had collected enough miscellaneous tools and buckets of chemicals (mineral spirits, contact cement, beer, etc,) that my basement was starting to look like a bad imitation of Lowes. Yes, I said basement, no shop for me.


The edge banding frightened me. It seemed both too fragile to cut and at the same time too thick to cut precisely. I wanted to cut the veneer at 45 degree angles for the corners, but it seemed way too intimidating for me to try. So I decided just to do butt edges on the rear of the first cabinet. The iron was hot and the veneer went on successfully. I didn’t break anything, kill any household pets, or drop a hot iron on myself - success! Initial success gave me confidence to look into the best way to cut 45 degree angles in edge banding.


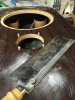
A night on the Tube of You provided some answers. The idea was to start ironing on the band from the center, and work your way out towards the edges, but don’t iron the last 1-2”. Then you stop, go to the next piece, and again start in the middle, and don’t iron down the edge. You’ll end up with 2 loose, overlapping pieces at the edge. Grab a straight edge ruler and SHARP utility knife, screw up your courage, put down the beer, and lay the straight edge across the overlapping veneer and cut through both pieces without breaking anything or slipping the angle. I tried it and it pretty much worked. I had a few edges that were not 100% as tight as I wanted, but frankly, they turned out OK. Rack one up for the amateur!

IMG_0683.JPG

IMG_0685.JPG

corner.jpeg

IMG_0687.JPG
 
Phase 5.1 - Nooooooooo! More failure


I was picking up cabinet number one to move it to the floor to put cabinet number two up on the saw horses. When “IT” happened. My hand slipped and the 50 pound cabinet with the new cherry edge band slipped out of my hands, dropped to the floor, and smashed right on the new corner with the edge banding. Smash, crack, boom!


We’ll just leave it at this (turn up your volume):

https://theuselessweb.site/nooooooooooooooo/


After a few choice words, and perhaps a tear, I applied a big hunk of wood putty in vain hopes of getting it patched up pretty quickly. But as a few folks here pointed out, wood putty was not a good choice for that size repair. That needed something stronger than putty. Bring on the Bondo! Between Bondo, saw dust, and 2 big ugly cabinets, the WAF factor in the basement was dropping. Like a hot rock in a hot rock dropping contest.


Anyway, After some sanding, I got the corner mostly patched up and a patch piece of edge banding glued back on. Since it’s the back of the cabinet, I’m not going to go crazy making it look perfect. If it were the front I’d be pulling it off and redoing the whole side. But hey, it’s the back and who the hell cares besides me and the dog? Rack one up for the amateur!

IMG_0720.JPG

IMG_0723.JPG


IMG_0726.JPG

IMG_0756.JPG
 
Phase 6 - Whereas I cut wood with scissors


Now it was time.

Time to truly see where my n00b woodworking skillz would take me. It was time to measure, cut, glue, and apply the paper backed veneer. Let me say that this is nice, high quality stuff. 10 mil, paper backed grade A cherry veneer. What could possibly go wrong?

The experts say to cut a piece of the veneer just barely bigger than the size of the cabinet. You don’t want too much overhang because you have to press the hell out of the veneer and if there are large overhangs, you can break the veneer, or crack it at one of the edges. No pressure Mr. “Amateur measure fives times and still screw it up!”

So I measured twice. And wrote it down. And measured one more time. And I cut the veneer. It’s thin enough you can cut it with scissors, and that’s what I did. I was sweating bullets the first cut. The veneer ain't’ cheap, and while I can always order more, I didn’t want to order more. It came out just fine. Whew! Rack one up for the amateur!

I thought Bondo smelled bad. LOL! Wait until you smell contact cement. I had the door open and respirator on, but man that stuff stinks! The glue went on just fine with a short nap roller, and using another tip from the pros, I layed dowels on the glued-up cabinet and gently laid the veneer on the dowels. That let me align the veneer as close as possible (i.e. don’t drink beer and eyeball it). Then you pull the middle dowel out, press the veneer down onto to the center of the cabinet and work your way out to the edges, removing dowels as you go. By God it worked.

Next up, the most expensive and complex tool used during this project. A 1x4 with a rounded over edge. You’re supposed to press the hell out of the veneer in alternating directions with a veneer scraper. Or a rounded over spare piece of wood. Don’t use a j-roller or empty Guinness beer can. Not enough pressure to seat the veneer properly.

After the veneer is properly pressed down like your life depends on it, you get to bring out the big guns. A power tool. One that has the potential to destroy all your work in short order. The router. The only router I have is a big boy Bosch. No trim router for me. I threw on a flush cut bit, reminded myself to go counter clockwise, and then disaster struck! No, just kidding, the router part went fine. I knocked off the overhang then hand sanded down the edges.

IMG_0728.JPG

IMG_0747.JPG

IMG_0784.JPG

IMG_0748.JPG

IMG_0749.JPG
 
Phase 7 - Holy frijoles - this is actually looking nice and not like the rough pine box I built in seventh grade shop class


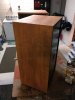
I got the rest of the sides on one cabinet and holy smokes. Or holy frijoles, if you like Mexican food. It actually looks good.

Then I did the unthinkable. I called my wife down and asked for her opinion. I know, I know, crazy talk. I held my breath for a few seconds, then she said “I like it. It looks good. You should build a woodshop down here”. I immediately declared success and started searching pinterest for “small basement woodshop”.

After coming to my senses, I got back to work on cabinet two. I’ll skip the details on cabinet two as it was more of the same; measure, pray, cut, glue up veneer, press with stick, route edges, etc. It also came out looking good.

IMG_0758.JPG

IMG_0759.JPG

IMG_0763.JPG

IMG_0751.JPG
 
Phase 8 - Paint touch up and the Great Danes


I spent some time touching up the paint and poly where it had been sanded down, and moved on to finishing the cherry. There are as many ways to finish wood as there isles in Lowes. Lots. After much back and forth, I decided on the traditional Whale oil finish. Just kidding! I went with Danish oil.


Here’s how the final finishing went. Sand, sand some more, then apply the oil. Wait 24 hours, more oil, wait, wet sand with oil and 600 grit sandpaper, build a trebuchet (just kidding, wanted to make sure you were still with me,) and after days and days of wondering why you didn’t go into architecture as an undergrad, you get to apply poly finish. Now, many of you pros will say “Danish Oil is it’s own topping”. Yes, true - you can leave it with only the Danish Oil. But frankly, I didn’t really like how it looked, and I knew these would end up in the living room where my teenage son would be wandering through with soft drinks and my wife would be wandering through with glasses of wine. Danish Oil is not known for it’s protection against liquids. So I applied 3 coats of wipe on satin poly. And the Danish Oil-Wipe One Poly combo? It looks very good and I feel better about wandering liquids.


Dammit if these are looking like real cabinets, whoo hoo!

IMG_0808.JPG

IMG_0817.JPG

IMG_0846.JPG
 
Phase 9 - Woofers and mids and tweeters, oh my.


Do yourself a favor, please. If you’re going to disassemble something, take picture of it. I didn’t take pics of the speaker connections when I took these damn things apart and I couldn’t figure out how to reconnect the wires. I was staring blankly at the schematic, when it hit me. The crossovers each have the T/M/W (tweeter, mid, woofer) marked + and - on each each wire. Yes, a self-documenting system, whew!


I crazy-glued one of the cracked crossover edges back together, I drilled out new holes in my fancy patch dowels, and installed the crossovers in the cabinets. One of the spade connectors was missing from the mid wires, so I ordered a pack of 50 from parts-express and attached it (anyone want 49 spade connectors)? I also ordered some new fuses, since those were missing from the crossovers.


You probably noticed the felt and foam on the inside of the cabinets and thought to yourself “Self, in all the years of inspecting Cerwin Vega speakers, I don’t remember there being any lining in them?”. And you would be right. I was fiddling with adding lining to them back when they were in the living room in their fugly infancy. And I liked how the lining tightened up the bass. No, I didn’t use any fancy-schmacy tools to measure sound, I just went by ear. So the lining stays.


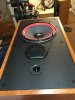
Then the mids went in and now we finally get to the story of the tweeters. The VS120’s didn’t come with L pads installed, and the factory tweeters were, well, hot. A little too harsh and bright for me. I wanted to test out a replacement tweeter, so the pros at parts-express recommended a Peerless by Tymphany (formerly Vifa) 1” soft dome tweeter. I ordered 2 of them before I started this whole mess and tried them out. They were great! Efficient, loud, yet still smoother than the originals - they are a great go-to for making these speakers sound even better. In went the Vifa’s.

cv tweeter install.jpeg

cv woofer install.jpeg
 
Phase 10 - From woodworker to tailor


The grills on these old speakers had me a bit worried. The plastic frames were in good shape, but cloth was beat, and the frames were an odd shape, jutting out at an angle. I knew I wanted to put new cloth on them, but much like the veneer work - this was my first time tackling such a project. There was a hidden danger with attempting this as well. I’m kind of known as “Pigpen” from Peanuts. The poor kid who always has a cloud of dust around him. I seem to attract dirt, paint, and grease wherever I go. Where there’s a project, I’m covered in the left over detritus of the project. If I take a mid day break to go to 7-11 for a beverage, I look like a homeless guy, scruffy, covered in dirt with paint on my face. And all I did was a load of laundry.


And here I was - facing down fancy new CLEAN cloth that I had to measure, cut, and NOT GET GLUE on. Really?! I can sand veneer if I screw it up. I can’t sand cloth if I get glue on it! I almost called my wife for help. But of course valor and stupidity got the best of me and I decided to try it myself.


I had new black cloth and special glue from simplyspeakers. I watched their video on how to recover grills. I washed. I showered. I set up an isolated bubble and donned a chemical suit. Well, OK I washed my hands and cleared off the kitchen island. But it FELT like bubble prep!


And I did OK. I didn’t screw them up. The logos were a little tricky to get uninstalled and snapped back in, but overall, the grills came out nice. Rack one up for the clean amateurcv grill 1.jpeg

cv grill 2.jpeg

cv grill 4.jpeg
 
Phase 11 - Get those bodies off the floor


So now what, you ask? You’ve fixed up these awesome cabinets, but you forgot the bases! Fear not intrepid readers, for I had foresight into this many moons ago. This was not a cheap solution, but I brought in the pros.


I called Deer Creek Audio for custom stands. I actually called them months ago when the original, fugly iteration of the cabinets were in my living room. I didn’t tell you I ordered these a long time ago, but why spoil the surprise?


Deer Creek took my measurements and crafted up an awesome set of speaker stands. If you go to the link below, my custom stands are listed on their website at the bottom of their page. I feel like an imposter having my lowly Cerwin Vega stands listed there alongside stands for JBL, Infinity, and Klipsch, but every dog has its day.


https://deercreekaudio.com/p/custom-stands


I broke these stands out of deep freeze storage, and we carefully moved the speakers out of the basement into the light of day. AHHHHHH! Now we’re cooking.

cv lr 3.jpeg
 
Phase 12 - Done!


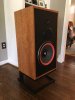
What can I say? They’re done, installed on the custom stands, and rocking the house! I love how they turned out, the wife loves how they turned out, the dog just wants to go for a walk, but what’s an amateur to do?

How do they look? Great? How do they sound? Like Cerwin Vega three way RAWK speakers with new tweeters. Great!

Thanks to everyone who read this long-ass thread and who provided help and guidance along the way. And thanks again to @KrautNotRice for the inspiration.

cv done 1.jpeg

cv done 2.jpeg

cv done done.jpeg

cv lr 1.jpeg

cv lr2.jpeg

cv lr 3.jpeg
 
Man they turned out KILLER!!!! Awesome work.
Love the stands as well, really sets it off. Looks like you upgraded the inputs posts as well, that's always a nice touch.
 
Man they turned out KILLER!!!! Awesome work.
Love the stands as well, really sets it off. Looks like you upgraded the inputs posts as well, that's always a nice touch.

Thanks man! Yea, I'm very happy with how they turned out. There were times during the project when I came close to throwing in the towel and throwing them in the dumpster. But I'm glad I stuck with it.

Your ADS project was really the inspiration, so thanks!

Actually the input posts are the stock ones - I think the new cables I used have longer banana plugs, so they look a little different.

It's nice to sit back and enjoy them, rather than have to go to the basement and spend hours sanding them, lol!
 
Looks so good.....

There’s good money to be made doing that.

Thanks! I don't know about good money. I spent sooo much time tweaking, redoing paint, sanding, etc, it certainly couldn't be a profitable venture with all the labor required.

Might be a fun thing to when I retire though.
 
Back
Top Bottom