• The move to the new server is done. There are some software and database maintenance updates in process. This has us passing the hat around to help out. We appreciate any donations. Seriously, even a dollar helps. The payment page may be found here - https://www.audiokarma.org/support.html

Lokerola's EPI M400 Restore

lokerola

AK Subscriber
Subscriber
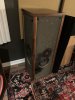
This thread is to document the restore of my EPI M400 speakers. The is going to be a bit of a "resto-mod" with a replacement of the crossover and all drivers with new ones from human speakers.

Why new drivers, you ask? Well, three of the woofers are blown and I know how good the new drivers from human are since I restored a pair of M100's using human's drivers. The new tweeters have more extension and are smoother than the 40 year old original tweeters.

Does this make sense financially? No. But a full driver & crossover replacement will cost as much as a pair of new Wharfedale Linton's or KLH Model 5's. And I'm a fan of the EPI house sound, so why not (don't answer that, it's a rhetorical question, LOL).

Specs on the original M400's:
Dimensions: 38" x 14" x 14"
Weight: 90 lbs
Response: 28 to 18k Hz
RMS Power: 30 to 200 watts (conservative rating)
Impedance: 8 ohms
MSRP: 800.00
Built: 1973

Yep, these are 90lbs each. Heavy MDF cabinets with bracing on the inside and walnut and brass on the outside. Even though 3 out of 8 woofers were blown, they put still out out excellent, tight, bass.

EPI glued the 4 grills on from the factory and there's a lot of old glue to remove. There are also a lot of brads on the face of the MDF that need to be hammered flat. My plan is to sink all the brads, fill all holes with putty, sand the faces smooth, and repaint the faces satin black. The grills will be reattached with velcro.

This is probably going to take me a month to get both cabinet faces all prepped and painted.

The walnut veneer is in decent shape. There's no loose veneer, but it has a lot of minor wear, tear, and scratches from 40 years of use. My plan is to use steel wool to apply Restore A Finish, and top it with wax. I'm not going for a 100% perfect veneer restore. A bit of patina is kind of cool.

Here's the start of the disassembly and prep work.

Bonus operational woofer looking for a walk at the end of pics below!

speaker1-1.jpg

speaker1-2.jpg

speaker1-3.jpg

woofer2.jpg
 
Last edited:
Register to hide this ad
A couple of things

A) looking forward to the document process
B) What looks like a "Giant" hanging in the background looks cool, hopefully it rides as well as it looks
C) Dogs rule!!!! and make sure the "Woofer" gets a good walk
 
A couple of things

A) looking forward to the document process
B) What looks like a "Giant" hanging in the background looks cool, hopefully it rides as well as it looks
C) Dogs rule!!!! and make sure the "Woofer" gets a good walk

Thanks! Yea, the Giant is a Defy Advanced. Mostly Shimano 105, but with an Ultegra crankset. It rides great. Unfortunately my right knee has been giving me problems, so I've been off the bike recently. :(
 
Painting has started on 2 sides of speaker 1. I'll need to clean up the edges a bit after everything dries, but it's looking OK. I used satin black oil based paint. Again, I'm not going for perfect.

What the speakers look like before the resto work - lots of exposed brads, hardened glue, fading paint, and old velcro:
erpires4.jpg

Painting progress:

epires2.jpg

epires3.jpg

epires1.jpg
 
Those speakers are shaping up mighty fine.

I use flat black paint on my baffles. It is amazing how fresh black paint covers up imperfections and improves the look of speakers.
 
Nice job so far. I love the simplicity of EPI speakers. I also love the walnut/brass of those. Much like a pair of M150s I restored as you are. Rumor has it that those cabinets were manufactured by a coffin maker.
 
Those speakers are shaping up mighty fine.

I use flat black paint on my baffles. It is amazing how fresh black paint covers up imperfections and improves the look of speakers.

Thanks, yea I'm starting to think I might switch to flat black paint. As you said, it should hide imperfections better.

Nice job so far. I love the simplicity of EPI speakers. I also love the walnut/brass of those. Much like a pair of M150s I restored as you are. Rumor has it that those cabinets were manufactured by a coffin maker.

Thanks, I've heard that as well about the coffin makers. They're darn near as heavy as a coffin! Maybe if I'm cremated they can put my ashes in them and bury me in the speakers. OK, that was morbid. Never mind, LOL!
 
Thanks, yea I'm starting to think I might switch to flat black paint. As you said, it should hide imperfections better.

The satin finish on yours look OK to me. Generally, you won't be looking at the baffles from an angle so the slight sheen won't be as apparent.

Thanks, I've heard that as well about the coffin makers. They're darn near as heavy as a coffin! Maybe if I'm cremated they can put my ashes in them and bury me in the speakers. OK, that was morbid. Never mind, LOL!

Please don't put your ashes in that beautiful cabinet. :eek: I live close enough to Virginia that I may want to buy them from your estate. o_O
 
Found a few more brads, hammered them down, put on some spackling compound, sanded, painted again, and done. Two of eight sides painted.

I think I'll stick with the satin black. It has more protection than flat black against fingerprints and that sort of thing, while not being too glossy.

epires-6.jpg
 
I will be watching this renewal. Looks great so far. I have always loved the Epicure “modular” approach. When done I think you will really be impressed. Not many better in their day.
 
Those horrible Callins capacitors...! I hate seeing them in vintage speakers. It's amazing how many brands used them, from that time period. I'm truly glad you're replacing them.

Oh, great work so far...! :D

Ha! Yea, these EPI's are a conundrum. Parts of of these speakers are well made, high-quality components. The original woofers and tweeters are pretty amazing. The outer parts of the cabinets (i.e. the walnut, brass, and underlying MDF) are well made. But there are other parts that feel, well, 1973 hippy-dippy quality. The caps, the cheesy spring loaded speaker connections, the whack-a-doodle brad and nail construction on the faces.

But....and here's the big but....even being 50 years old (50!) with original components and three blown woofers - these damn things rock. I guess it's all hail the acoustic suspension design. I can't wait until I get to put these back together with upgraded components.
 
Speaker one refinish done. It has a much lower serial number on the crossover than the second speaker. The first speaker is in the sub-1000 range and the second one is in the 3000's. The first was one was better built, that's for sure. The screws were straighter in the holes, the brads were more neatly nailed in, and there was more insulation inside the cabinet. The caps are also different between the two crossovers.

Speaker one on the left and speaker two on the right. The restored cabinet is a good 3-footer, meaning it looks great at about 3 feet. Once you get close you can see a lot of imperfections. But it's a lot better than the unrestored speaker!

Also, I've got to sell some speakers - the room is filling up!
spkr3.jpg

Crossover removal. No screws - so The Hammer comes out!
sprk2-2.jpg

A lot of the old Masonite is starting to crumble around the screws. This one had a fourth screw randomly screwed in. Made on a Friday after a Happy Hour lunch perhaps?
sprk2-6.jpg

Whacky caps.
spkr2-1.jpg

View of the inside of the cabinet from the empty crossover hole.
sprk2-3.jpg
 
For the crumbling masonite, you may want to try Minwax Wood Hardener. I use it for strengthening crumbling particle board and MDF, particularly around driver mounting holes. It is really thin and soaks in well. It is surprising how much can soak into that old material.
 
"operational woofer".... my favorite part of this post.

this project came out awesome. when i recapped my 100's, i attached the new cap pair (2 4.7's to replace the single 10uf) to the terminal side lead of the installed cap, then wired to the tweeter, then cut the existing cap lead to the tweeter. minimally invasive. i see now, in the future. no screws = hammer.
 
Ha! Yea, these EPI's are a conundrum. Parts of of these speakers are well made, high-quality components. The original woofers and tweeters are pretty amazing. The outer parts of the cabinets (i.e. the walnut, brass, and underlying MDF) are well made. But there are other parts that feel, well, 1973 hippy-dippy quality. The caps, the cheesy spring loaded speaker connections, the whack-a-doodle brad and nail construction on the faces.

But....and here's the big but....even being 50 years old (50!) with original components and three blown woofers - these damn things rock. I guess it's all hail the acoustic suspension design. I can't wait until I get to put these back together with upgraded components.
I got to listen to mine before purchasing. All foams gone, original everything. They sounded really good, as they were. Can't wait to get them back to full strength. There definitely is a bunch of awesome mixed with weird wonky on these things. I really can't understand the glue and nails on the grills? planning on recessing some magnets instead.

Thanks again for making this thread!. Took all the guess work out of my future project.
 
Back
Top Bottom