• The move to the new server is done. There are some software and database maintenance updates in process. This has us passing the hat around to help out. We appreciate any donations. Seriously, even a dollar helps. The payment page may be found here - https://www.audiokarma.org/support.html

LT 30 Resurrection - Tone Arm Wiring

JStiks

New Member
Hopefully someone may know how to remove the head shell connector to allow access to wiring. I have everything in order but changing these wires. Original owner removed The mute switch plus didn’t leave enough line in place. I removed the 2 small screws but no luck on movement... Please help! By the way if anyone has a mute switch love to acquire....

LT 30 Mitsubishi turntable
 
Register to hide this ad
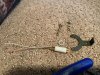
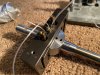
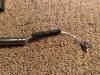
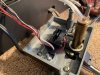
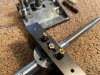
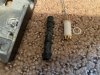
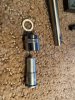
Thanks! I really needed to see how to remove this Headshell connector, but it wasn't on that thread. I watched a similar removal and realized I wasn't pulling enough. I will have to see if anyone sells the connector, though it works I noticed one pin doesn't spring back far enough. All wires replaced, TA completley refurbished, and the sound is awesome! I will attach photo's of parts and pieces for those willing to take on a tedious task for the good of vinyl!

I was able to work around the existing ground so once the connector was off, removed insulating rubber, threaded fishline through, pulled new line through with insulating rubber, and reconnected connector (Cleaned). the rest was puting the TA together making sure the tracking servo was back in place and no wires were pinched as it was placed into the main base. Obviously a lot more to it, but time on hand worth it.

Now for finding a muting switch... Hmm
 

Attachments

  • L Bracket for Tracking Servo TA.jpg
    L Bracket for Tracking Servo TA.jpg
    135 KB · Views: 29
  • New ToneArm Wiring Base.jpg
    New ToneArm Wiring Base.jpg
    103.9 KB · Views: 31
  • New ToneArm Wiring.jpg
    New ToneArm Wiring.jpg
    172.5 KB · Views: 28
  • New Wiring Top Tonearm.jpg
    New Wiring Top Tonearm.jpg
    103.5 KB · Views: 31
  • Fish Line to  secure Wiring.jpg
    Fish Line to secure Wiring.jpg
    99.2 KB · Views: 28
  • Fishline to secure wiring.jpg
    Fishline to secure wiring.jpg
    124.8 KB · Views: 27
  • Headshel l Connector.jpg
    Headshel l Connector.jpg
    108.6 KB · Views: 28
  • Headshell Connector 2.jpg
    Headshell Connector 2.jpg
    79.7 KB · Views: 27
  • LT 30 Tracking Servo.jpg
    LT 30 Tracking Servo.jpg
    105.6 KB · Views: 28
I had removed mine to replace damaged wire, thot it was in the thread. The OEM wire is excellent and should be left alone if its it's good.
 
Thanks! I really needed to see how to remove this Headshell connector, but it wasn't on that thread. I watched a similar removal and realized I wasn't pulling enough. I will have to see if anyone sells the connector, though it works I noticed one pin doesn't spring back far enough. All wires replaced, TA completley refurbished, and the sound is awesome! I will attach photo's of parts and pieces for those willing to take on a tedious task for the good of vinyl!

I was able to work around the existing ground so once the connector was off, removed insulating rubber, threaded fishline through, pulled new line through with insulating rubber, and reconnected connector (Cleaned). the rest was puting the TA together making sure the tracking servo was back in place and no wires were pinched as it was placed into the main base. Obviously a lot more to it, but time on hand worth it.

Now for finding a muting switch... Hmm
The procedure you used is similar to mine, the muting switch may be a common type.
 
Well almost 100%. the wire had to be changed since the original owner removed the muting switch and the existing wire was cut back to close to the pivot. All good though, used the silver wire thicker gauge, worth it since the effort still had to be made. I will probably use a connection board I have from a luxman parts piece. it wont mute but keeps the wire where it needs to terminate. Thanks!
 
Had one other issue which was well coverred by the resource thread on AK.
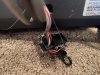
https://audiokarma.org/forums/index.php?threads/mitsubishi-lt-30-restoration.298682/ A bulb for the size sensor went out. I replaced all 3 on lamp pc board . Pictures for referrence plus PDF with lamps for replacement. Now we should be good! I purchased the lamps through Bulbtown.com. I received the lamps and a 10% discount card code. It's in the pictures as well!

By the way, the holder has a notch for the board and needs to go in place before you solder. I learned hard way. I removed bulb, fit it in holder, then respolderred with board in place. (I purchased enough bulbs to replace all, in case). Bulbs are inexpensive...

Love the vinyl and the play!
 

Attachments

  • Mitsubishi LT-30 Lamps.pdf
    Mitsubishi LT-30 Lamps.pdf
    420.2 KB · Views: 5
  • BulbsWiredLampPCBoard.jpg
    BulbsWiredLampPCBoard.jpg
    124.4 KB · Views: 16
  • BulbTown Coupon.jpg
    BulbTown Coupon.jpg
    134.7 KB · Views: 14
  • LampPCBoard.jpg
    LampPCBoard.jpg
    98.2 KB · Views: 14
Left channel is out on the LT-30 I just finished doing an overhaul on. I have to dive in and hope it is not non repairable a broken wire. Hate to go through all that to replace!!
 
How did/best way to extract the rubber stopper in the arm? Headshell side with a knot or is it possible to push out from counter balance side? Once I do some continuity tests, I will know where problem lies. I HATE soldering and working with those tiny cartridge wires!
 
How did/best way to extract the rubber stopper in the arm? Headshell side with a knot or is it possible to push out from counter balance side? Once I do some continuity tests, I will know where problem lies. I HATE soldering and working with those tiny cartridge wires!
I had a pinched wire in mine that required disassembly and replacement, pix in the big LT-30 thread. Iirc, I used a small lathroscopic forceps to remove the damper plug.
 
I saw those. Those forceps would be very handy in all kinds of situations, but I have just regular locking forceps. If the plug is just past the end of the headshell mounting plug, then it should be easy to pull it out with fine LONG needlenose or forceps?
 
I got lucky. I found the real cause before I went and unnecessarily replaced the TA wiring. The spring loaded headshell receiver was the issue. They were not making good contact. Deoxit on a Q-tip and exercise the spring loaded contacts a few times and both channels are perfect.
 
Back
Top Bottom