


David_NC
Super Member
I really enjoy my R-115 and have used it regularly in a secondary system since switching to separates in my main setup. In particular, it sounds great with ADS L780/2's. The 780's don't have the best low bass response, so I use a subwoofer with this setup. The issue is that the R-115 doesn't have pre-out / main-in jacks like the R-117; instead, it has two sets of preamp outputs. I use an external crossover and amp with this sub, so using a speaker level sub connection isn't possible, and I like to remove that low bass from the main speakers when using a sub, and simply using the pre outs wasn't doing that.


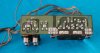
(R-117 on left, R-115 on right)
Interestingly, the 115 routes it's preamp and main amp wiring to the jack board, just like the 117 does; it has a couple internal connections in different locations and is lacking the third pair of RCA jacks.


First, I unplugged the preamp from the board and use another preamp's output to drive the 115's amps to verify that it would work as I planned. Looking over the preamp output board and poking around on with with a multimeter confirmed that I'd need to change the board a bit. I'd need to sever the traces where the purple circles are and run a jumper between the other two points as indicated by the purple line.
This was easy but fairly tedious. I used a utility knife to cut the traces and then used a burr tip in a Dremel to remove them. This was much more time-consuming on the Luxman board than on the trashed PC power supply board I tested this 'technique' on first; the Luxman board's traces are much heavier, and the board is far more substantial than the test power supply's board. For some reason, I forgot to take a pic of the board after I modified it, but it's basically like this:

The jumper is actually on the top side of the board but connects to the same points. I used a very small drill bit in a low speed battery powered screwdriver to enlarge the holes in the board where the jack and plug are attached. After placing the jumper and re-soldering the connections, I tested it with a meter... ugh, continuity on the Right main-in jack. It took a bit of time to see the tiny bit of solder that was grounding one of the connections, but that was easily resolved.
After getting everything reinstalled, it was time to test. It works perfectly and is easily reversible, if desired. I really like being able to use the high-pass output of my crossover now, and this setup sounds even better with this configuration. To finish it up, I'll label the jacks with a white on black P-Touch label eventually. Hopefully, this all will be of use to another R-115 owner!
(R-117 on left, R-115 on right)
Interestingly, the 115 routes it's preamp and main amp wiring to the jack board, just like the 117 does; it has a couple internal connections in different locations and is lacking the third pair of RCA jacks.
First, I unplugged the preamp from the board and use another preamp's output to drive the 115's amps to verify that it would work as I planned. Looking over the preamp output board and poking around on with with a multimeter confirmed that I'd need to change the board a bit. I'd need to sever the traces where the purple circles are and run a jumper between the other two points as indicated by the purple line.
This was easy but fairly tedious. I used a utility knife to cut the traces and then used a burr tip in a Dremel to remove them. This was much more time-consuming on the Luxman board than on the trashed PC power supply board I tested this 'technique' on first; the Luxman board's traces are much heavier, and the board is far more substantial than the test power supply's board. For some reason, I forgot to take a pic of the board after I modified it, but it's basically like this:
The jumper is actually on the top side of the board but connects to the same points. I used a very small drill bit in a low speed battery powered screwdriver to enlarge the holes in the board where the jack and plug are attached. After placing the jumper and re-soldering the connections, I tested it with a meter... ugh, continuity on the Right main-in jack. It took a bit of time to see the tiny bit of solder that was grounding one of the connections, but that was easily resolved.
After getting everything reinstalled, it was time to test. It works perfectly and is easily reversible, if desired. I really like being able to use the high-pass output of my crossover now, and this setup sounds even better with this configuration. To finish it up, I'll label the jacks with a white on black P-Touch label eventually. Hopefully, this all will be of use to another R-115 owner!
Last edited:


