• The move to the new server is done. There are some software and database maintenance updates in process. This has us passing the hat around to help out. We appreciate any donations. Seriously, even a dollar helps. The payment page may be found here - https://www.audiokarma.org/support.html

Magnavox 8804: A build thread in many parts

Fury161

Never Stop Learning
Subscriber
I enjoyed building my 8600 so much that I've been on the lookout for the next victim and recently came across an 8804 for a price i couldn't pass up. So, following the guidance of the always brilliant Mr. Dave, I've started working on this beauty. I figured I'd memorialize in a separate thread so anyone can see what I've done and learn from it (and likely learn more from my mistakes... haha).

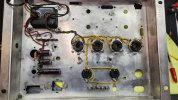
To start with, this is how she showed up:

20250609_162739.jpg

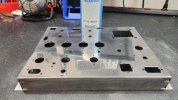
Pretty good but oh lordy, did it stink of cigarette smoke. It was like a wave when I opened the box. After humming a hawing for a few days, I decided I wanted to do a reflective surface (inspired by Dynaco amps). I did my 8600 that way but made the decision late in the process when the build had started. That was a PITA so I decided to strip the chassis down to scratch and start fresh. (I also like to build things up from nothing when I can it forces me to really lean in and learn.)
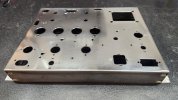
20250615_092401.jpg

After a few hours of hand sanding and some Mother's aluminum polish. Not quite the reflective surface I was hoping for but not bad. I realized later that I should have started with a lower grit and used the orbital sander on it, at least to start with. I'll remember that for the next one.

20250615_145840.jpg

Transformer had a few chips and some start of surface rust so it got a fresh coat of flat black. Here it is reinstalled with the sockets back in as well. Going to use Dave's suggestion of SS rectification.

20250615_145852.jpg

And the heater wiring going in. I have a bunch of 12ax7's here so I'm going to re-wire it for those.


Next steps:

- OPT have been ordered from MPS, should have those in early June
- Mouser order should be here by Wednesday
- Like the last build, I'm going to bring the PS caps under the chassis. I just don't like the look of the can caps, especially not right in front and I have the right nichicons aleady.
- Probably going to skip the pilot light on this build, I find it obtrusive on the 8600 even with the brightness dialed down. You can tell when the amp is on anyways..
- figure out what I want to do to cover the unused holes in the chassis. I have a few ideas swirling, nothing solid - yet.


Finally, a picture of the (mostly) finished 8600. Apropos of nothing, I just like this photo.

20250606_093000.jpg
 
Register to hide this ad
Pretty good but oh lordy, did it stink of cigarette smoke.
Yuck!
I decided to strip the chassis down to scratch and start fresh. (I also like to build things up from nothing when I can it forces me to really lean in and learn.)
Starting fresh is a fantastic idea.
After a few hours of hand sanding and some Mother's aluminum polish.
Its not Aluminum its steel!
Steel is magnetic.

View attachment 3530122


Next steps:

- OPT have been ordered from MPS, should have those in early June

- figure out what I want to do to cover the unused holes in the chassis. I have a few ideas swirling, nothing solid - yet.
This should be at the top of the list and is why i chose to interject.

Finally, a picture of the (mostly) finished 8600. Apropos of nothing, I just like this photo.

View attachment 3530141
You do good work and you have a nice listening space. I think you should seriously consider building a new chassis for your magnavox.
Between the holes left from the factory and the modifications that you intend to do, you're going to have a lot of holes to patch only to end up with an amplifier thats full of patches. I suggest, before you get any further along, stop, buy a new Aluminum chassis from Bud or Hammond or Par metals.

Then once you've finished you'll have something nice instead of something thats full of patches.

Ditching the can cap, swapping output transformers and moving the power supply reservoir underneath is going to require chassis building tools so why not go ahead and start with a blank canvas to make your art on?

It will look way better, and your Mothers Mag and Aluminum polish will actually shine it up to a mirror finish.
Polished aluminum looks way better than anything you could plate or paint steel with...
 
Nice work on the chassis. :thumbsup:
Can I ask why since you removed the sockets you re-installed those phenolic 9 pin sockets? After all these years they tend to be rather brittle and crack easily.
 
Yuck!

Starting fresh is a fantastic idea.

Its not Aluminum its steel!
Steel is magnetic.


This should be at the top of the list and is why i chose to interject.


You do good work and you have a nice listening space. I think you should seriously consider building a new chassis for your magnavox.
Between the holes left from the factory and the modifications that you intend to do, you're going to have a lot of holes to patch only to end up with an amplifier thats full of patches. I suggest, before you get any further along, stop, buy a new Aluminum chassis from Bud or Hammond or Par metals.

Then once you've finished you'll have something nice instead of something thats full of patches.

Ditching the can cap, swapping output transformers and moving the power supply reservoir underneath is going to require chassis building tools so why not go ahead and start with a blank canvas to make your art on?

It will look way better, and your Mothers Mag and Aluminum polish will actually shine it up to a mirror finish.
Polished aluminum looks way better than anything you could plate or paint steel with...

Thanks for the comments, friend.

The Mother's does a pretty nice job of cleaning it up, the metal mismatch notwithstanding.

It's a good idea switching to a new chassis. I know it would be easier. IDK, I guess it felt like it was moving too far away from the original, if that makes sense. I like it to be a bit of an homage to where it came from but with some new flourishes. Maybe I'm clinging too hard to that idea since the only thing really left stock is the power transformer and sockets. I'll definitely think about the new chassis though and shop around.

I appreciate the perspective.
 
Nice work on the chassis. :thumbsup:
Can I ask why since you removed the sockets you re-installed those phenolic 9 pin sockets? After all these years they tend to be rather brittle and crack easily.

Thanks! I kept the best two and they were actually in prety decent shape so I just tossed them back in.
 
Dang it!

It's beautiful. Why's it got to be $250 though...
Skip the wood and the price will drop a zero.


Consider this:
When you hire someone with technical skills that person gets paid well, on an hourly basis. Often in excess of $100 per hour. As one of em i can say we honestly live to do this stuff.

By the time you're done you may have 50 to 100 hours in a project like this.


If you pay yourself half what a pro makes ($50 per hour)
And you only bill out half of your hours.
Say 50 of em.

Thats $2500 worth of you that goes into a build.
The most expensive part is the labor and its the part that cant be bought because it contains within it the artistic abilities of the builder, their years of experience and a fortune worth of tools.

Value yourself as a professional and realize in dollars what your labor is worth and the chassis expense is minimal compared with your labor.

I fully realize that none of this puts the dough in your pockets, im just suggesting a new way of looking at what you're doing...
 
Last edited:
Skip the wood and the price will drop a zero.


Consider this:
When you hire someone with technical skills that person gets paid well, on an hourly basis. Often in excess of $100 per hour. As one of em i can say we honestly live to do this stuff.

By the time you're done you may have 50 to 100 hours in a project like this.


If you pay yourself half what a pro makes ($50 per hour)
And you only bill out half of your hours.
Say 50 of em.

Thats $2500 worth of you that goes into a build.
The most expensive part is the labor and its the part that cant be bought because it contains within it the artistic abilities of the builder, their years of experience and a fortune worth of tools.

Value yourself as a professional and realize in dollars what your labor is worth and the chassis expense is minimal compared with your labor.

I fully realize that none of this puts the dough in your pockets, im just suggesting a new way of looking at what you're doing...


Again, very good points and good perspective. I don't hesitate to drop the extra coin to do something right for anyone else. Why not vice-versa?

The wood sure is pretty .... haha
 
Nice work on the chassis. :thumbsup:
Can I ask why since you removed the sockets you re-installed those phenolic 9 pin sockets? After all these years they tend to be rather brittle and crack easily.

Would you care to take a guess as to why my 9300 is currently out of commission?
 
Would you care to take a guess as to why my 9300 is currently out of commission?
Those sockets are so dried out and brittle. It doesn't take much for a crack to appear just plugging a tube into one. Then some of the pin contacts can wind up touching. Not good.
 
Those sockets are so dried out and brittle. It doesn't take much for a crack to appear just plugging a tube into one. Then some of the pin contacts can wind up touching. Not good.
and that would be exactly what happened.

Its on the list, just haven't quite gotten there yet. I spent some time on much longer-idled projects and got them sorted out. Honestly if I had the sockets on hand I'd have probably fixed it by now, its basically an evening of work but I haven't bought the sockets so there hasn't been a random "hey, I'll go fix that" evening.
 
and that would be exactly what happened.

Its on the list, just haven't quite gotten there yet. I spent some time on much longer-idled projects and got them sorted out. Honestly if I had the sockets on hand I'd have probably fixed it by now, its basically an evening of work but I haven't bought the sockets so there hasn't been a random "hey, I'll go fix that" evening.
ya, I get it. I still have a amp to fi ish and a couple other pieces of equipment that needs a little work. Nothing big, its jus5 finding enough time to do it. Especially now that the weather is better, lots of outside projects to get to.
 
Parts are still dragging thanks to Mouser so I had a bit more time today so I gave the chassis another shot at polishing, this time with more power tools. Pretty happy with it. Much better than before. Not pefect but that's as much metal polishing as I want to do. So there it is.

I also decided to stay with the stock chassis for this build. Even though this is a resto-mod, I still want it to feel like a Maggie. My next build will be all custom from scratch so I'll use a new chassis then. The new OPT's will cover the holes behind the 6v6 pretty well and the choke is going to go where the rectifier tube was. So that really only leaves a couple gaps to fill. I have a few ideas but I decided this morning I'm not going to fret over it too bad, it's okay if it doesn't look brand new.

20250618_170625.jpg

And I bought some new 9 pin sockets for the 12AX7's
 
Finally got my Mouser order in and found a few hours to reassemble and start on the power supply

1000007258.jpg
New power cord and upgraded 9 pin sockets

1000007256.jpg

Still working through the logistics of where everything needs to go. I should probably settle on a switch too.

Tomorrow finish the 275 line, finish painting the choke and install it. Start wiring the 12ax7's if there's enough time.
 
I used a toggle switch in the hole the hum pot shaft goes through.
I don't remember if I had to use a step bit to enlarge it or not, but thats where I put it in both 175 amps I had. There are some nice short shaft toggle switches with a round bead at the and that look nice.
I used one in my sweep tube amp build too.
 

Attachments

  • 20201129_172201.jpg
    20201129_172201.jpg
    67.9 KB · Views: 25
Back
Top Bottom