• The move to the new server is done. There are some software and database maintenance updates in process. This has us passing the hat around to help out. We appreciate any donations. Seriously, even a dollar helps. The payment page may be found here - https://www.audiokarma.org/support.html

Marantz 300DC Basket Case

tarior

Dirty pool, old man?
Subscriber
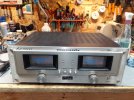
Here is a basket case Marantz 300DC amp that someone gave me years (decades?) ago because they couldn't make it work. Almost all of the wiring and connectors in it were corroded and/or broken, along with a lot of the components on the driver boards and the meter/protection board were also corroded. I rewired it and replaced all the connectors with new Molex connectors. I don't even want to talk about how long this took.
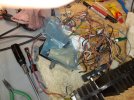
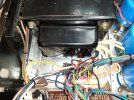
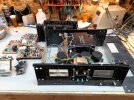
What I started with. I repainted the worst part of the chassis that was all rusty. I bought some stuff on ebay, like the rear panel.
20250305_121240.jpg
What was left of the wiring.
20250305_121247.jpg
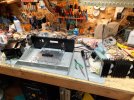
Bare chassis.
20250305_121253.jpg
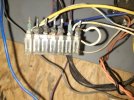
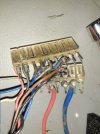
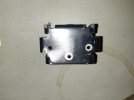
Headers all crusty and breaking apart.
20250305_161346.jpg
Crusty corroded wires.
20250305_161353.jpg
20250306_180205.jpg
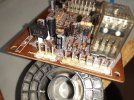
Corroded resistors. Interestingly, they all tested good. Some of the diodes and transistors were corroded as well.
20250310_154326.jpg
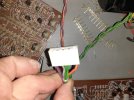
New Molex connectors.
20250305_193941.jpg
Rebuilt protection/meter drive board with new Molex headers.
20250305_163446.jpg

To be continued...
 
Register to hide this ad
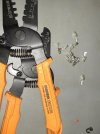
Crimp tools for the new connectors. The shells and terminals come separately.
20250305_194022.jpg
All new signal wires and almost all internal wiring was replaced. I even had to go into the transformer and lengthen some of its output wires to get them to reach the new bridge rectifiers and the ground busses.
20250307_162658.jpg
Mogami goodness.
20250307_162858.jpg
New bridges, EMI suppression caps, and wires. The old speaker output wires were corroded, so I used some nice OFC 16 guage wire that I had laying around.
20250307_162754.jpg
20250309_211854.jpg
There are a hell of a lot of wires in this unit, considering that it's just a power amp. Even from the factory, the wiring wasn't especially tidy. Making it all look nice is challenging.
20250309_211902.jpg
20250309_211908.jpg
The heat sinks for the drivers had burrs at the screw holes that would hold the new drivers/pre drivers away from the metal. A few swipes with a file took care of that.
For drivers, I used 2SC4883A/A1859A. For pre drivers (if you wanna call 'em that) I used 2SA1209/C2911. The originals tested good, but I was leary of them just the same as this amp showed a lot of signs of being ridden hard and put away wet. I also replaced the mismatched incorrect outputs (2N5067/2N6246. No, really!) with MJ21193/94.
20250312_131218.jpg
All corroded components replaced. Q706, 707,708, 710 were replaced with TTA004B, Q709 with TTC004B. Q718 31V zener was severely corroded and replaced with two 16V zeners in series. Q733 was physically broken and replaced with 1N4148, Q735 with 1N4004. Caps are the usual Nichicon PW/PS/HE. Resistors are whatever was in the parts bins. I only buy metal film and carbon film these days. DC offset trimmer is Bourns 3299.
20250312_203034.jpg

To be continued again...
 
Last edited:
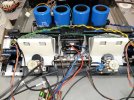
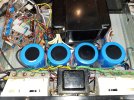
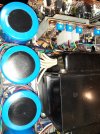
New ground busses and wiring to go with new filter caps. UCC 10,000uF, 100 Volt. Connections are crimped and soldered. Original wiring from the bridge rectifiers was 18 guage. Since it was crusty and corroded, it was replaced with twisted double runs of 20 gauge, equivalent to 17 gauge. A slight upgrade, and perfectly adequate.

20250313_192224.jpg
More shots of the internal wiring.
20250313_210251.jpg
20250313_210302.jpg
Many, many cable ties were used in this project.
20250313_192243.jpg
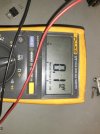
DC offset. Full disclosure; it doesn't quite hold this number perfectly, as it doesn't have a servo. It does stay within a mV or so of zero. It is very stable. :)
20250313_113944.jpg
On the bench cooling down after power testing. Clipping onset was at 42. something volts. Just shy of 220 watts. Clipping behavior at 10K and 20K was perfectly stable with no ringing or overshoot. Driving it at 20Hz, the protection circuit would open the relay at 38 volts or so, part of that may have been due to some spurious noise when adjusting my function generator. It seems to be working as designed.
At any frequency, the overload indicator lights would come on at about 37 volts output.
20250313_210347.jpg

I'm sure I have a better top cover around here somewhere, along with a pair of rack handles. As it turns out, I have almost enough pieces to put another one of these together...
But first, I think I need to clean up the giant mess I made working on this thing. BTW, I am aware that some pics show screws missing. They were taken during the process when boards were going in and out, populating the wiring and whatnot. Said fasteners have all been installed.
 
I have a 300DC coming in for restoration and this is, as always, fantastic content. Thank you for the pictures and description of your process - it's what makes AK unparalled.
 
I have a 300DC coming in for restoration and this is, as always, fantastic content. Thank you for the pictures and description of your process - it's what makes AK unparalled.
Thanks. I'm not quite as good at the whole pictorial/explanation thing as some of these guys, but I do what I can. I'm lucky to even make myself stop to take pics or write down notes.
 
So after all that, I have this leftover from the original unit and a parts unit I bought many years ago.
20250314_162505.jpg

A bent, crusty chassis, a good transformer, two heatsinks, two driver boards (one is missing a heatsink for the drivers), two regulated power supplies, one protection board, one f'ed up but repairable input board, one nice meter, one meter with a big scratch, and a rat's nest of wiring. Not sure, but think I have a bottom and top cover. Somewhere.
No face plate or meter level buttons. It's almost another amp... :idea:
 
I say go for it.
That scratch is likely removable. Sand the surface from 320-1500 grit with flat piece of a wooden block, then polish it with marine polish cream for gelcoat. Knobs no, but faceplate could be a bigger problem. It can be done anyway. You can buy pre anodized alu sheets and guys from some small workshop with laser cutting can do wonders. They can scan the measurements from the other unit and even engrave your lettering if you want to. I would sure go with black anodized one. Here in our country I can bet that the price for faceplate should not exceed 200 bucks.
For example... https://laserworksok.com ... They don t even have art fee If you have a good picture, but you have another faceplate that is even better. ;)
 
Last edited:
Wow, master tech level work there Arthur! I'm in awe of your knowledge, persistence and "do-it-right-ness". I have a 170DC on the way and then a 300DC from a fella for full resto, but I bet it's nothing this bad!!
 
Thanks Randy. It was a lot of work. I kinda I wish I had a matching preamp for it.
 
Very nice work. It came out great. Its better than factory. :thumbsup:
I had a similar box-0-mess sent to me. It was a 1060 integrated amp in pieces. Parts missing, wires cut boards pulled some wrong parts installed, bent face plate, missing solder eyes, etc. It was a mess. Not quite as bad as yours though. There wasn't any corrosion.
But it did take time to put it back together. I restored another one in much nicer shape at the same time. The restored mess went to one of my son's and has been trouble free for around 5 or so years.
If it were me I would start slowly collecting parts for that second one.
Make a list of what's needed and order a few bits every month.
 
Very nice work. It came out great. Its better than factory. :thumbsup:
I had a similar box-0-mess sent to me. It was a 1060 integrated amp in pieces. Parts missing, wires cut boards pulled some wrong parts installed, bent face plate, missing solder eyes, etc. It was a mess. Not quite as bad as yours though. There wasn't any corrosion.
But it did take time to put it back together. I restored another one in much nicer shape at the same time. The restored mess went to one of my son's and has been trouble free for around 5 or so years.
If it were me I would start slowly collecting parts for that second one.
Make a list of what's needed and order a few bits every month.
It's actually not missing much. It needs a face plate, one heatsink for the driver transistors, a top cover, and a bottom cover. I'm reasonably certain that I have a top and bottom cover somewhere around here. The scratched meter I think is fixable.
I kinda tinkered with it last night. The unregulated supply, protection board, and both regulated supplies are functional. I also got one amp channel working. The other has a short that I haven't tracked down yet.
 
Great work! I hope you took the opportunity to use longer wires to make it easier to service. I did with mine and used thicker gauge wire as well. These are wonderful sounding amps.
 
Great work! I hope you took the opportunity to use longer wires to make it easier to service. I did with mine and used thicker gauge wire as well. These are wonderful sounding amps.
I did make it to where one could get the amp modules out far enough to be able to unplug them a little easier. Same for the protection board.
 
Back
Top Bottom