• The move to the new server is done. There are some software and database maintenance updates in process. This has us passing the hat around to help out. We appreciate any donations. Seriously, even a dollar helps. The payment page may be found here - https://www.audiokarma.org/support.html

Marantz 6100 Turntable Disassembly Help

odysseysys

New Member
Hello,

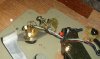
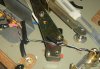
I need to disassemble a Marantz 6100 Turntable so that I can redo the veneer. I'm at the stage of taking off the tone arm/base and I’m not sure if there is a standard way to do this. My main problem is that there's no easy way to disconnect the tone arm wire. The second problem is that the hardware locking the tone arm and base is painted. I'm assuming this is some kind of setting. I just need some direction. Does anyone know this info or know of a link that describes this operation?

Thanks :thmbsp:

Dan
 

Attachments

  • Top.JPG
    Top.JPG
    46.2 KB · Views: 172
  • Bottom.JPG
    Bottom.JPG
    72.8 KB · Views: 163
  • Bottom2.JPG
    Bottom2.JPG
    82.5 KB · Views: 157
Register to hide this ad
Hi Odysseysys,

Welcome aboard Audio Karma!
Unsolder your tonearm wires at the tags (that 90 degree terminal block) making notes of which wire goes where when it’s time to resolder. You should be able to pull the tube with the wires out through the top of the tonearm stub – making sure you don’t lose that O-ring, which I suspect, slipped down off the stub. (It should be pretty apparent where it lives when you reassemble.)
Next – go ahead and loosen those painted hex bolts AFTER making two marks with a sharp felt tip – one around the stub where the auto return linkage meet and a second scribed vertically on the stub and crossing down onto the same linkage (forming a “t”). This will allow you to return the two-plane settings on this linkage.
Hopefully, you should be able to remove the stub and go about your veneer work.

Since you’ve gone ahead and removed the tube from the gimbled yoke, you should take the opportunity to clean and relube the bearings (alcohol/light machine oil). You might also consider rewiring the tonearm. I’m not much of big interconnect upgrade fanatic – but those thin 32Ags do tend to oxidize and degrade after 20 years or so and you might get some nice sonic improvements to match the looks of the finish work your planning.
 
Well...
The tonearm wire replacement is probably a stretch. But since Odysseysys has already gone this far, it might be worth his time "to go to school" on this so when that 6300 comes his way, he's ready to rocket.
 
I agree with Mopic, It's a good learning experience. He/she gets to perform a few different exercises many of us may take for granted after awhile.
1. Mechanical
2. Electronics/electrical
3. Woodworking
4. Patience
5. DIY Gratification
6. Organization, documentation, note taking, pictures, etc.

Welcome Ody,
We like seeing people's projects. :thmbsp:
 
Thank you

Thank you for the warm welcome and especially for the clear directions from Mopic5. I got the 6100 for free and I wanted to experiment on it before I refinish my 6300. On another topic, I fabricated four aluminum feet for my 6300. I don't how efficient they are concerning the transmission of vibration but I think they look better than the wood feet it came with. I machined them from aluminum stock and used the fasteners from the wood feet.:thmbsp:
 

Attachments

  • 6300.JPG
    6300.JPG
    47.4 KB · Views: 162
Back
Top Bottom