ForrestFire
New Member
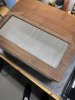
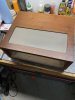
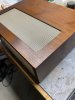
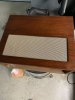
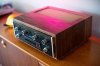
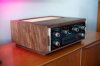
Recently I built myself a nice solid walnut McIntosh L12 case and since I am more of a visual person, I thought I'd document my experience here for those who might be interested in making one yourself.
Goal: To recreate a McIntosh L12 case but with solid walnut and a waterfall grain.
Difficulty: 5/10
Required tools:
Table saw
router table w/ flush trim templating bit, 45° chamfer bit with a 3/4in cut length, and rabbeting bit with 1/2in cutting height
Ratchet clamps
A good sander
So starting off, I was lucky to already have an L52 case I could use as reference for measurements. The top and bottom are 17in wide while the sides are 6 1/2in wide. Material is 3/4 in and depth is 14 1/4in.
I picked my boards from my local hardwood dealer and started by joining enough boards to give me over 50 inches in length.
After the glue dried, I took the time to do an initial sanding at 80 grit to remove the glue and flush up the seams.
Next, I cut my panels to their lengths, making sure to keep note of the grain for later. No waste cuts in between! This is crucial for the waterfall edge.
Once I had my rough boards, I took them to the router table. I found the best way to get a waterfall edge is using a large 45deg chamfer bit. Since I am dealing with end grain of a hardwood, I took my time taking off little by little in order to minimize blow out and really sneak up on a precise 45deg miter. I also used a trick I picked up from this video to support the guide bearing once it's higher than the material I'm cutting.
Next up came the most difficult step, the airflow cutouts.
I made myself templates out of 1/4in MDF and traced the outline of the cut outs. Used the jig saw to remove as close to my line as I could, then took it back to the router table w/ a templating bit.
Here's where I learned some major lessons. My first attempt was going well until I had to route the corners. For reasons I didn't learn until later, the workpiece kept kicking back while trying to route the corners. One time it did it with so much force that my workpiece went flying into the wall, causing the thin sections of the piece to break. Since I was going for a waterfall end grain, this meant I pretty much had to start the project over from scratch. It also turns out I used far too much double sided tape on my templates. I could not remove them without the template tearing at its thinnest section.

Second attempt, I learned that I needed to really sneak up on the corners. First by clearing all the straight lines then doing some climb cutting from one direction and then the other. All was good.
Next was to route out the rabbet where the mesh grate would sit. Again, since I am dealing with hardwood, I started off by cutting a 1/8in rabbet and decreased the bearing size over time to 1/4 in.
Frustratingly, the corners again caused problems. Kick back causing my top panel to explode into the wall.
3rd times a charm, right???
At this point I was quite frustrated and decided not to cut my miters until I had the air cut outs completed. Also, walnut is *expensive*, so I decided to reuse a bottom panel I had successfully routed and mitered to save on material. Waterfall grain doesn't matter on the underside.
Templating went fine and I was able to work my way up the bearing sizes to get a 1/4in rabbet for the top. Then came back to cut out the miters on the remaining work pieces.
After that, it seemed like it would be easiest to install the mesh grate before I glued the final piece together. I cut out the grate with a handheld grinder, spray painted it with some spray paint (Rust-oleum Sunlit brass, to be exact).
I made little 1/4in strips to hold the grate in place and glued it all down with some CA glue. McIntosh seemed to have preferred staples here, but CA glue definitely did the trick.

Time for a quick sanding @ 80 grit, then did a test fit.
All was square.
The glue up was fairly straight forward. I used the blue tape method to tape the seams together, applied glue in the joints, and folded over the box. A ratchet clamp is super handy here.
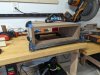
While the glue was drying, I went ahead and made the slanted legs. There's a decent thread here on the legs in case you're curious. I was able to cut out both legs with just 3 cuts like one of the users mentioned before. I started with a 12 x 4in stock of 3/4in walnut. I set my table saw to 30° and cut the first slant. Then I would scoot over the fence (I mostly eye balled it here), adjust my saw to 35° and would make the cut. That's one leg. Then like I did the first time, I would set the table saw to 30° and flipped the work piece around. I then used my first leg to match the width of the following cut. And just like that, 3 cuts, 2 legs. I was able to make 2 sets of legs + 1 extra with just the one 12 x 4in board.
after 24 hours, I proceeded to work the grits from 80 -> 120 -> 150 -> 180. Stopping at 120 on the bottom so I could install the legs. That itself was fairly easy, just made some layout marks 1 in away from the front and back and 1 1/2in away from the sides.
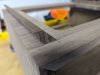
For finish, I prefer Rubio Monocoat. It's pricey but extremely easy to apply and dries fairly quickly. Despite it's name, I will say that Rubio works best with walnut when you buff after the first coat and apply a second coat 24 hours after. Here's an instructional video I referenced along with a photo of what it looks like after just a single coat.
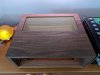
Now all that was left is to install the panlocs and put my McIntosh C29 into its new home.
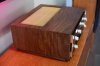


Lessons learned:
Label your pieces Front, left side, right side, bottom along with what is the finished side of your project.
Routing corners requires a lot of finesse. Take your time and route out as much on the longer grain as you can first.
Goal: To recreate a McIntosh L12 case but with solid walnut and a waterfall grain.
Difficulty: 5/10
Required tools:
Table saw
router table w/ flush trim templating bit, 45° chamfer bit with a 3/4in cut length, and rabbeting bit with 1/2in cutting height
Ratchet clamps
A good sander
So starting off, I was lucky to already have an L52 case I could use as reference for measurements. The top and bottom are 17in wide while the sides are 6 1/2in wide. Material is 3/4 in and depth is 14 1/4in.
I picked my boards from my local hardwood dealer and started by joining enough boards to give me over 50 inches in length.
After the glue dried, I took the time to do an initial sanding at 80 grit to remove the glue and flush up the seams.
Next, I cut my panels to their lengths, making sure to keep note of the grain for later. No waste cuts in between! This is crucial for the waterfall edge.
Once I had my rough boards, I took them to the router table. I found the best way to get a waterfall edge is using a large 45deg chamfer bit. Since I am dealing with end grain of a hardwood, I took my time taking off little by little in order to minimize blow out and really sneak up on a precise 45deg miter. I also used a trick I picked up from this video to support the guide bearing once it's higher than the material I'm cutting.
Next up came the most difficult step, the airflow cutouts.
I made myself templates out of 1/4in MDF and traced the outline of the cut outs. Used the jig saw to remove as close to my line as I could, then took it back to the router table w/ a templating bit.
Here's where I learned some major lessons. My first attempt was going well until I had to route the corners. For reasons I didn't learn until later, the workpiece kept kicking back while trying to route the corners. One time it did it with so much force that my workpiece went flying into the wall, causing the thin sections of the piece to break. Since I was going for a waterfall end grain, this meant I pretty much had to start the project over from scratch. It also turns out I used far too much double sided tape on my templates. I could not remove them without the template tearing at its thinnest section.
Second attempt, I learned that I needed to really sneak up on the corners. First by clearing all the straight lines then doing some climb cutting from one direction and then the other. All was good.
Next was to route out the rabbet where the mesh grate would sit. Again, since I am dealing with hardwood, I started off by cutting a 1/8in rabbet and decreased the bearing size over time to 1/4 in.
Frustratingly, the corners again caused problems. Kick back causing my top panel to explode into the wall.
3rd times a charm, right???
At this point I was quite frustrated and decided not to cut my miters until I had the air cut outs completed. Also, walnut is *expensive*, so I decided to reuse a bottom panel I had successfully routed and mitered to save on material. Waterfall grain doesn't matter on the underside.
Templating went fine and I was able to work my way up the bearing sizes to get a 1/4in rabbet for the top. Then came back to cut out the miters on the remaining work pieces.
After that, it seemed like it would be easiest to install the mesh grate before I glued the final piece together. I cut out the grate with a handheld grinder, spray painted it with some spray paint (Rust-oleum Sunlit brass, to be exact).
I made little 1/4in strips to hold the grate in place and glued it all down with some CA glue. McIntosh seemed to have preferred staples here, but CA glue definitely did the trick.
Time for a quick sanding @ 80 grit, then did a test fit.
All was square.
The glue up was fairly straight forward. I used the blue tape method to tape the seams together, applied glue in the joints, and folded over the box. A ratchet clamp is super handy here.
While the glue was drying, I went ahead and made the slanted legs. There's a decent thread here on the legs in case you're curious. I was able to cut out both legs with just 3 cuts like one of the users mentioned before. I started with a 12 x 4in stock of 3/4in walnut. I set my table saw to 30° and cut the first slant. Then I would scoot over the fence (I mostly eye balled it here), adjust my saw to 35° and would make the cut. That's one leg. Then like I did the first time, I would set the table saw to 30° and flipped the work piece around. I then used my first leg to match the width of the following cut. And just like that, 3 cuts, 2 legs. I was able to make 2 sets of legs + 1 extra with just the one 12 x 4in board.
after 24 hours, I proceeded to work the grits from 80 -> 120 -> 150 -> 180. Stopping at 120 on the bottom so I could install the legs. That itself was fairly easy, just made some layout marks 1 in away from the front and back and 1 1/2in away from the sides.
For finish, I prefer Rubio Monocoat. It's pricey but extremely easy to apply and dries fairly quickly. Despite it's name, I will say that Rubio works best with walnut when you buff after the first coat and apply a second coat 24 hours after. Here's an instructional video I referenced along with a photo of what it looks like after just a single coat.
Now all that was left is to install the panlocs and put my McIntosh C29 into its new home.
Lessons learned:
Label your pieces Front, left side, right side, bottom along with what is the finished side of your project.
Routing corners requires a lot of finesse. Take your time and route out as much on the longer grain as you can first.