

You are using an out of date browser. It may not display this or other websites correctly.
You should upgrade or use an alternative browser.
You should upgrade or use an alternative browser.
McIntosh MC-240 Restoration
- Thread starter wcarroll
- Start date

Made a bit more progress on the MC240 restoration this week: :thmbsp:
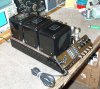
Went ahead and replaced all of the "bumble bee" capacitors on the main circuit board. Also, I was able to start riveting the tube sockets to the new chassis. Here are some pictures:


Changing these capacitors was way more difficult than it looks! Each lead passes through an eyelet and is then wrapped around a solder terminal and then soldered in place along with one or two resistors. To do this correctly, each of the resistor leads had to be desoldered and moved to get at the original capacitor leads. :sigh: I just don't like leaving pieces of the original leads in place when replacing these components. The new caps are much smaller physically than the originals--- thus, they fit on the board without touching or crowding each other. Having the circuit board out of the chassis surely made the cap replacement much easier. I'm sure the bottom terminals would have been very difficult to get to with the board assembled to the chassis.
The rivets are working out perfectly. Such a scary proposition at first, it now seems easy to rivet these things. I do have many more rivets to install, but it is nice to be assembling the parts onto the new chassis! :yes:
And now for a question... Do I really need to change the electrolytic can capacitors? I don't see any electrolyte leaking and there was no hum present in my initial testing of the amp.
Wes
Went ahead and replaced all of the "bumble bee" capacitors on the main circuit board. Also, I was able to start riveting the tube sockets to the new chassis. Here are some pictures:
Changing these capacitors was way more difficult than it looks! Each lead passes through an eyelet and is then wrapped around a solder terminal and then soldered in place along with one or two resistors. To do this correctly, each of the resistor leads had to be desoldered and moved to get at the original capacitor leads. :sigh: I just don't like leaving pieces of the original leads in place when replacing these components. The new caps are much smaller physically than the originals--- thus, they fit on the board without touching or crowding each other. Having the circuit board out of the chassis surely made the cap replacement much easier. I'm sure the bottom terminals would have been very difficult to get to with the board assembled to the chassis.
The rivets are working out perfectly. Such a scary proposition at first, it now seems easy to rivet these things. I do have many more rivets to install, but it is nice to be assembling the parts onto the new chassis! :yes:
And now for a question... Do I really need to change the electrolytic can capacitors? I don't see any electrolyte leaking and there was no hum present in my initial testing of the amp.
Wes

crooner
Tube Marantzed
Nice, neat work you are doing there!
As for the electrolytic cans, if hum is low or absent I'd leave them in for now. Be sure to use a variac or a light bulb in series with the AC to reform them before putting the unit back into service. I would energize the caps at a lower voltage for a few hours. This should extend their useful life.
If you end up needing replacements, there's an outfit called Zack Engineering (Vibroworld) that custom makes exact replacements. They use a shiny chrome plated material that's actually nicer than the originals. In the case of the MC240, the caps are underneath the chassis, so appearance is not really important.
However, the Vibroworld units are made with modern caps stuffed inside the cans, so reliability is much increased over the original Mallory FP capacitor technology.
I have no relation whatsoever with them. I'm just a happy customer, having restored a couple of tube amps using their custom cans.
As for the electrolytic cans, if hum is low or absent I'd leave them in for now. Be sure to use a variac or a light bulb in series with the AC to reform them before putting the unit back into service. I would energize the caps at a lower voltage for a few hours. This should extend their useful life.
If you end up needing replacements, there's an outfit called Zack Engineering (Vibroworld) that custom makes exact replacements. They use a shiny chrome plated material that's actually nicer than the originals. In the case of the MC240, the caps are underneath the chassis, so appearance is not really important.
However, the Vibroworld units are made with modern caps stuffed inside the cans, so reliability is much increased over the original Mallory FP capacitor technology.
I have no relation whatsoever with them. I'm just a happy customer, having restored a couple of tube amps using their custom cans.
wcarroll said:Made a bit more progress on the MC240 restoration this week: :thmbsp:
Went ahead and replaced all of the "bumble bee" capacitors on the main circuit board. Also, I was able to start riveting the tube sockets to the new chassis. Here are some pictures:
Changing these capacitors was way more difficult than it looks! Each lead passes through an eyelet and is then wrapped around a solder terminal and then soldered in place along with one or two resistors. To do this correctly, each of the resistor leads had to be desoldered and moved to get at the original capacitor leads. :sigh: I just don't like leaving pieces of the original leads in place when replacing these components. The new caps are much smaller physically than the originals--- thus, they fit on the board without touching or crowding each other. Having the circuit board out of the chassis surely made the cap replacement much easier. I'm sure the bottom terminals would have been very difficult to get to with the board assembled to the chassis.
The rivets are working out perfectly. Such a scary proposition at first, it now seems easy to rivet these things. I do have many more rivets to install, but it is nice to be assembling the parts onto the new chassis! :yes:
And now for a question... Do I really need to change the electrolytic can capacitors? I don't see any electrolyte leaking and there was no hum present in my initial testing of the amp.
Wes
Last edited:
Man that looks great Wes. Changing all those caps has always looked difficult to me. Well, maybe tedious is a better word for it. I just got some rivets today. Took a few practice whacks. That riveting part is going to be fun, I like hitting things. Anyway, your restoration looks great. Keep up the good work.

jcmjrt
Addicted Member
This is what I did (per TerryD recommendation). Worked great for me.
From tubesandmore.com (AES)
Main filters C-EC80-40-30-20-525 tie the 80/40/20 together for the 100+
section.
Doubler Capacitors C-EC200-150-350 tie the 200 and 150 together for a nice
stiff doubler supply, they are taller but fit, use duck tape to insulate the
hot one.
From tubesandmore.com (AES)
Main filters C-EC80-40-30-20-525 tie the 80/40/20 together for the 100+
section.
Doubler Capacitors C-EC200-150-350 tie the 200 and 150 together for a nice
stiff doubler supply, they are taller but fit, use duck tape to insulate the
hot one.
crooner
Tube Marantzed
Are those the newly manufactured caps by CE Engineering?
They look nice, but unfortunately I had one fail in a Stereo 70 amp. Given the MC240 uses a doubler supply and a soft start thermistor, they should be more reliable.
They look nice, but unfortunately I had one fail in a Stereo 70 amp. Given the MC240 uses a doubler supply and a soft start thermistor, they should be more reliable.
jcmjrt said:This is what I did (per TerryD recommendation). Worked great for me.
From tubesandmore.com (AES)
Main filters C-EC80-40-30-20-525 tie the 80/40/20 together for the 100+
section.
Doubler Capacitors C-EC200-150-350 tie the 200 and 150 together for a nice
stiff doubler supply, they are taller but fit, use duck tape to insulate the
hot one.
Last edited:

bigpoppapump
Active Member
Man O man , thanks for posting this. I look forward to watching the discussion everyday. You got to have a lot of confidence to try this and you guys make it look like a walk in the park. God speed.
crooner said:I also noticed the shiny brushed appearance of the metal underneath. Quite different from the duller cold-rolled steel McIntosh originally used. I am guessing this new chassis is rust resistant. Aluminum? :scratch2:
I'm guessing but if his reproduction chassis is similar to mine. It is in fact simply cold rolled steel that has been Chrome plated. McIntosh used Pre-plated Chrome plated steel. Evident from the dullness in the bends which is the chrome finish stretching and becoming less shiny. These reprodcutions are made from regular steel, the brushed surface you see on the inside is probably from the deburing machine which is like a big belt sander almost. The outside has to be hand polished to a very smooth finish or the chrome plating will not have the "mirror" look finish.
jcmjrt
Addicted Member
crooner said:Are those the newly manufactured caps by CE Engineering?
They look nice, but unfortunately I had one fail in a Stereo 70 amp. Given the MC240 uses a doubler supply and a soft start thermistor, they should be more reliable.
Yep, CE engineering. All I can say is I haven't had any issues and apparently Terry hasn't or he wouldn't have recommended them.
crooner
Tube Marantzed
Excellent explanation, thanks!
BTW, because of this restoration thread, I am considering doing the same. Perhaps get a rust bucket MC240 and use the new chassis. Sounds like fun! :thmbsp:
BTW, because of this restoration thread, I am considering doing the same. Perhaps get a rust bucket MC240 and use the new chassis. Sounds like fun! :thmbsp:
scott0527 said:I'm guessing but if his reproduction chassis is similar to mine. It is in fact simply cold rolled steel that has been Chrome plated. McIntosh used Pre-plated Chrome plated steel. Evident from the dullness in the bends which is the chrome finish stretching and becoming less shiny. These reprodcutions are made from regular steel, the brushed surface you see on the inside is probably from the deburing machine which is like a big belt sander almost. The outside has to be hand polished to a very smooth finish or the chrome plating will not have the "mirror" look finish.
Here's a question about chassis grounding:
My MC240 was originally the early version with the preamp power socket. The new repro chassis does not have provisions for this socket, so I am eliminating it. This preamp power socket had a solder terminal to provide chassis ground for several wires, including one from the input controls and one from the main circuit board. Can someone tell me where the chassis ground wires are connected on the later MC240 version? I've studied a few pictures found online, but am still unclear about where they go on the later MC240. Looks like there is another chassis ground on the terminal strip mounted near the first 12AX7A socket. Is this a good spot?
Watch for some updated pictures soon. There hasn't been much time to work on the amp lately, but started back on it tonight. :yes:
My MC240 was originally the early version with the preamp power socket. The new repro chassis does not have provisions for this socket, so I am eliminating it. This preamp power socket had a solder terminal to provide chassis ground for several wires, including one from the input controls and one from the main circuit board. Can someone tell me where the chassis ground wires are connected on the later MC240 version? I've studied a few pictures found online, but am still unclear about where they go on the later MC240. Looks like there is another chassis ground on the terminal strip mounted near the first 12AX7A socket. Is this a good spot?
Watch for some updated pictures soon. There hasn't been much time to work on the amp lately, but started back on it tonight. :yes:

I didn't try to save the RCA jacks from my original chassis... Looked impossible, plus they are not in good condition. I bought some Radio Shack 274-346 Phono Jacks which mount with a nut from inside the chassis:

Looks original from the outside. :thmbsp: They come four to a package, so you'll end up with three extras for the parts box.
Looks original from the outside. :thmbsp: They come four to a package, so you'll end up with three extras for the parts box.
Several of my grounds are attached to one of the screws that holds the speaker treminal strip on.
By the way, I have been secretly chugging away at my chassis transfer. All is going well. I've got one wire out of each output transformer that I didn't mark and can't figure out where the hell they go. I took a lot of detailed pictures too and damned if this wire is not in any of them! I'll have to post a picture.
By the way, I have been secretly chugging away at my chassis transfer. All is going well. I've got one wire out of each output transformer that I didn't mark and can't figure out where the hell they go. I took a lot of detailed pictures too and damned if this wire is not in any of them! I'll have to post a picture.

dewickt
Will fix about Anything
Wires missed on my last 240 swap, 2 that went to the old preamp socket from the power transformer are now unused 6.3V winding. Also missed the output transformer ground wires one from each transformer to the ground lug at the speaker terminal screw. No matter how carefull I tagged them I missed these 4 wires.