Laricc
Member
Alrighty, this is gonna be a long one.
I posted in the past regarding McIntosh ML-1Cs, hoping to find answers on how to replace the upper midrange and tweeters. The most information I could find on replacing these two drivers was from this post, along with getting some help from people in the comments.
tl;dr, I learned that morels were the way to go. From there, it would start the long journey to fix my ML-1Cs.
So to begin,
The morel speakers I used were the MOREL MDM 55, which I used for the upper midrange, and the MOREL MDT 22 for the tweeter.
After doing my own research, I hit my first roadblock, which was replacement caps. I ended up getting a lot of help from a friend who ended up helping me a great deal with finishing the speakers, both electrically and structurally.

Due to the MOREL drivers being only 8 ohms, it meant that the caps had to be replaced. In the process I ended up replacing the other caps as well to keep everything new.

Caps used, top to bottom.
Tweeter cap - 2 uF
Upper midrange cap - 8.2 uF
Woofer cap - 150 uF
Lower midrange cap - 12 uF
After that, I had to get to mounting the new upper midrange and tweeter. Sadly the original upper midrange was irregularly shaped, making it difficult to find a replacement. Thus I got some wood from a local store, 1/8 inch depth, and cut it into a strip. I glued it in place, and from there I punched out a hole with a drill press.

The next step was fixing the tweeter hole, which wasn't any easier. It required an MDF donut to mount properly, which once again required the drill press to accomplish. (Sadly I couldn't find any easier way to do this.)

After this, they were ready to be mounted.


(Grill mounted)
Once the upper midrange and tweeter were mounted, I refoam the midranges.
The lower midranges required an 8" surround. From there I learned one of the best methods I've seen to refoam a speaker. This was done by applying the surround to the cone first, letting it dry, and applying it to the basket last. This stops the cone from warping, and overall makes it an easier process. The glue I used was MI-3035, a glue made by simply speakers, and I just used a glue syringe to get better control.
(The woofer requires a 12" foam surround)

One thing I bought for both the woofer and lower midrange was some woofer sealant, which protects both fabric and foam surrounds and stops them from deteriorating.

(You can see it applied in these as it makes the surrounds more dark and glossy)
The final steps of this project were remounting the speakers and putting in new insulation.

I ended up using some EcoTouch PINK R-6.7 insulation, 3 rolls per cabinet.

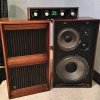
FINAL PRODUCT


I wasn't planning on making them look pretty...Their veneer was already scuffed when I got them.
Regardless, all I cared about was the sound. These by far are the best pair I got now.
-- Hope this helps anyone else who ends up in this situation!
I posted in the past regarding McIntosh ML-1Cs, hoping to find answers on how to replace the upper midrange and tweeters. The most information I could find on replacing these two drivers was from this post, along with getting some help from people in the comments.
tl;dr, I learned that morels were the way to go. From there, it would start the long journey to fix my ML-1Cs.
So to begin,
The morel speakers I used were the MOREL MDM 55, which I used for the upper midrange, and the MOREL MDT 22 for the tweeter.
After doing my own research, I hit my first roadblock, which was replacement caps. I ended up getting a lot of help from a friend who ended up helping me a great deal with finishing the speakers, both electrically and structurally.
Due to the MOREL drivers being only 8 ohms, it meant that the caps had to be replaced. In the process I ended up replacing the other caps as well to keep everything new.
Caps used, top to bottom.
Tweeter cap - 2 uF
Upper midrange cap - 8.2 uF
Woofer cap - 150 uF
Lower midrange cap - 12 uF
After that, I had to get to mounting the new upper midrange and tweeter. Sadly the original upper midrange was irregularly shaped, making it difficult to find a replacement. Thus I got some wood from a local store, 1/8 inch depth, and cut it into a strip. I glued it in place, and from there I punched out a hole with a drill press.
The next step was fixing the tweeter hole, which wasn't any easier. It required an MDF donut to mount properly, which once again required the drill press to accomplish. (Sadly I couldn't find any easier way to do this.)
After this, they were ready to be mounted.
(Grill mounted)
Once the upper midrange and tweeter were mounted, I refoam the midranges.
The lower midranges required an 8" surround. From there I learned one of the best methods I've seen to refoam a speaker. This was done by applying the surround to the cone first, letting it dry, and applying it to the basket last. This stops the cone from warping, and overall makes it an easier process. The glue I used was MI-3035, a glue made by simply speakers, and I just used a glue syringe to get better control.
(The woofer requires a 12" foam surround)
One thing I bought for both the woofer and lower midrange was some woofer sealant, which protects both fabric and foam surrounds and stops them from deteriorating.
(You can see it applied in these as it makes the surrounds more dark and glossy)
The final steps of this project were remounting the speakers and putting in new insulation.
I ended up using some EcoTouch PINK R-6.7 insulation, 3 rolls per cabinet.
FINAL PRODUCT
I wasn't planning on making them look pretty...Their veneer was already scuffed when I got them.
Regardless, all I cared about was the sound. These by far are the best pair I got now.
-- Hope this helps anyone else who ends up in this situation!