


tomdowns
New Member
Hi everyone,
So I came across a second set of XR3 speakers that had damaged tops. They where perfect for something I always wanted to try after reading on Roger Russel's site http://www.roger-russell.com regarding stacking the XR series speakers. I could not find any information regarding the stacking of these speakers and I found one picture of a XR5 that was stacked; I noticed that they had ran the speaker wire right off the back at the joining of the 2 speakers and I didn't like that. I decided that running the top speaker wire inside the bottom speaker would be cleaner. I didn't think passed how to terminate the wire at the base of the speakers; so I tailed it out until I decide a solution. So, if anyone has any recommendations on how to put a 2nd terminal block on the base; please feel free to let me know.
I have attached some pictures of the process.
1 remove X Over cover
2 remove X Over
3 Inside with X Over removed 1
4 Inside with X Over removed 2
Note that there are 4 1/4" head screws that need removed to remove top.
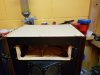
5 remove top.
I had to use a block of wood and a hammer to tap the top loose; it had been glued.
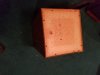
6 I drilled 2 holes for 1/4 20 screws and the speaker wire
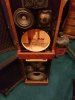
7 Inside view of Bolts (double Nuts) and back speaker hole
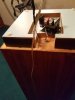
8 carefully drilled a hole in bottom and ran wire with coat hanger
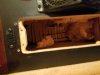
9 Pushed coat hanger up into top speaker
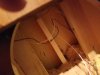
10 Coat Hanger in top speaker.
At this point I soldered the speaker wires together, shrink wrapped, used plumbers putty on any holes and put everything back together.
It took about 3 1/2 hours to complete; would have took less time if I knew what I was doing.
I hope this helps someone one day.
Regards,
Tom
So I came across a second set of XR3 speakers that had damaged tops. They where perfect for something I always wanted to try after reading on Roger Russel's site http://www.roger-russell.com regarding stacking the XR series speakers. I could not find any information regarding the stacking of these speakers and I found one picture of a XR5 that was stacked; I noticed that they had ran the speaker wire right off the back at the joining of the 2 speakers and I didn't like that. I decided that running the top speaker wire inside the bottom speaker would be cleaner. I didn't think passed how to terminate the wire at the base of the speakers; so I tailed it out until I decide a solution. So, if anyone has any recommendations on how to put a 2nd terminal block on the base; please feel free to let me know.
I have attached some pictures of the process.
1 remove X Over cover
2 remove X Over
3 Inside with X Over removed 1
4 Inside with X Over removed 2
Note that there are 4 1/4" head screws that need removed to remove top.
5 remove top.
I had to use a block of wood and a hammer to tap the top loose; it had been glued.
6 I drilled 2 holes for 1/4 20 screws and the speaker wire
7 Inside view of Bolts (double Nuts) and back speaker hole
8 carefully drilled a hole in bottom and ran wire with coat hanger
9 Pushed coat hanger up into top speaker
10 Coat Hanger in top speaker.
At this point I soldered the speaker wires together, shrink wrapped, used plumbers putty on any holes and put everything back together.
It took about 3 1/2 hours to complete; would have took less time if I knew what I was doing.
I hope this helps someone one day.
Regards,
Tom
Attachments
-
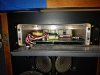 1 XR3 Xover.jpg102 KB · Views: 32
 -
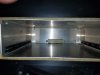 2 XR3 Xover removed.jpg53.8 KB · Views: 29
 -
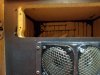 3 XR3 Xover box removed1.jpg79.9 KB · Views: 27
 -
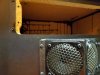 4 XR3 Xover box removed2.jpg80.1 KB · Views: 26
 -
 5 XR top removed.jpg66.5 KB · Views: 27
 -
 6 XR3 drill holes for wire and bolts.jpg62.7 KB · Views: 27
 -
 7 XR3 bolted.jpg54.8 KB · Views: 32
 -
 8 XR3 run wire in.jpg33.5 KB · Views: 32
 -
 9 XR3 run wire to next speaker.jpg54.4 KB · Views: 28
 -
 10 XR3 wire coathanger in top speaker.jpg52.3 KB · Views: 32
Last edited: