• The move to the new server is done. There are some software and database maintenance updates in process. This has us passing the hat around to help out. We appreciate any donations. Seriously, even a dollar helps. The payment page may be found here - https://www.audiokarma.org/support.html

Micromatic teardown & rebuild

yes- I will post a pic- after more reading I found in some literature that it is called a cotter pin and that it is just there to keep the bottom of the spindle from turning in circle but doesn't stop it from going back and forth. Also found out that the bottom of the spindle "shaped like a "J" is called a pawl. I was just going to put it back together without the spring clip (I have misplaced it) the clip in most of the pics I have seen are shaped in a kind of square and with 2 "legs" going ? I don't know where? Now I have a new prob- before reassembling I noticed some kind of shorting switch- on another site. Can't I just plug the 3 wires coming from the electric caps to where they go on the terminal strip and on the back of the terminal strip the wires from my tonearm and be done with it?
 
I'm NOT SURE what you mean by "Electric Caps". Hopefully you aren't describing the main power to the unit. If so you DO NOT WANT TO DO THIS! DEATH SENTENCE FOR THE TURNTABLE, CARTRIDGE AND NEEDLE!!!! Plus a POSSIBLE NEAR DEATH EXPERIENCE for yourself!!!

If you are referring to the RCA JACKS which connect the LEFT AND RIGHT Channel interconnects between the Turntable and the Amp/receiver, yeah go ahead and change out if you want.

The "Shorting switch" keeps output from the cartridge from going to the amp, during cycling. It closes after the needle is actually sitting on the record. It's nice as you don't have all the bumps, bangs, whirs, hum, etc., while the tonearm's cycling from the rest to the record, and then back at the end of the record.
You could bypass it yes. The ceramic cartridge's were/are more succeptable to outside noise influence from the cycling than a magnetic. That's the main reason I could tell for the shorting switch on a lot of them.

If you can't find the spring clip, find an appropriate sized rubber band (temporary fix) and find a suitable mounting spot on the frame keeping in mind the orientation of the tensioin of the spring clip. That should do you for a while.
 
Unfortunately you bumped a day late! I bought a Magnavox Astro Sonic 2ST678 at GW on Sunday, labeled as t/t inoperative. Took out the t/t and spent last night re-lubing and generally playing about with it. Finally worked out the idler would not contact the pulley on the motor shaft. The lubricant has seized solid, finally got it off and re-lubed. Spent today rubbing the console with Old English furniture polish and then re-installed the t/t and fired her up. The changer works like a charm. When I pulled out the changer I found a spare stylus which I installed, an Astatic N307. The cart is an EV but the only # I could find was 347. Ordered a new needle from the bay, cross matched to the N307 but with a 78 stylus. Thinking about installing a preamp and hooking it to the tape input, but as of now have not found the tape input on the amp. The idea being to hook my Garrard Type A with the GE VR ll mono cart and see how it sounds with a vintage 1964 amp.
 
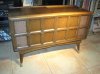
Hello Larryderouin, I find this tutorial quite interesting. A couple weeks ago today, I found a nice maggie console which everything works (minus the turntable). The Model is: 1P3300 - it must of been produced sometime mid to late 60s. I have attached some pics. Anyway, it has 2 problems which concern me. First issue: The idler wheel does not make close enough contact with the inner rim of the turntable base on slower speeds (16 and 33). Issue 2: It is difficult to turn the speed knob counter-clockwise (from slower speed far right to faster speed far left). This is a four speed turntable where the idler wheel moves up and down to make contact with correct portion of the (motor shaft?). HELP! :tears:

I have lubed most parts inside, but I haven't removed the motor (or motor mounts) and the Idler wheel / speed mechanism section as i am fearful of losing something or forgetting where everything attaches. Any help with this specific turntable is greatly appreciated.:scratch2:
 

Attachments

  • IMG_3183.jpg
    IMG_3183.jpg
    62.2 KB · Views: 129
  • IMG_3173.jpg
    IMG_3173.jpg
    53.6 KB · Views: 105
  • IMG_3174.jpg
    IMG_3174.jpg
    57.9 KB · Views: 87
  • IMG_3171.jpg
    IMG_3171.jpg
    77.2 KB · Views: 108
  • IMG_3178.jpg
    IMG_3178.jpg
    61.7 KB · Views: 88
frankinftl;

Looks like a '68 or 69 model. Bears a strong resemblance to the coffee table model I have.


The speed selector is NOT a change on the FLY like most TT's. It has to be OFF to change speeds.

Best thing I can suggest is to get a LARGE Space set up. Then take a before and after pic of each part as you remove it. Lay them out in order. It looks complicated but really it's not that bad. Just clean each piece as you take it out, and lay it in line next to the previous piece. Once you get it all out, then reverse the process. The pics will help.

The idler wheel assy is pivoted. The pivot is most likely dirty and needs to be cleaned and lubed. Again, piece by piece with before and after pics, clean and lay them out in a line.

That model I've never seen before, although it looks like it's just cosmetics to the W620. Make sure the idler and spindle are ABSOLUTELY CLEAN by alcohol. DO NOT Touch the edges of the wheel and or the spindle after cleaning. Also the inside of the platter needs alcohol. 91% is the minimum I use. Sometimes I can get denatured @ the pharmacy.

Larry

The worst thing they did with the schools was to do away with mandatory shop classes for boys.
 
frankinftl;

Looks like a '68 or 69 model. Bears a strong resemblance to the coffee table model I have.


The speed selector is NOT a change on the FLY like most TT's. It has to be OFF to change speeds.

Best thing I can suggest is to get a LARGE Space set up. Then take a before and after pic of each part as you remove it. Lay them out in order. It looks complicated but really it's not that bad. Just clean each piece as you take it out, and lay it in line next to the previous piece. Once you get it all out, then reverse the process. The pics will help.

The idler wheel assy is pivoted. The pivot is most likely dirty and needs to be cleaned and lubed. Again, piece by piece with before and after pics, clean and lay them out in a line.

That model I've never seen before, although it looks like it's just cosmetics to the W620. Make sure the idler and spindle are ABSOLUTELY CLEAN by alcohol. DO NOT Touch the edges of the wheel and or the spindle after cleaning. Also the inside of the platter needs alcohol. 91% is the minimum I use. Sometimes I can get denatured @ the pharmacy.

Larry

The worst thing they did with the schools was to do away with mandatory shop classes for boys.

Thanks so much for responding. I think I will start with the motor mount and then the Idler Wheel section. I will take your advise and take pictures before and after. Last time I attempted to break down a changer (Technics-1360) it was a failed disaster, and I ended-up junking the TT and purchasing another one. A pricey lesson, indeed.

This maggie has another model number on the inside. It reads W626-08-01. It's important to note that this changer is different from the other models of the time (Imperials and astro-sonic) in that the spindle is a shorter spindle. I think it accommodates (at most) maybe 7 or 8 records. It's a small table, and the whole console is small too (which is why i purchased it). It measures 36"wide, 25"tall, and 16"deep. I really like it, it's perfect size. I hope I can get this working again. Here's a video of the console, when I first purchased it ( i have fixed the pilot lamp on front ). http://www.youtube.com/watch?v=ApT5rKvH2xM

Thanks again.
 
Great thread larryderouin. :thmbsp:

If the bearing is running perfect and smooth, should I just leave it alone?
Mine is from '62.


Steve

You can pull the platter just to check and see the lubricant condition and level. (check the dipstick). When you put it back on drizzle a drop or 2 of light oil on the spindle shaft before the platter drops down.

Prevailing knowledge on the Collaro is spin it up to 33-1/3 and then turn it off. if it spins more than 60 seconds bafore stopping, good. Less than 45 it needs attention now. Obviously the longer the better. None of mine spin down for less than 92 seconds, with the longest being 110 seconds. The 110 second being the W620 shown in the tutorial.

Larry


Larry
 
An update. After relubing my micromatic I found it wouldn't run at 78rpm. After much head scratching I worked out that the motor wires come up under the idler. The casing surrounding the wires was fouling the idler preventing it from reaching the pulley. Trimmed the casing so it did not foul the idler and it now runs perfectly at 78rpm. This appeared to be a factory installation. So check that casing, if the idler doesn't move freely on it pivot it could give speed issues.
 
Last edited:
You can pull the platter just to check and see the lubricant condition and level. (check the dipstick). When you put it back on drizzle a drop or 2 of light oil on the spindle shaft before the platter drops down.

Prevailing knowledge on the Collaro is spin it up to 33-1/3 and then turn it off. if it spins more than 60 seconds bafore stopping, good. Less than 45 it needs attention now. Obviously the longer the better. None of mine spin down for less than 92 seconds, with the longest being 110 seconds. The 110 second being the W620 shown in the tutorial.

Larry


Larry

Thanks Larry

I'll go through your tutorial and see what needs to be done. It has no problem spinning 1 minute.


Steve
 
W620-11-00

Extremely new to everything that has to do with turn tables, but rather decent with audio equipment, this tear down looks nearly exactly the same as my model W620-11-00 that I pulled from a console I inherited from my grandpa, not sure on the specifics of the actual console model. Are they nearly identical? Regardless, right now I just use the console to play my computer, etc. through. All the speakers are in great condition, but I would really like to use the turn table as I inherited a multitude of old records as well. The arm and etc. are great, I bought a replacement needle and such. The wheel's don't seem to be hard, but the table wouldn't spin, it seemed as though one of the wheels was struggling to reach the pin (not sure on the terminology here), looked like the whole thing might need some oiling and it would be good to go. Although, while looking at this tear down I saw you had 5 platter bearings..I think I am missing the first two? I can lift the table right off, and I only have the gold bearing and then two silver ones underneath it. Are these absolutely essential? Is it possible to find replacements? Or should I look for a replacement turntable, which I can't seem to find regardless? Again, I'm extremely new to this topic, so I appreciate any help. Thanks
 
Extremely new to everything that has to do with turn tables, but rather decent with audio equipment, this tear down looks nearly exactly the same as my model W620-11-00 that I pulled from a console I inherited from my grandpa, not sure on the specifics of the actual console model. Are they nearly identical? Regardless, right now I just use the console to play my computer, etc. through. All the speakers are in great condition, but I would really like to use the turn table as I inherited a multitude of old records as well. The arm and etc. are great, I bought a replacement needle and such. The wheel's don't seem to be hard, but the table wouldn't spin, it seemed as though one of the wheels was struggling to reach the pin (not sure on the terminology here), looked like the whole thing might need some oiling and it would be good to go. Although, while looking at this tear down I saw you had 5 platter bearings..I think I am missing the first two? I can lift the table right off, and I only have the gold bearing and then two silver ones underneath it. Are these absolutely essential? Is it possible to find replacements? Or should I look for a replacement turntable, which I can't seem to find regardless? Again, I'm extremely new to this topic, so I appreciate any help. Thanks

The 620 is pretty much identical to the unit used for the teardown, except for the tonearm IIRC. Look on the bottom of the platter at the bearing surface (race). Sometimes a shim gets stuck on there are it looks flush to the casing. I've seen anywhere from 3 to 5 shims used depending on the table. More often than not they are used for clearance fo the rim to chassis. If the platter rubs when turning it's missing a shim. a very thin flat washer can be used as long as the thickness is roughly the same.

Just go thru the whole thing like the tutorial, and barring worn out parts (idler wheel) it'll run as good as new.

The way to tell if the turntable is spinning correctly without drag (bearing condition and lube) is to let it run @ 33-1/3 for 30 minutes to warm it up. Then time the spin down time with your watch. 30 to 60 seconds is fair, 60-90 is good and 90 to 105 is excellent! Also download a strobe disk from Vinylengine.com and put it on the Turntable. It should run fairly accurately.

If it's slow, clean the idler wheel, and inner surface ofthe platter with 91% Isopropyl. reclean the center shaft, bearings, and relube.


Larry
 
The way to tell if the turntable is spinning correctly without drag (bearing condition and lube) is to let it run @ 33-1/3 for 30 minutes to warm it up. Then time the spin down time with your watch. 30 to 60 seconds is fair, 60-90 is good and 90 to 105 is excellent! Also download a strobe disk from Vinylengine.com and put it on the Turntable. It should run fairly accurately.

I understand letting it warm up @ 33-1/3, but how do I time the spin down time with a watch to 60-90, 90-105? Not sure what that means, sorry to be a hassle! I printed out a strobe disk though...depending on how much time I have this week I will start the entire process and check if there is drag/use the strobe disk and such. Thanks for all your help, Larry!
 
Back
Top Bottom