VA1DER
Member
I have been lucky/blessed/obsessive enough to find three sets of original, 40-2039 no-suffix Minimus 7W with the walnut veneered baffle. There are a lot of speaker refinishing threads, most of them by people far more experienced in woodworking than I am. But I thought I would share my experience very lightly refurbishing a pair in already pretty good condition to look superb. I am aiming this at people at a very moderate level of skill who want their Minimus 7Ws to pop.
Requirements:
Before:
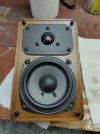
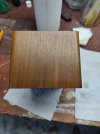
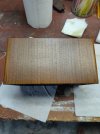
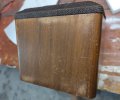
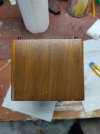
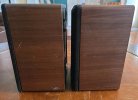
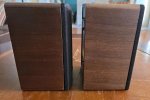
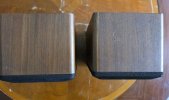
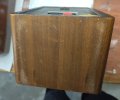
Here are the sales photos of the Minimus 7Ws I bought. The seller didn't post photos of the bottom of the speakers, but I knew what to expect. Bottom photos are mine taken on arrival:


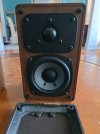

Identify trouble spots for pre-treatment:
Dented Dome:
The different methods of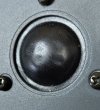 getting domes to round again is covered elsewhere in more detail than I'm going into. These are treated silk domes, so responsive to a light suction, but not something I'll use a vacuum on. I treated mine treated mine with the french-kiss method.
I will note that you can disassemble an SD-51 tweeter and actually pull the dome off for proper reconstruction. If you decide to do this, then a ping-pong ball is almost exactly the right size to push in from the back. I don't like doing this, though, because getting the dome back on can be very tricky given the strength of the magnet.
I might have considered disassembling if mine turned out worse than this. The remaining dimples may self-resolve over time and use, or with continued occasional smoothing. The vibrations of playing sound can actually work dimples out sometimes. Some gentle heating can also help, but this is also dangerous. I am going to give this some time and see how it in after a month or two of usage.
Paint Splotch:
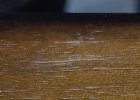
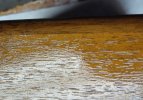
 I can't fault the general shape of these 43-year old speakers, but lord save me from people who work paint into the grain!
So, what I have to consider here is that I have maybe half a millimetre of veneer thickness, that walnut grains are deep anyway, and to sand this down enough to get at the bottom of where paint is inside the grain I a) risk going below the veneer depth, and b) will certainly end up with a spot that lacks grain depth.
I do not ever recommend chemical paint stripping, unless the entire speaker is going to be stripped. Any sort of chemical spot removal will leave a mark that stands out through any number of later oilings.
My treatment plan is removal of surface pain residue with a magic eraser (this will also remove some finish coloration along with some of the paint smudge, but that's ok, because it won't leave chemical marks), followed by grain surgery with an exacto knife.
Yes, I use an exacto knife. To clear out a grain channel of embedded paint, put the exacto knife point down inside the grain channel, and slide it backwards along the grain channel. The back of the point sliding through the grain channel will scrape the bottom and walls and can clear it of paint. This is tricky work, but can go surprisingly quickly. There are 12 or so grain channels filled with paint in this splotch, and it only took me about ten minutes to clear this. Don't worry too much if you are taking away some finish as you dig the paint out - it's to be expected. Just be careful you're not enlarging the grain channel too much. Whatever finish is taken off here, the BLO will fix nicely.
To Be Continued!
Requirements:
- Minimus 7W walnut veneer (or similar) speakers in good to moderately rough shape.
- Boiled linseed or Tung oil (see below)
- Sponge brush
Most people say to avoid sponge brushes for boiled linseed oil, but I love them for speaker refurb. They can be "painted", swabbed, dabbed, and pressed with equal ease to work the oil in to problem spots. - Cotton swabs (off-brand can be better)
These are being used her for the front (if you have an original Minimus 7W with the veneered baffle), so I find off-brand is better as they aren't as soft and don't spread oil where you don't want it. - Paper towel
- Small exacto-style knife (for paint)
- Magic Eraser or similar melamine sponge
Before:
Here are the sales photos of the Minimus 7Ws I bought. The seller didn't post photos of the bottom of the speakers, but I knew what to expect. Bottom photos are mine taken on arrival:
Identify trouble spots for pre-treatment:
- Dented dome. I hate that. The longer it's left, the harder it is to get the creases out. People that leave dents in their domes need a dent in their dome.
- Paint splotch. I don't know what it is with people who own wood speakers, but every pair I have ever bought used has had paint on them somewhere. They are inevitably magnets for catching paint drips. The previous owner did the worst thing possible with this one, which is partially wipe it then leave it dry. The owner basically worked into the grain for me. Thanks.
Note: if you get paint on your wood speaker, get it ALL off immediately, or let it dry fully when it can often be pried off as a whole chip. - Bottom weat-through
Dented Dome:
The different methods of
getting domes to round again is covered elsewhere in more detail than I'm going into. These are treated silk domes, so responsive to a light suction, but not something I'll use a vacuum on. I treated mine treated mine with the french-kiss method.I will note that you can disassemble an SD-51 tweeter and actually pull the dome off for proper reconstruction. If you decide to do this, then a ping-pong ball is almost exactly the right size to push in from the back. I don't like doing this, though, because getting the dome back on can be very tricky given the strength of the magnet.
I might have considered disassembling if mine turned out worse than this. The remaining dimples may self-resolve over time and use, or with continued occasional smoothing. The vibrations of playing sound can actually work dimples out sometimes. Some gentle heating can also help, but this is also dangerous. I am going to give this some time and see how it in after a month or two of usage.
Paint Splotch:
I can't fault the general shape of these 43-year old speakers, but lord save me from people who work paint into the grain!So, what I have to consider here is that I have maybe half a millimetre of veneer thickness, that walnut grains are deep anyway, and to sand this down enough to get at the bottom of where paint is inside the grain I a) risk going below the veneer depth, and b) will certainly end up with a spot that lacks grain depth.
I do not ever recommend chemical paint stripping, unless the entire speaker is going to be stripped. Any sort of chemical spot removal will leave a mark that stands out through any number of later oilings.
My treatment plan is removal of surface pain residue with a magic eraser (this will also remove some finish coloration along with some of the paint smudge, but that's ok, because it won't leave chemical marks), followed by grain surgery with an exacto knife.
Yes, I use an exacto knife. To clear out a grain channel of embedded paint, put the exacto knife point down inside the grain channel, and slide it backwards along the grain channel. The back of the point sliding through the grain channel will scrape the bottom and walls and can clear it of paint. This is tricky work, but can go surprisingly quickly. There are 12 or so grain channels filled with paint in this splotch, and it only took me about ten minutes to clear this. Don't worry too much if you are taking away some finish as you dig the paint out - it's to be expected. Just be careful you're not enlarging the grain channel too much. Whatever finish is taken off here, the BLO will fix nicely.
To Be Continued!
Last edited: