• The move to the new server is done. There are some software and database maintenance updates in process. This has us passing the hat around to help out. We appreciate any donations. Seriously, even a dollar helps. The payment page may be found here - https://www.audiokarma.org/support.html

Mirage refoaming

M0t0wn

Well-Known Member
Hi,

I am thinking that the off-time between X-mas and New Year would be a good time to re-foam my Mirage 360 and SM-.4 speakers.

Before I start this how would I know that the driver coils are not damaged and this would be a worth while project?
I also have thought about having this done. Is it a reasonable job to do yourself?

Any tips/hints that pertain to Mirage? Preffered re-foam kit suppliers?

Thanks!
 
Last edited:
Register to hide this ad
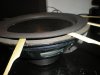
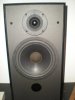
Mabe it helps if I post a picture of the 360's. I have never refoamed before and I was hoping for some hints.
 

Attachments

  • 077.jpg
    077.jpg
    91.4 KB · Views: 55
Poly cone and dustcap on the M-360's? The brochure here http://www.who-sells-it.com/cy/mirage-speakers-1446/m-360-5782.html identifies them as poly, but also states rubber surround, not foam. Probably a later model. Anyway, I had SM-1's and refoamed them, as my 2nd refoam project ever, with generic surrounds using the shim method. But I didn't manage to salvage the poly dustcaps so I replaced them. Now I would probably use a test tone and save the original dustcaps. So it can be done with relatively little experience.

To test the woofers prior to refoaming, lay the speakers on their back to provide equal support to the woofers, and play low-level music or test tones through them. Or check for continutiy with a multimeter.
 
Last edited:
Poly cone and dustcap on the M-360's? The brochure here http://www.who-sells-it.com/cy/mirage-speakers-1446/m-360-5782.html identifies them as poly, but also states rubber surround, not foam. Probably a later model. Anyway, I had SM-1's and refoamed them, as my 2nd refoam project ever, with generic surrounds using the shim method. But I didn't manage to salvage the poly dustcaps so I replaced them. Now I would probably use a test tone and save the original dustcaps. So it can be done with relatively little experience.

To test the woofers prior to refoaming, lay the speakers on their back to provide equal support to the woofers, and play low-level music or test tones through them. Or check for continutiy with a multimeter.

Your reply is much appreciated. Foam or rubber I don't know but it has deteriorated. Just ordered two kits today before I was able to read your post. Will check the woofers tomorrow.
 
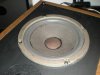
The picture of your M-360 woofer is definately foam surround. Butyl rubber (as in the brochure) don't generally deteriorate (or do so at a far far slower rate). The kits you orders are 99% sure to be foam - I can't recall actually seeing rubber "refoam" kits for sale more than once or twice. There is lots of help here on this site on refoaming. For example, from the speaker forum reference sticky: http://www.audiokarma.org/forums/showthread.php?t=20643
 
Those are foam. Mirage and PSB would generally have foam on the lower models, rubber mid line. For example a PSB 30R/30MKII/300 had foam the 40R/40MKII/400 were rubber. My Mirage 190 are foam, my 290 were rubber. I am sure the same applies to the 60 series Mirage.
 
I check the speakers (SM-.4 they sound fine now it's waiting for the mailman
 
Last edited:
By the way, I know we have a pic here of the 360 woofer, but may I just add, for completeness sake:

:worthless
 
Pics

Pictures of the SM-.4. I made so many pictures of gear today no problem adding some more.

I have read the refoam tread, watched a youtube video and the foam supplier video.
I like to ask one stupid question. In the instructions the woofer is removed from the speakers. But the SM-.4 are not so large. Mounted in the Speakers I think I would have more control of the woofers. Bad idea?
I was able to peel of the old surround very easely almost like the glue was still very gummy.
 

Attachments

  • 047.jpg
    047.jpg
    61.3 KB · Views: 19
  • 048.jpg
    048.jpg
    63.9 KB · Views: 13
I like to put the woofer magnet-side down on a smooth table top, so that I can spin it easily and use two hands on opposite sides of the woofer to pinch the inner flange of the foam to the cone from each side (thumb and forefinger) ... and then later do the same with the outer flange of the foam to the basket flange. I find that you really need to do this during the initial set-up time of the glue (I use Aleene's Tacky Glue). It also ensures the glue is evenly spread between the 2 surfaces. Otherwise the foam will spring-away from the surface. If the woofer is left in the speaker you wouldn't be able to reach the rear-side of the cone. ***

Try to position the inner flange as "centered" as you can on the cone (usually there will still remain evidence of where the old gasket was attached to help you with this). When you glue the foam's outer flange to the basket's flange try to push the foam gasket down straight onto the flange of the basket, and then not move it around or you could push the cone off-center and cause rubbing of the voice coil (this is one reason I like to shim - it helps to establish and hold this location for you). Note that even if you got the inner gasket perfectly "centered", don't be surprised if the foam is not even all the way around the woofer basket when you do that gasket - foams, cones and spiders are not all 100% aligned.

*** edit: I've seen posts where people use clothes-pins to hold gaskets down while glue sets-up ... usually just (I believe) when doing the basket flange glue. Or, using pots or bowles, etc to provide even pressure all-around. Or, if there are outer gaskets, puting them in place over the gaskets and turning the speaker upside down to use the speaker's weight to press the gasket in place while glue dries
 
Last edited:
All done but one with issue's.
Started yesterday, all went well. Some are messier than others but since this was my first refoam I am not unhappy.
I have not taken them up all they way, sofar it sounds good except for one of the SM-.4. It is not as loud as the other one and sounds bad at higher volume. I rechecked the resitance, it is around 5 Ohm. I checked the movement and it is hanging up. If I push the cone over it moves better.
What to do?
 
Yeaaaahhh. Sounds like you got it off center just a bit. You need to do it again, which is a little more difficult since you just did it. Or you can *try* to get teh outside off the basket and recenter it. I *always* play the woofer at low volume while I do the outside to basket to make sure all is well before it drys.

Not a big deal, you'll get it!
 
All done but one with issue's.
Started yesterday, all went well. Some are messier than others but since this was my first refoam I am not unhappy.
I have not taken them up all they way, sofar it sounds good except for one of the SM-.4. It is not as loud as the other one and sounds bad at higher volume. I rechecked the resitance, it is around 5 Ohm. I checked the movement and it is hanging up. If I push the cone over it moves better.
What to do?

Sounds like you have a voice coil rub. If it's slight, you may be able to rotate the woofer 180 degrees from the original position and play in low volume to see if gravity helped. If not, I see two options - 1) try to pry off the new foam surround off of the basket, intact, and reglue. 2) you will need to remove the new surround and redo the refoam with a brand new surround.

The way I have centered the cone in the early days was to lift up the cone while the glue is wet on the outer edge, and let it fall in place naturally - then start pressing the outer edge to the basket, taking care not to move the cone. Cloth pins had gotten me in trouble before, so I just use my fingers to press them downward ONLY, no running your fingers along the edge (will shift.) Then I discovered the 30Hz CD from Rick Cobbs (who sells foam surrounds on eBay.) With the CD, it's playing the low bass note constantly, so the voice coil centers itself. While the woofer is bopping up and down playing that constant tone, you just start pressing the outer edge down to the basket, and allow it to dry while the woofer is playing the tone. After the glue dries, it's all centered.
 
Thanks guys I think I have made a recovery and saved the surround. After fast eddies's post I started to remove (slowely) the installed surround. Found out that a chisel shaped exacto blade worked the best. It took me 45 minutes to remove it and finish up the reglue. I picked a radio station with some low volume slow music and it worked great. I am actually worried now that I had not installed enough glue in the first place.
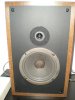
Posted some pictures of the original instal of the SM-.4 and the 360.
In order to remove the 360 woofer I took out the binding postes so I could push the woofer out. Found the crossover and a nice seal between the box and the binding posts.

O, do I have nothing better to do tonight? My wife works nightshift and we celebrated earlier this week and last night.

Tomorrow a picture of the recovered woofer.

Again thanks for the tips and encouragement.
 

Attachments

  • 071.jpg
    071.jpg
    55.2 KB · Views: 18
  • 066.jpg
    066.jpg
    76.5 KB · Views: 17
  • 057.jpg
    057.jpg
    61 KB · Views: 14
  • 055.jpg
    055.jpg
    119.1 KB · Views: 13
  • 054.jpg
    054.jpg
    101.1 KB · Views: 12
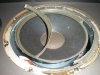
First picture is of the "recovered" woofer of the SM-.4 and the second is the 360.
They are playing fine now.
 

Attachments

  • 022.jpg
    022.jpg
    86.5 KB · Views: 6
  • 023.jpg
    023.jpg
    71.3 KB · Views: 9
Nice save .... sorry I was not about to "lend a hand".

Saw some Mirages tucked in the back of a thrift shop today ... not out on the floor yet. I'll see if I can coax them out of hiding! I think they were M-360's .... maybe M-460's.
 
Saw some Mirages tucked in the back of a thrift shop today ... not out on the floor yet. I'll see if I can coax them out of hiding! I think they were M-360's .... maybe M-460's.

Yup .... M-460's in walnut. Rubber surrounds, stitched to the cone. Enclosures are a bit rough around the edges, but for $40, they sound fantastic!
 
Back
Top Bottom