

You are using an out of date browser. It may not display this or other websites correctly.
You should upgrade or use an alternative browser.
You should upgrade or use an alternative browser.
Mitsubishi LT-30 restoration
- Thread starter kotofei
- Start date
Got it all back together this a'noon and all functions are A-OK.
Put the Denon DL-110 in the composite shell in it and set it up by ear. Holy ####!!!, does this thing ever sound good!! I'm playing it thru the $38 e-Bay Audiowind phono right now, still need to order board parts for the CNC.
Pix to follow.

Hooray! I was worried you get through all of this and hate it. It's a really nice turntable, I can't think of a single complaint that I have with mine. Happy listening!

Pio1980
AK Member
The thing's servo action is dead-silent and silky smooth and the tracking servo is proportional-responsive like the ReVoX Linatrack, no herky-jerky crabbing here and the tracking can be set during play to average dead-nuts-on tangent at a very slow crawl. The VTA can also be set by ear while playing and locked in, something the PL-L1000 for one lacks.
This is the most intelligently designed and solidly built integrated LT I've yet encountered, it all works to serve the sonics exceptionally well and with superb ergonomics. Anyone who aspires to design and produce an integrated servo arm LT should study this one first to see how it is done right.
BTW, I set tangency here the same way I do it on the H-K RABCO TTs, tracking so that the gimbal remains symmetrically square in it's frame while playing. Then it's a matter of getting the stylus tip on the tangent line and it's done.
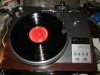
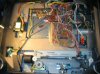
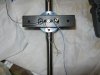
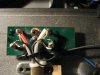
Have added a couple pix of the restored function TT and the underside before buttoning the bottom plate. Note the rerouted and shortened signal and ground leads from the carriage to the terminal plate. There is no hum or noise due to the rerouting of the original shielded signal runs and the routing of the arm wires to the muting board in the arm carriage base.
This is the most intelligently designed and solidly built integrated LT I've yet encountered, it all works to serve the sonics exceptionally well and with superb ergonomics. Anyone who aspires to design and produce an integrated servo arm LT should study this one first to see how it is done right.
BTW, I set tangency here the same way I do it on the H-K RABCO TTs, tracking so that the gimbal remains symmetrically square in it's frame while playing. Then it's a matter of getting the stylus tip on the tangent line and it's done.
Have added a couple pix of the restored function TT and the underside before buttoning the bottom plate. Note the rerouted and shortened signal and ground leads from the carriage to the terminal plate. There is no hum or noise due to the rerouting of the original shielded signal runs and the routing of the arm wires to the muting board in the arm carriage base.
Attachments

Last edited:

Congratulations! You did a wonderful job.
I also thought mine is not doing "crabbing" until I donned my 3x goggles and closely look at the tonearm base. It's there, little stop and go steps. I still don't know is it right or the movement should be constant and smooth.
How did you do this? Mitsu supplied a special jig that could be used for this,did you get it?
...no herky-jerky crabbing here ...
I also thought mine is not doing "crabbing" until I donned my 3x goggles and closely look at the tonearm base. It's there, little stop and go steps. I still don't know is it right or the movement should be constant and smooth.
the tracking can be set during play to average dead-nuts-on tangent at a very slow crawl...
...BTW, I set tangency here the same way I do it on the H-K RABCO TTs, tracking so that the gimbal remains symmetrically square in it's frame while playing.
How did you do this? Mitsu supplied a special jig that could be used for this,did you get it?

Not sure which PC board holder you mean, managed to pinch the cart sig wires under the selector track detector remounting it to the carriage, all good now.
I'm trying to do more "fixing" and not too much damage in the meantime, hoping to come out 'in the black'.
That's what I meant, there are a bundle of wires to be managed there.
It looks like you stayed with the muting switch rather than bypassing it. That design shorts out the signal path as opposed to breaking it, so there should be no impact on sound quality when the switch is open.
Fantastic job! Post more pics please.:thmbsp:
Pio1980
AK Member
Congratulations! You did a wonderful job.
I also thought mine is not doing "crabbing" until I donned my 3x goggles and closely look at the tonearm base. It's there, little stop and go steps. I still don't know is it right or the movement should be constant and smooth.
How did you do this? Mitsu supplied a special jig that could be used for this,did you get it?
I cleaned and lubed as much as I could going thru it as well as thoroughly cleaning the rails and roller surfaces, this may have aided response smoothness. It's also possible I did not look as close as you as the advance pulsing on Technics TTs is slight but readily apparent.
RE the tracking tangency, I decided to trust the design and precision of the arm and carriage assembly of the H-K ST rather than follow the recommendation from H-K as the rod they use for the reference is not tangent to the carriage rails while the carriage frame is. On the big Mitz the design and precision is such that the carriage and gimbal frame can be trusted to be in line with the guide rails, and the arm tube to be tangent to the gimbal. Therefore these structures are trustworthy as a reference and can be used to set tangency independent of any other device IMO. It's the stylus tip location that is tricky unless the proper tip distance to headshell collar is known, 50mm according to one user. Then one just sets to that and makes the rest of the adjustments re tracking force and VTA and It's done. Since the accessories including the distance guage and protractor card are usually long-gone this method seems simple and effective for all practical purposes and the DL-110 comes mounted on a universal tip setting gauge, I did it thus.
Last edited:
Pio1980
AK Member
That's what I meant, there are a bundle of wires to be managed there.
It looks like you stayed with the muting switch rather than bypassing it. That design shorts out the signal path as opposed to breaking it, so there should be no impact on sound quality when the switch is open.
Fantastic job! Post more pics please.:thmbsp:
Thnx!
I made a command decision to keep the muting as I like the silence of the cue muting and I probably will not be using strain gauge carts in this TT.
The arm rewire pics will be forthcoming, please feel free to link those entries to your other thread.
scottyh777
Super Member
This is awsome news and great work.Congrats.
Pio1980
AK Member
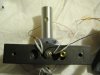
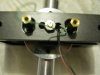
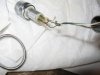
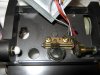
Here are some pics showing the arm rewire procedure mentioned earlier as necessary due to apparent factory errors. I also found the channels somehow reversed from cart to output leads. Here you see the Butyl damping plug removed from the arm tube with the tool used to extract and replace it. You see the troublesome pinched green wire in the 4th pic.
Attachments


Last edited:
Pio1980
AK Member
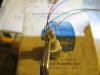
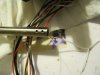
More showing the rewiring with dental floss and the heat sinking of the socket pins for soldering. It is absolutely necessary to use a heat sink on the headshell pins for soldering, a once-use small disposable suture forcep is ideal as an example. Otherwise there is more than a risk melting the socket's plastic portion.
FWIW, the factory arm wiring looks pretty good to me otherwise, I probably wouldn't bother replacing it unless there were problems like mine to be dealt with.
FWIW, the factory arm wiring looks pretty good to me otherwise, I probably wouldn't bother replacing it unless there were problems like mine to be dealt with.
Attachments


Last edited:



+1.
i'd also like to thank you for documenting this. I hope i don't have to rewire my arm but if i do, this will be an incredibly valuable reference.
Pio1980
AK Member
As I recall the damper is far enuff to clear the ends of the cart pin insulators when socket pins are compressed, installed smaller end first. Mine appeared to have been installed after wiring was threaded in, I replaced it with the wiring thru the center to facilitate wire replacement without pulling the damper should it ever be again required.
Disassembly was far less intimidating than anticipated and without any apparent 'gotcha' booby traps. It is absolutely necessary to use a heat sink on the headshell pins for soldering, a once-use small disposable suture forcep is ideal as an example. Otherwise there is more than a risk melting the socket's plastic portion..
Disassembly was far less intimidating than anticipated and without any apparent 'gotcha' booby traps. It is absolutely necessary to use a heat sink on the headshell pins for soldering, a once-use small disposable suture forcep is ideal as an example. Otherwise there is more than a risk melting the socket's plastic portion..
Last edited:
Pio1980
AK Member
Still tweaking. Got the soft VCR covers from tubetoons and the pair are a perfect fit. Ordered 27mm superballs and superglued them one in each footer dimple. They are a bit oblong so installed long axis vertical and they seem to provide good suspension. 30mm balls should work well.
The DL-110 sounds somewhat thin and strident at 47k loading, much more listenable at 3.3k. May tweak that more later.
The DL-110 sounds somewhat thin and strident at 47k loading, much more listenable at 3.3k. May tweak that more later.
Last edited:
Pio1980
AK Member
Have noticed an occasional tendency for the tracking error light to come on. Analyzing the symptom and the schematic leads me to think the function transfer relay RL101 for the horizontal tracking motor may have an intermittent contact resistance problem that may or may not go away with use. I've had occasional self-correcting contact problems with similar board mounted signal switch relays in some preamps.
Pio1980
AK Member
This is a much better TT than the DL-110 presently on it is a pick-up, both of my 'better' carts are LOMCs for which I presently lack an appropriate SUT/head amp. This awaits further investigation, meanwhile I've now got the on-off switch/arm rest lock workable so everything but the plinth cosmetics has been addressed AFAIK.
Pio1980
AK Member
Still having infrequent problems with tracking and still suspect intermittent tracking servo function transfer relay switch contacts.
In spite of this I've been very pleasantly surprized with excellent results from the DL-110 thru the formerly unappealing ESP P-06. So much so that I played a succession of 5 records until I just ran out of evening.
In spite of this I've been very pleasantly surprized with excellent results from the DL-110 thru the formerly unappealing ESP P-06. So much so that I played a succession of 5 records until I just ran out of evening.
Last edited: