• The move to the new server is done. There are some software and database maintenance updates in process. This has us passing the hat around to help out. We appreciate any donations. Seriously, even a dollar helps. The payment page may be found here - https://www.audiokarma.org/support.html

My Grill Table Rebuild

RickeyM

Addicted Member
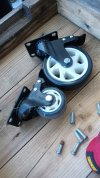
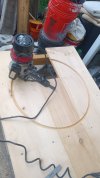
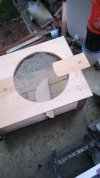
I built a table for my kettle about four years ago and it's served me well, but it's showing it's age. Time and the elements have not been kind. I'm in the process of breaking it down and cleaning it up. Some of the wood pieces of the frame will have to be replaced. The top (deck) will get new wood too. I'm also adding larger wheels for easier rolling.
Work in progress:
IMG_20260829_105947-L.jpg
IMG_20260829_110007-L.jpg
IMG_20260829_110018-L.jpg
IMG_20260829_112255-L.jpg
IMG_20260829_113513-L.jpg
 
Register to hide this ad
The bottom deck planks are OK mainly because they've been covered with cement board. The kind of stuff you put on a bathroom floor before putting tile down. At first I was only going to replace only the lower frame rails but now I'll do top and bottom ones just because. Also I want to use threaded inserts and stainless steel fasteners this time. Originally I used lag screws which over time have a habit of loosening. Let's see if I can get eight years out of it this time.
 
Project "Over Engineering" is slowly coming along. Using a combination of oiled and Shou-sugi-ban treatments on the framing. Using both threaded inserts and pocket screws to join the framing together. Prior grill tables were just screwing some mainly scrap and reclaimed wood together. This one is actually planned out. I even made up a couple of jigs to put all the holes drilled in the framing in the right places.

i-HPBSvQh-XL.jpg
i-CTFQ57K-XL.jpg
i-PNrrLKr-L.jpg
 
The top is screwed down and stained (1-coat) and the casters are mounted on the frame. It's pretty sturdy but I'm thinking of adding cross bracing to the framing.

i-M2CqVP3-XL.jpg
i-LXbM6Zd-XL.jpg
 
I applied some wood stain (Teak) to the top a couple of days ago, but I put it on way to heavy so I had to go back and sand it off. Two steps up and one step back. I tried again yesterday using a sponge and contrary to instructions on the can, I thinned it a little. Because pine wood notoriously famous for not taking stain evenly, I'll wait another day before doing a light sanding. The bottom shelf of salvaged pallet boards, oiled for protection against the elements, was installed today. I'm thinking of maybe leaving the table's sides open.

i-xcHpPHb-L.jpg
 
Last edited:
Instead of having open sides I decided to use up some scrap wood I had laying around. Cut to size and a couple of coats of paint later.

i-BnCpZND-L.jpg


A little light sanding and some Spar Urethane for the top.

i-sQ5V2tC-XL.jpg
i-s6sLzcK-XL.jpg


Next I'll add some fold out shelves on the sides. At least one big enough to hold a Weber Smokey Joe ;)
 
I can smoke better on an old Weber better than 99% of any BBQ I've ever tasted. Made ribs and chicken on it once, sons GF parents were visiting from Texas. I said, crap I should have made something else. The dad said he manages a big hitter BBQ place in Texas. Said he'd serve those meats in his restaurant over anything they served...LOL.
 
Back
Top Bottom