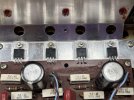
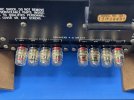
I don’t live in a hifi desert, given the Sansui 5000x and Sherwood S-7310 I recently picked up locally, but they are definitely rare to find available in the wild.


That leaves online sources to find projects.
I had a few switch/pot cleaning and lamp replacements under my belt when I picked up a Rotel RX-404 with a quiet right channel. I wanted one because I saw one on the shelf in a Skylabs video and couldn’t stop thinking about it. I got lucky. The quiet right channel was one bad cap in the main amp section (mostly). It had bad glue so I went ahead with a full recap under the tutelage of Painttoad. I did replace a few corroded resistors and a couple of popped diodes (even brought my left meter back).
Feeling confident with how well that went, I started looking for additional projects on eBay. After some discussion with another enthusiast, I found myself looking at Harman Kardon’s. Prices weren’t nearly what I expected them to be and before I knew it, a reasonably priced 330a was paid for.
The listing said, “Harman Kardon 330A AM/FM Stereo Receiver - Tested. Tested Works but volume scratchy, pots need to be cleaned. Display bulbs outAs is condition. Please see attached photos for details” Photo below is from the listing.

I was so excited when it arrived. I unboxed it, took some quick photos, and rushed to share in Discord.
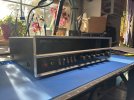
Embarrassed to say, I was so excited to have a Harman Kardon, it didn’t immediately dawn on me until my Discord post published, that I did not, in fact receive the 330a I thought I had bought. I rushed to the listing to double check.
I received a Three Thirty (ashamedly not knowing that was a thing). Anxiously, I messaged the seller informing him of the mistake, hoping I could get what I actually ordered. As I waiting for a response, I investigated the Three Thirty and fell in love with it too. It was a simple mixup. He grabbed and shipped the wrong box. The seller said he’d send the correct order and when I received it and inspected it, I could send the Three Thirty back. Instead, I made an offer on the Three Thirty. That will be a future project.
The 330a eventually made it. Nice.

I made sure all of the fuses were correct and cautiously put it on the dim bulb to see what I had bought. Indeed, scratchy controls, and intermittent right channel. If you held the Speakers 2 switch just right, you could get it to come in, kind of.

I started with the basics. Pots and Switches cleaned. I even disassembled the toggle switches, polished the metal contacts, and straightened them (Thanks Trevor’s Bench for the video!).


The right channel came back with low-end distortion, but volume was full.
(to be continued because of my 10 photo limit)
That leaves online sources to find projects.
I had a few switch/pot cleaning and lamp replacements under my belt when I picked up a Rotel RX-404 with a quiet right channel. I wanted one because I saw one on the shelf in a Skylabs video and couldn’t stop thinking about it. I got lucky. The quiet right channel was one bad cap in the main amp section (mostly). It had bad glue so I went ahead with a full recap under the tutelage of Painttoad. I did replace a few corroded resistors and a couple of popped diodes (even brought my left meter back).
Feeling confident with how well that went, I started looking for additional projects on eBay. After some discussion with another enthusiast, I found myself looking at Harman Kardon’s. Prices weren’t nearly what I expected them to be and before I knew it, a reasonably priced 330a was paid for.
The listing said, “Harman Kardon 330A AM/FM Stereo Receiver - Tested. Tested Works but volume scratchy, pots need to be cleaned. Display bulbs outAs is condition. Please see attached photos for details” Photo below is from the listing.
I was so excited when it arrived. I unboxed it, took some quick photos, and rushed to share in Discord.
Embarrassed to say, I was so excited to have a Harman Kardon, it didn’t immediately dawn on me until my Discord post published, that I did not, in fact receive the 330a I thought I had bought. I rushed to the listing to double check.
I received a Three Thirty (ashamedly not knowing that was a thing). Anxiously, I messaged the seller informing him of the mistake, hoping I could get what I actually ordered. As I waiting for a response, I investigated the Three Thirty and fell in love with it too. It was a simple mixup. He grabbed and shipped the wrong box. The seller said he’d send the correct order and when I received it and inspected it, I could send the Three Thirty back. Instead, I made an offer on the Three Thirty. That will be a future project.
The 330a eventually made it. Nice.
I made sure all of the fuses were correct and cautiously put it on the dim bulb to see what I had bought. Indeed, scratchy controls, and intermittent right channel. If you held the Speakers 2 switch just right, you could get it to come in, kind of.
I started with the basics. Pots and Switches cleaned. I even disassembled the toggle switches, polished the metal contacts, and straightened them (Thanks Trevor’s Bench for the video!).
The right channel came back with low-end distortion, but volume was full.
(to be continued because of my 10 photo limit)