Hi everyone,
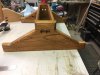
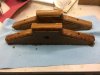
I recently closed my computer business and had some computer and equipment racks headed for the dump. After removing the servers I had an idea of converting the racks into a audio display for my increasing collection of vintage Hi-fi gear. The racks I used are known as "relay" or "open frame" racks, made of aluminum type alloy. The rack and shelves are quite expensive new about $150 for just 2 shelves, used or (free in my case) is the only way to go. My main goal was to build a modular system that can be expanded, or separated as needed. It seemed pretty simple to build, but it's been a lot of work !!!
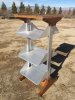
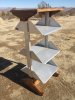
Ok how about some pics
And now with equipment
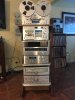
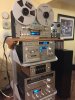
I am currently about 1/2 way finished with the 2nd rack and have materials for about 2 more
I am pretty happy so far. The rack is rock solid with no racking back and forth. The base has adjustable feet for leveling and sliders for moving around. The base is made from 1 1/2 oak, the top shelf is 1" oak. No worries about the reel to reel falling off as it has been screwed to the top via the threads in the bottom for the feet that always seem to be broken off the RT-909
If there is any interest I can post construction pics
I recently closed my computer business and had some computer and equipment racks headed for the dump. After removing the servers I had an idea of converting the racks into a audio display for my increasing collection of vintage Hi-fi gear. The racks I used are known as "relay" or "open frame" racks, made of aluminum type alloy. The rack and shelves are quite expensive new about $150 for just 2 shelves, used or (free in my case) is the only way to go. My main goal was to build a modular system that can be expanded, or separated as needed. It seemed pretty simple to build, but it's been a lot of work !!!
Ok how about some pics
And now with equipment
I am currently about 1/2 way finished with the 2nd rack and have materials for about 2 more
I am pretty happy so far. The rack is rock solid with no racking back and forth. The base has adjustable feet for leveling and sliders for moving around. The base is made from 1 1/2 oak, the top shelf is 1" oak. No worries about the reel to reel falling off as it has been screwed to the top via the threads in the bottom for the feet that always seem to be broken off the RT-909
If there is any interest I can post construction pics