MCM_Fan
AK Subscriber
OK, here's a quick little DIY I did today. I never cared much for the stock speaker binding post connectors on my NAD 7250PE. They look similar to the 5-way binding posts that come standard on many newer style receivers, but they are not. They do not accept banana plugs or spade terminals, bare wire only. Here's a photo of the stock speaker binding posts:

I love the sound of this receiver and had it open today to Deoxit the volume/balance pots. So, I thought I might was well upgrade the speaker terminals while I had the cover off. I have several pairs of 5-way binding posts that I bought off eBay in bulk at $0.99 each with free shipping. I originally bought them for some little TPA3116 Class D amps I built. I also recently replaced the stock binding posts on my Son of Ampzilla with these inexpensive, modern 5-way binding posts. Here's what they look like:
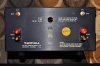
The spacing of the original. non-standard binding posts is bigger than the standard 3/4" center-to-center spacing of modern 5-way binding posts. So, I needed to make a small 4.6" x 2.0" plate for the new binding posts. I made this plate out of 3/32" thick Lexan I purchased at Home Depot for $4.68 for an 8x10 sheet (enough to make eight of these small plates).
I had never worked with Lexan before, but found it really easy to work with. I cut it on my table saw using the same Forrest Woodworker II Thin Kerf blade is use for general purpose wood working. This is a carbide tipped blade with 40 TPI. A finer tooth blade is generally recommended for plastic, but this is a high quality blade that cut through the Lexan without overheating and left a nice, clean edge.
To drill the holes, I first made a template out of thin, non-corrogated cardboard. I taped this template over the Lexan and used a center punch to mark the center of each hole. I then drilled the 8 - 1/2" holes for the binding posts using a step drill I got at Harbor Freight for my previous projects. I also drilled three small 3/32" holes for the self-threading screws that will attach the mounting plate to the inside of the rear panel of the receiver. I then roughed up the surface of the Lexan by hand sanding it with 220 grit sand paper. Even though I use Krylon Fusion paint which bonds well to plastic, I figured it would bond even better with a rougher surface.
Here's what the mounting plate looked like before painting:
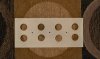
I did a test fit at this point, and all looked good. So, next I painted the top surface with 4 light coats of Krylon Fusion Matte Black paint for plastics. I let it dry about 45 minutes between coats. Here it is after painting:

I'm going to let the paint fully cure for a few days before I mount it in the chassis, and then I'll be back to post the "after" photos of my little DIY project.
I love the sound of this receiver and had it open today to Deoxit the volume/balance pots. So, I thought I might was well upgrade the speaker terminals while I had the cover off. I have several pairs of 5-way binding posts that I bought off eBay in bulk at $0.99 each with free shipping. I originally bought them for some little TPA3116 Class D amps I built. I also recently replaced the stock binding posts on my Son of Ampzilla with these inexpensive, modern 5-way binding posts. Here's what they look like:
The spacing of the original. non-standard binding posts is bigger than the standard 3/4" center-to-center spacing of modern 5-way binding posts. So, I needed to make a small 4.6" x 2.0" plate for the new binding posts. I made this plate out of 3/32" thick Lexan I purchased at Home Depot for $4.68 for an 8x10 sheet (enough to make eight of these small plates).
I had never worked with Lexan before, but found it really easy to work with. I cut it on my table saw using the same Forrest Woodworker II Thin Kerf blade is use for general purpose wood working. This is a carbide tipped blade with 40 TPI. A finer tooth blade is generally recommended for plastic, but this is a high quality blade that cut through the Lexan without overheating and left a nice, clean edge.
To drill the holes, I first made a template out of thin, non-corrogated cardboard. I taped this template over the Lexan and used a center punch to mark the center of each hole. I then drilled the 8 - 1/2" holes for the binding posts using a step drill I got at Harbor Freight for my previous projects. I also drilled three small 3/32" holes for the self-threading screws that will attach the mounting plate to the inside of the rear panel of the receiver. I then roughed up the surface of the Lexan by hand sanding it with 220 grit sand paper. Even though I use Krylon Fusion paint which bonds well to plastic, I figured it would bond even better with a rougher surface.
Here's what the mounting plate looked like before painting:
I did a test fit at this point, and all looked good. So, next I painted the top surface with 4 light coats of Krylon Fusion Matte Black paint for plastics. I let it dry about 45 minutes between coats. Here it is after painting:
I'm going to let the paint fully cure for a few days before I mount it in the chassis, and then I'll be back to post the "after" photos of my little DIY project.
Last edited: