

You are using an out of date browser. It may not display this or other websites correctly.
You should upgrade or use an alternative browser.
You should upgrade or use an alternative browser.
Near Exact Paint Match for AU/TU-717
- Thread starter Zekeman
- Start date
Gone Johnson
GoneJohnson
I have used the Rustoleum paint on several projects. If you use heat you can control the time required for the hammered look to appear and make it consistant across the whole cabinet. My wife hates it when I use the range.
John
John

myu701
Vintage futurist
I like that hammered metal look... of course, with the TU and AU units stacked together, the difference will be noticeable unless you paint both. My AU-719 has a grungy looking cover... one major scratch on the left side and a lot of wear around the screw holes. The TU-719 is nearly perfect... so, I'd hate to paint it and lose the OEM look. I did see an XX-517/717/719/919 cover for sale on that auction site once, in very good condition, but that was long before I got my gear. 

nosirrah
RIP 11-19-2019
range
Leaves that "just painted" smell thruout the house doesn't it?
Don't ask....
Casey
I have used the Rustoleum paint on several projects. If you use heat you can control the time required for the hammered look to appear and make it consistant across the whole cabinet. My wife hates it when I use the range.
John
Leaves that "just painted" smell thruout the house doesn't it?
Don't ask....
Casey

westend
Audiopile
What worked for me on an AU-719: Krylon brushed metallic, oil rubbed bronze-satin on the case; Rustoleum satin, black on the rack handles. Looks pretty good for a rattle can job, the Krylon could be a little less metallic but it lays down smoother than the hammered paints.
Attachments


Harvestor
Addicted Member
Awesome...What worked for me on an AU-719: Krylon brushed metallic, oil rubbed bronze-satin on the case; Rustoleum satin, black on the rack handles. Looks pretty good for a rattle can job, the Krylon could be a little less metallic but it lays down smoother than the hammered paints.
Now to find it

Audiomania
Active Member
Amazon has both

Dupli-Color DE1651 "Cast Coat Iron" worked very well for me. It's an engine enamel. Other than being a bit lighter than the original, it has the perfect amount of metallic flake and sheen.

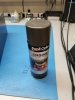
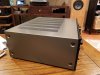
For the rack handles I used Dupli-Color DE 1634 Low Gloss Black.

My rack handles came out near perfect after sand blasting them with very fine sand.
For the rack handles I used Dupli-Color DE 1634 Low Gloss Black.
My rack handles came out near perfect after sand blasting them with very fine sand.
Harvestor
Addicted Member
Friggin awesome!Dupli-Color DE1651 "Cast Coat Iron" worked very well for me. It's an engine enamel. Other than being a bit lighter than the original, it has the perfect amount of metallic flake and sheen.
View attachment 1541883
View attachment 1541884 View attachment 1541885
For the rack handles I used Dupli-Color DE 1634 Low Gloss Black.
View attachment 1541888
My rack handles came out near perfect after sand blasting them with very fine sand.
Harvestor
Addicted Member
Dupli-Color DE1651 "Cast Coat Iron" worked very well for me. It's an engine enamel. Other than being a bit lighter than the original, it has the perfect amount of metallic flake and sheen.
View attachment 1541883
View attachment 1541884 View attachment 1541885
For the rack handles I used Dupli-Color DE 1634 Low Gloss Black.
View attachment 1541888
My rack handles came out near perfect after sand blasting them with very fine sand.


I did as you suggested and I am impressed with the results, but I was considering putting a clear coat on and I was unsure whether or not that was a good idea or not, so I did not do that
Nice job! The trick with this paint (and perhaps with most other paints) is to do two light coats and finish with a final thicker coat. That gives a nice even finish.View attachment 1547910
View attachment 1547912
I did as you suggested and I am impressed with the results, but I was considering putting a clear coat on and I was unsure whether or not that was a good idea or not, so I did not do that

SargentRay
New Member
Wow ! I must say i am impressed with your re-paint jobs guys with the Dupli Color. I just got a hold of both AU-717 and TU-717 units, but they are in rough shape although i got them from 2 different sellers. They are in the shop at the moment for complete overhauls, but i'll re paint them with this product as soon as i get them back. Thank's for the tip. I'll post pictures ASAP, but it'll likely be sometime after Christmas.
SargentRay
New Member
I forgot to ask, would i have enough of 1 can to do 2 casings, at 2 or 3 coats each ? I'm just about to order the paint. Also should i go with an etching primer ? Both cases have really deep scratch that will demand filing and sanding.
SargentRay
New Member
Ok, i finished the re paint, here's my work; I ended up having a can of paint mixed from a local car paint supplier. I chose the colour by comparing different samples, which had holes pierced into them so you can place them over the item your trying to match. I am pleased with the colour but not as much with the finish. I followed the manufacturer's instruction along with the salesman's but for some reason the satin finish is a bit uneven. It only shows when looking at an angle, but since the units will always be in a low wall unit, only the facings will be apparent. Still i hope you'll agree both units were in dire need of a re-paint, to say the lease. Some scratches were really deep into the metal, but i managed to fill them un with 2 coats of etching primer and hand sanding.
1-)

2-)

3-)

4-)

5-)

6-)

7-)

1-)
2-)
3-)
4-)
5-)
6-)
7-)
Last edited:

I'd say those look excellent. I understand the challenge of getting a consistent sheen, especially with a prepackaged rattle can versus using a HVLP spray rig with a better and more consistent fan pattern and regulated pressure.
There is also the fact that non-glossy solvent based finishes are achieved with flattening agents added to the paint. These change the drying characteristics to some extent and also do not react well on curing outside of a fairly narrow range of temperature and humidity. Both of which can have a deleterious effect causing satin and flat paints to dry with an inconsistent, banded/striped type of appearance.
All lessons learned years ago when I worked doing equipment and metal office furniture painting at a company that I was employed by. Had the benefit of working with and learning from another experienced professional painter who had even done bridge painting for the state DOT until he witnessed a coworker fall from a failed safety rigging. He got out of bridge work right quick after that.
There is also the fact that non-glossy solvent based finishes are achieved with flattening agents added to the paint. These change the drying characteristics to some extent and also do not react well on curing outside of a fairly narrow range of temperature and humidity. Both of which can have a deleterious effect causing satin and flat paints to dry with an inconsistent, banded/striped type of appearance.
All lessons learned years ago when I worked doing equipment and metal office furniture painting at a company that I was employed by. Had the benefit of working with and learning from another experienced professional painter who had even done bridge painting for the state DOT until he witnessed a coworker fall from a failed safety rigging. He got out of bridge work right quick after that.
SargentRay
New Member
Indeed Sansuiman, all of this is true but my biggest frustration came from the uneven pressure and
weird band like dispersion pattern of the paint coming out of the can. Guess this can painting option has it's serious limits. The salesman was trying to explain that the nozzles are made like this to imitate the spray pattern of a paint gun, but it's crap if you ask me, the old design was way more effective. Nonetheless i'm satisfied with the colour at least.
Here's a shot of both units side by side. Note that colour variations are induced by my burgandy colour cabinets reflecting in the background as these shots were taken in my kitchen

weird band like dispersion pattern of the paint coming out of the can. Guess this can painting option has it's serious limits. The salesman was trying to explain that the nozzles are made like this to imitate the spray pattern of a paint gun, but it's crap if you ask me, the old design was way more effective. Nonetheless i'm satisfied with the colour at least.
Here's a shot of both units side by side. Note that colour variations are induced by my burgandy colour cabinets reflecting in the background as these shots were taken in my kitchen
Last edited:
SargentRay
New Member
Thank you very much Sansuiman and thank's for noticing about the pictures. I was indeed a photographer in a past life. Nowadays i only do it for my own enjoyment, i rarely do paid gigs anymore, i especially avoid people shoots, they're just never happy and i'm no plastic surgeon, just a lil old photog. Besides i've been a cop for 30 years, retired a year an a half ago. Time to enjoy life now (and good sounding vintage gear right ? )

