
• The move to the new server is done. There are some software and database maintenance updates in process. This has us passing the hat around to help out. We appreciate any donations. Seriously, even a dollar helps. The payment page may be found here - https://www.audiokarma.org/support.html

Need Help Locating Short on a Pioneer SX-3700

AndyCares

New Member
Hey Akers. Hoping someone can steer me in the right direction here with the information I'm able to provide. I recently began working on a Pioneer SX-3700. Mostly replacing caps and trouble trannies. Anyway, I broke one of my own rules and replaced several caps and a few trannies before I was able to test on my DBT after each piece swap. Upon powering up, the 100W bulb lit brighter than I've ever seen. I narrowed it down to one piece, but cannot for the life of me figure out the source of the short. After identifying that I goofed and caused a short, I began backtracking and testing after each component removal. I finally narrowing it down to R334 on board GWM-159, which is a .22Ω / 2W cement resistor with one end on the emitter of 2sc2525 power train. When remove this resistor, the bulb dims to a normal level/almost totally off. If anyone could steer me in the right position, I would greatly appreciate it. I'm certainly no t a pro (hence this post), but I'm approaching novice territory imo. Can anyone suggest next steps given the info provided? Thanks in advance...
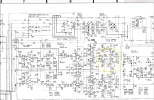
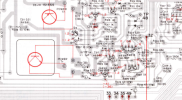
Screen Shot 2024-11-01 at 5.38.59 AM.pngScreen Shot 2024-11-01 at 5.37.26 AM.png
 
Register to hide this ad
You know there is a pioneer section where you might get more help
You said you changed parts but did not say what parts you changed and why you changed them.
Also you said you pulled an output emitter resistor but did not say which one. That’s the section you should focus on. So it’s either the output is railed, bias messed up, output bjt is shorted. Lots of possibilities to cause that problem.
Basically you need to verify that when you changed a semi that you used the correct one and it was installed correctly. In many cases you can while power is off, use your ohmmeter to test components for value/ opens/ shorts. Use diode test mode for semiconductor junctions. Compare the working channel to the non-working one.
 
I would suspect you burned the output, driver or pre driver. Could be a part with wrong orientation or a solder bridge. That resistor is connected to the emitter of the output, but all you are doing is defeating the circuit. It could be anything in that chain. Isolate and check everything you touched on that leg. It could also be a bad trimmer resistor or you just have it adjusted the wrong way way and the bias current is maxing.
 
I would suspect you burned the output, driver or pre driver. Could be a part with wrong orientation or a solder bridge. That resistor is connected to the emitter of the output, but all you are doing is defeating the circuit. It could be anything in that chain. Isolate and check everything you touched on that leg. It could also be a bad trimmer resistor or you just have it adjusted the wrong way way and the bias current is maxing.
You know there is a pioneer section where you might get more help
You said you changed parts but did not say what parts you changed and why you changed them.
Also you said you pulled an output emitter resistor but did not say which one. That’s the section you should focus on. So it’s either the output is railed, bias messed up, output bjt is shorted. Lots of possibilities to cause that problem.
Basically you need to verify that when you changed a semi that you used the correct one and it was installed correctly. In many cases you can while power is off, use your ohmmeter to test components for value/ opens/ shorts. Use diode test mode for semiconductor junctions. Compare the working channel to the non-working one.
Appreciate the guidance. Wasn't easy, but I figured it out. @rcs16 I thought I had posted in Pioneer, but see that's not the case now. Take care..
 
Back
Top Bottom