• The move to the new server is done. There are some software and database maintenance updates in process. This has us passing the hat around to help out. We appreciate any donations. Seriously, even a dollar helps. The payment page may be found here - https://www.audiokarma.org/support.html

newbie requesting help with 2215B restoration

Mike Nixon

New Member
trying to relive my youth, I recently acquired a couple of 2215B receivers - according to the seller, one is working and one is not. I figured for $100 it was worth a shot and give me something to learn one. I cut grass all summer in my neighborhood and saved every penny to purchase a new Marantz 2215B receiver and even though it was entry level Hi-Fi, I felt like I was living in the life of luxury when those blue lights came on. Fast forward many years and I would love to have one of these receivers glowing again in my office. I am not an electronics expert by any means but I am willing to take the time to learn and figure I have wasted way more money on less if it all goes south. For my own peace of mind, other than messing with the FM tuner, I would like to recap the rest of the unit and replace any other know "problem" components that are within the ability of someone without a bunch of test equipment other than some multi meters. I would like to use good quality components as this will be for my own listening enjoyment and I am not looking to shave a few dollars here and there. I look forward to the journey and I think the first thing I am going to do is build a DBT this weekend before I even attempt to power them up. I will post pictures after I pick up the units this afternoon.
 
Register to hide this ad
Lower power Marantz units are the best to learn on. And when you finish one, you really have something special regardless of power.. I don’t know if anyone makes a rebuild parts kit for the 2215B. If they do, it’s not a bad way to start. Otherwise, get a service manual and look in the parts list board by board for electrolytic capacitors. Compare the values to what you find on the board, as the manual is sometimes wrong. Everyone has their favorite types of caps, and there are many good ones - also, some really bad ones. Mainly, don’t buy off of eBay. There are many Chinese Fakes on there. Mouser and Digikey are two trusted parts sources, and will gladly handle small orders. Personally, I like to use Nichicon PW series caps in power supplies (part number prefix will be UPW) because they are 105 degree rated. On a 2215B, that’s not a big deal, but might as well set some habits. For most others, I like Elna Silmic II caps or Nichicon KL series (UKL). Search engines on Mouser or Digikey will help you find them. Others who know more than me probably have their favorites. Just browse around using the Search function from the Marantz forum and you will learn a lot. When you develop some questions, just bring them here. There are lots of folks willing to help, and a ton of knowledge above mine. Make sure you have a quality soldering station like a Hakko FX-888D. A bit of a hit to the budget is a desoldering gun like a Hakko FR300. It’s a luxury, but it will make removing components without damaging your boards a breeze. Otherwise, soldering braid or manual solder suckers are your options. You need to be able to get parts off of the boards without burning them or lifting traces. Here is a great thread about getting started in the hobby. Good luck!

https://audiokarma.org/forums/index...udio-gear-eh-heres-the-tools-you-need.333423/
 
Steven, thank you very much for the wealth of information and the link... ordered a Hako FX-888D this morning and will see if I can slide the FR300 under the wife's radar. The link is great.
 
I think the FR-300 has been replaced by the FR-301.
I had a couple of heating element failures in my FR-300, when the motor smoked, I went back to using my OLD 808.
I'm using the 301 now, sounds different, seems to work OK.

YMMV
Tom
 
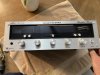
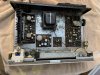
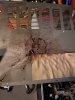
Thank you for the great suggestions... some tools on order, along with Deoxit D5 and F5 which should be here this week. In the mean time, I did pick up the units and the good thing is that there appear to be no scratches on the face of the receivers and the one working unit does sound good. I do have one stuck button, the high lo filter button is stuck, and the AM radio appears to not be working, but going to give everything a good cleaning when the Deoxit gets here. For now, I am going to focus on the non working unit. Taking advice that I have read here, I removed the covers to do a visual inspection prior to even plug in the receiver. I have attached pictures and as you can see, several things pop out. One - the unit is extremely dirty inside, two - the tuner string is removed from the pulleys but not broken, three - there is a large amount of of melted plastic type substance under the P800 power board assembly. I did notice that the larger caps all appeared to be bulging at the top. My thoughts are to do a through cleaning, recap the power board and then hook up to DBT and see what happens. A couple of questions - 1 - What is the best way to clean the boards beyond blowing them out and possibly using a soft paint brush to gently loosen the dirt from the components and boards. I would like for them to look as clean as possible. 2 - should I go ahead and replace the transistors while I am replacing the caps? 3 - As a newbie (not a great deal of solder experience but I am practicing) should I remove the boards to work on them? Thank you for any and all advice.
 

Attachments

  • IMG_4629.jpg
    IMG_4629.jpg
    127.4 KB · Views: 25
  • IMG_4628.jpg
    IMG_4628.jpg
    205.8 KB · Views: 26
  • IMG_4630.jpg
    IMG_4630.jpg
    106.4 KB · Views: 25
The most conservative way to clean is what you described - soft paint brush and compressed air. Then, as you go board by board to recap, use a Q-Tip and isopropyl alcohol to clean the board and components. Tedious, but it works. Good plan to start with the PS. That leaky looking stuff could be a spill into the unit, or I guess a big cap might leak that much. Philosophies vary on transistors as part of a normal recap. I leave them alone unless I find one bad during troubleshooting or if they are one of a few known troublemakers like 2SC458's. Known troublemakers will usually show up in your AK research of your unit. For most boards, you just do whatever you have to do to get access to both sides. That usually means removing the four screws that hold the board to the chassis so that you can flip them and get good access. Occasionally, there might be a wire or two that just keep you from getting adequate access. In that case, a little judicious removal of the wires from their terminals is called for. Then, after recapping, resolder them. There should be a detailed drawing of the tuning string path in the service manual. Good luck!
 
...A couple of questions - 1 - What is the best way to clean the boards beyond blowing them out and possibly using a soft paint brush to gently loosen the dirt from the components and boards. I would like for them to look as clean as possible. 2 - should I go ahead and replace the transistors while I am replacing the caps? 3 - As a newbie (not a great deal of solder experience but I am practicing) should I remove the boards to work on them?...

Slightly diluted glass cleaner, e.g., Windex with Q-tips is usually sufficient for cleaning boards. No need to replace transistors unless they are known to be failure-prone types. For soldering practice, use junker boards (e.g., old VCR); you do not want to practice on the Marantz. For glued down capacitors, make several vertical cuts on the plastic sleeve prior to desoldering and use a solvent (e.g., acetone or ethyl acetate) to detach the sleeve from the board.
 
Small update, I have been doing some cleaning and practice soldering (old circuit boards laying around) while I wait for my Deoxit and a few other items to come in (Covid is not helping with the 2 day shipping process I was used to) and I have started compiling a list of capacitors to purchase. I know for sure that I am going to replace all of the Electrolytic caps but what about the film caps and the ceramic caps? I have seen a couple of videos where some of the ceramic caps were replaced on the phono board but other than that I am not sure. Open to all suggestions. I have decided that I am going to order about 5 times the number that I actually just so that I can start assembling a good stock of them to have on hand as shipping is more than the actual caps.
 
‘For the most part, you can leave ceramic caps alone. They have a very long life. Some of the experts replace selected ones with modern C0G (NPO) versions that are more temperature stable. If you see those being done by the experts in their rebuild threads, you can decide whether to bother or not. Films in general also have very long lives. Generally, I leave the film caps alone. Others do a lot of experimenting with these. Marantz units seem to love WIMA film caps in low capacitance situations (3.3 uF or less). I use them all over my units, and the tone boards are covered in them. They are long lived, and are bipolar, so orientation is not an issue. If you research the issue of capacitor replacement, you will find a lot of romance involved. A person loves what a person loves. With cap issues, sometimes it is hard to separate fact from romance. :biggrin:
 
The only non-faulty ceramic capacitors that are worth replacing are the ones in the signal path, e.g. low-pass filter duty or tone controls. Here are "before and after" pictures of a P450 tone board (from Leestereo's Restoration and Upgrade Of A Marantz 2270).

index.php


index.php
 
Back
Top Bottom