Greetings audio goers,
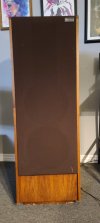
I have recently come into ownership of a pair of Norman Laboratories Model 9 speakers. They had been sitting in my grandmothers house collecting dust for over 39 years, at least...(my entire life). I was actually born in Norman, OK and joked about Norman Laboratories being in my hometown - not actually knowing that was the truth I am not exactly sure how these were acquired. My grandmother did professional glasswork, etching, stained, foiled, and she was the creator of the infamous stained glass that sat over O'Connell's in Norman for decades ... and it was rumored these pair were payment for services rendered (probably some family hyperbole at play as I had never seen or heard this woman be remotely interested in audiophile *anything*).
The things that stood out to me initially...
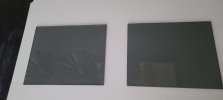
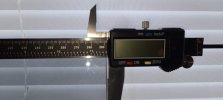
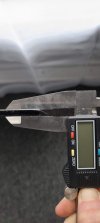
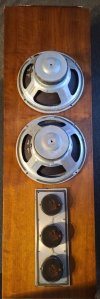
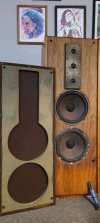
The tweeter baffle is a 1/16" thick sheet of stainless steel with a 3M hi-tak spray application maybe? Something to promote adhesion, rigidity and dampening.
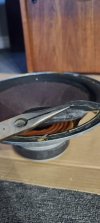
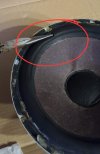
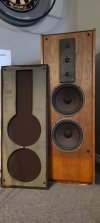
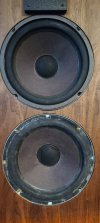
The front grill is formed MDF with the same sprayed application as well as each woofer baffle is reinforced with two 1/8" MDF rings laminated together for even more rigidity! Sadly, this ring was SO rigid it tore away from where it connects the frame to the surround on one of the woofers; the screw had been driven in almost sideways that it tore when unscrewing. However, this woofer seems to be the only visibly damaged one. The rubber surround was sliced badly as well.
The acoustic foam inside each enclosure appears to be fiberglass. Don't forget your Tyvek!
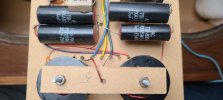
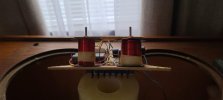
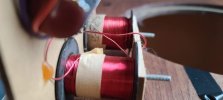
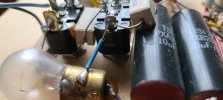
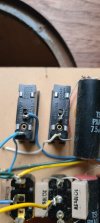
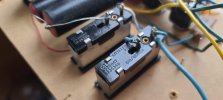
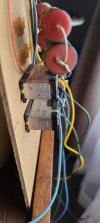
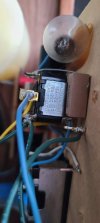
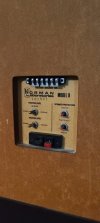
The crossovers are still inside the heart of fiberglass...but I suspect they are working just fine. Those pesky protection mechanisms though ... must go!
The tweeters are in working order.
5 of 6 woofers are visibly undamaged.
1 of 6 woofers badly damaged - complete refurbish will be necessary.
Back in November 2023 a friend gave me a Sears Solid State AM/FM, 8-Track, BSR turntable and I suppose I will be using it in the short term to drive these things. It drives decently on FM, but lacks any real power or punch with the phono driving.
Needs are as follows:
Small Amplifier recommendations (I have a Dayton Audio powered subwoofer and do like their amplifier offerings in small form factor)
Cross-over facelift; replace parts or overhaul altogether?
Speaker Protection mechanism ... is it necessary - specs of original components? I have serial numbers on the woofers and tweeters - Creedence and Phillips respectively...do we have numbers on ratings handy? I don't expect to be pushing these to their max, but we DO have to sound test, right? Right?
Contact Speaker Dave for sourcing replacement woofers or repair/refurbish the originals. The one woofer I had to fiddle with is in pretty bad shape but I think it can be saved. The rubber is still attached to the cone just not the frame.
Remove fiberglass "foam" inside the enclosures in favor of a less hazardous material, recommendations there? I used that pillow stuffing from the craft store for years in most of the car audio installations I did.
Budget friendly is preferred, but I understand not all parts are created equal. The only time I would go after a bad resistor is on a Roland TR-808. I am comfortable soldering if that factors into cost at all.
I made an album for the photos I was not able to attach.
Regards,
dsmflow
I have recently come into ownership of a pair of Norman Laboratories Model 9 speakers. They had been sitting in my grandmothers house collecting dust for over 39 years, at least...(my entire life). I was actually born in Norman, OK and joked about Norman Laboratories being in my hometown - not actually knowing that was the truth
I am not exactly sure how these were acquired. My grandmother did professional glasswork, etching, stained, foiled, and she was the creator of the infamous stained glass that sat over O'Connell's in Norman for decades ... and it was rumored these pair were payment for services rendered (probably some family hyperbole at play as I had never seen or heard this woman be remotely interested in audiophile *anything*). The things that stood out to me initially...
The tweeter baffle is a 1/16" thick sheet of stainless steel with a 3M hi-tak spray application maybe? Something to promote adhesion, rigidity and dampening.
The front grill is formed MDF with the same sprayed application as well as each woofer baffle is reinforced with two 1/8" MDF rings laminated together for even more rigidity! Sadly, this ring was SO rigid it tore away from where it connects the frame to the surround on one of the woofers; the screw had been driven in almost sideways that it tore when unscrewing. However, this woofer seems to be the only visibly damaged one. The rubber surround was sliced badly as well.
The acoustic foam inside each enclosure appears to be fiberglass. Don't forget your Tyvek!
The crossovers are still inside the heart of fiberglass...but I suspect they are working just fine. Those pesky protection mechanisms though ... must go!
The tweeters are in working order.
5 of 6 woofers are visibly undamaged.
1 of 6 woofers badly damaged - complete refurbish will be necessary.
Back in November 2023 a friend gave me a Sears Solid State AM/FM, 8-Track, BSR turntable and I suppose I will be using it in the short term to drive these things. It drives decently on FM, but lacks any real power or punch with the phono driving.
Needs are as follows:
Small Amplifier recommendations (I have a Dayton Audio powered subwoofer and do like their amplifier offerings in small form factor)
Cross-over facelift; replace parts or overhaul altogether?
Speaker Protection mechanism ... is it necessary - specs of original components? I have serial numbers on the woofers and tweeters - Creedence and Phillips respectively...do we have numbers on ratings handy? I don't expect to be pushing these to their max, but we DO have to sound test, right? Right?
Contact Speaker Dave for sourcing replacement woofers or repair/refurbish the originals. The one woofer I had to fiddle with is in pretty bad shape but I think it can be saved. The rubber is still attached to the cone just not the frame.
Remove fiberglass "foam" inside the enclosures in favor of a less hazardous material, recommendations there? I used that pillow stuffing from the craft store for years in most of the car audio installations I did.
Budget friendly is preferred, but I understand not all parts are created equal. The only time I would go after a bad resistor is on a Roland TR-808. I am comfortable soldering if that factors into cost at all.
I made an album for the photos I was not able to attach.
Regards,
dsmflow
Attachments
-
 20240307_054312.jpg60.1 KB · Views: 40
 -
 20240307_071508.jpg63.1 KB · Views: 42
 -
 20240307_065011.jpg57.5 KB · Views: 43
 -
 20240307_064816.jpg79.6 KB · Views: 46
 -
 20240307_054839.jpg72.2 KB · Views: 44
 -
 20240307_054745.jpg67.7 KB · Views: 44
 -
 20240307_054610.jpg75.4 KB · Views: 43
 -
 20240307_054512.jpg79 KB · Views: 43
 -
 20240307_054406.jpg58.1 KB · Views: 42